

Install our radio kit in a '93-'96 Chevy Impala!
Jun 25th 2025
Today we're going to be diving into how to install our radio kit into a '93-'96 Chevy Impala! While this guide will be specific to the Impala, the general installation will be similar across other models. Thank you to our customer Bobby Schulz for the detailed pictures and help creating this guide! If you want a more in-depth guide on everything from installation to operation of our radio kit, check out our guide here!
If you're wondering where to pick up a kit like this yourself, check them out here! We have options for everythign from the OBS Chevy trucks to C5 Corvettes, Camaros; even Dodge Dakotas and Jeeps!
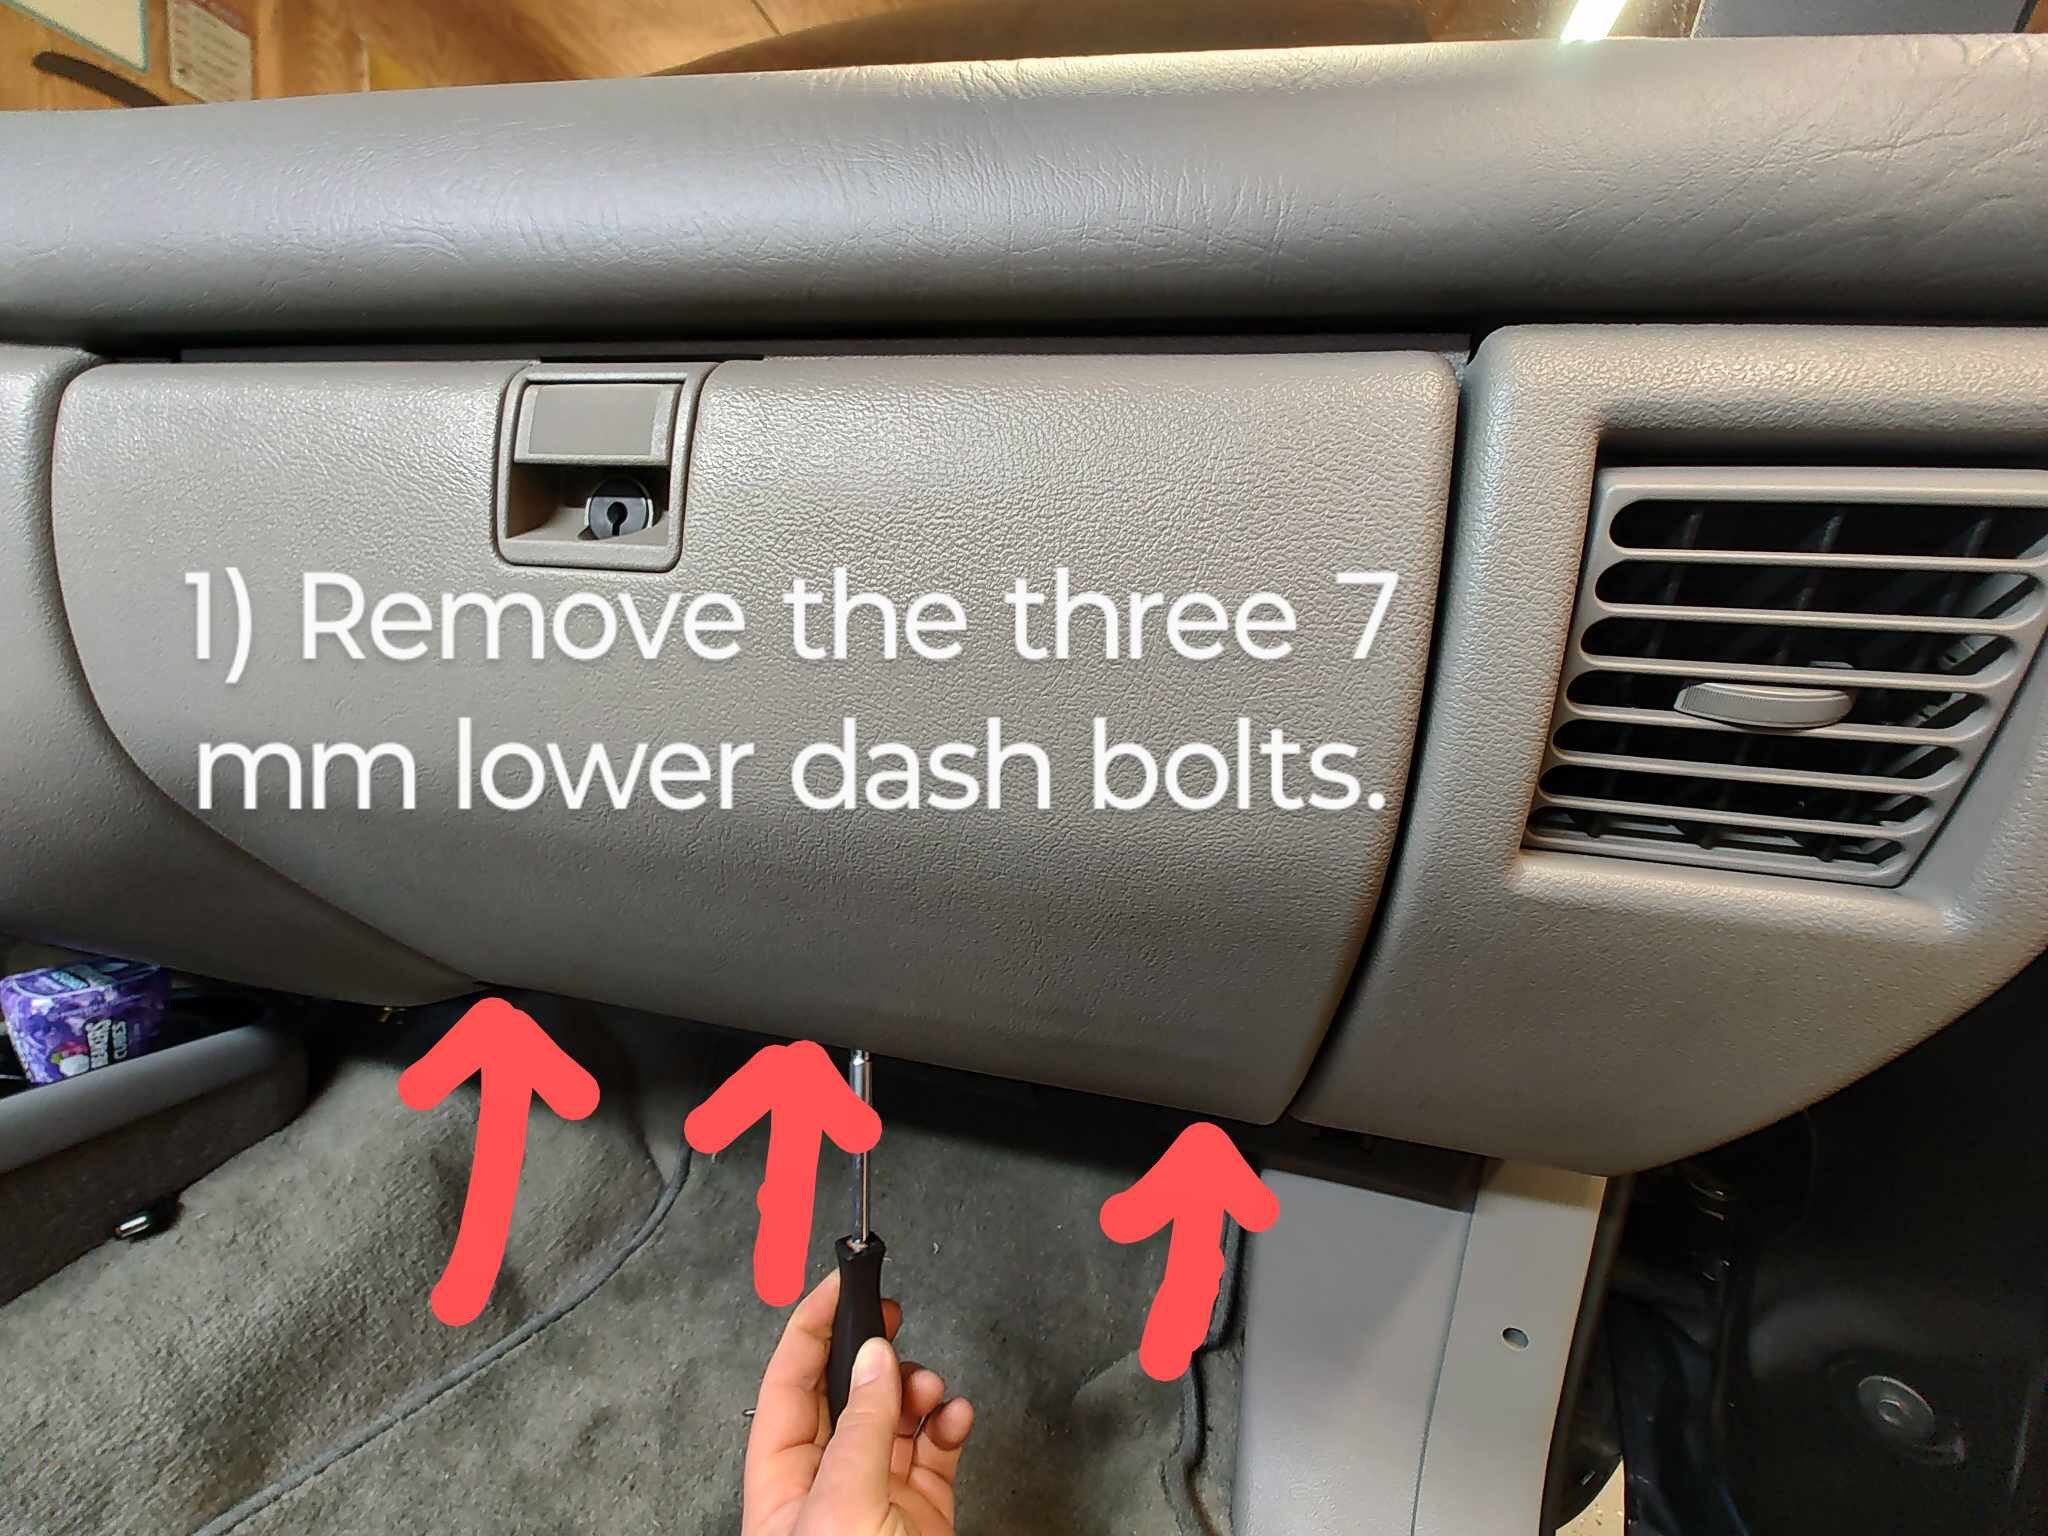
First things first! We need to remove much of the lower section of the dashboard to get access to the radio. We’ll start by removing the three 7mm bolts on the bottom of the glove box.

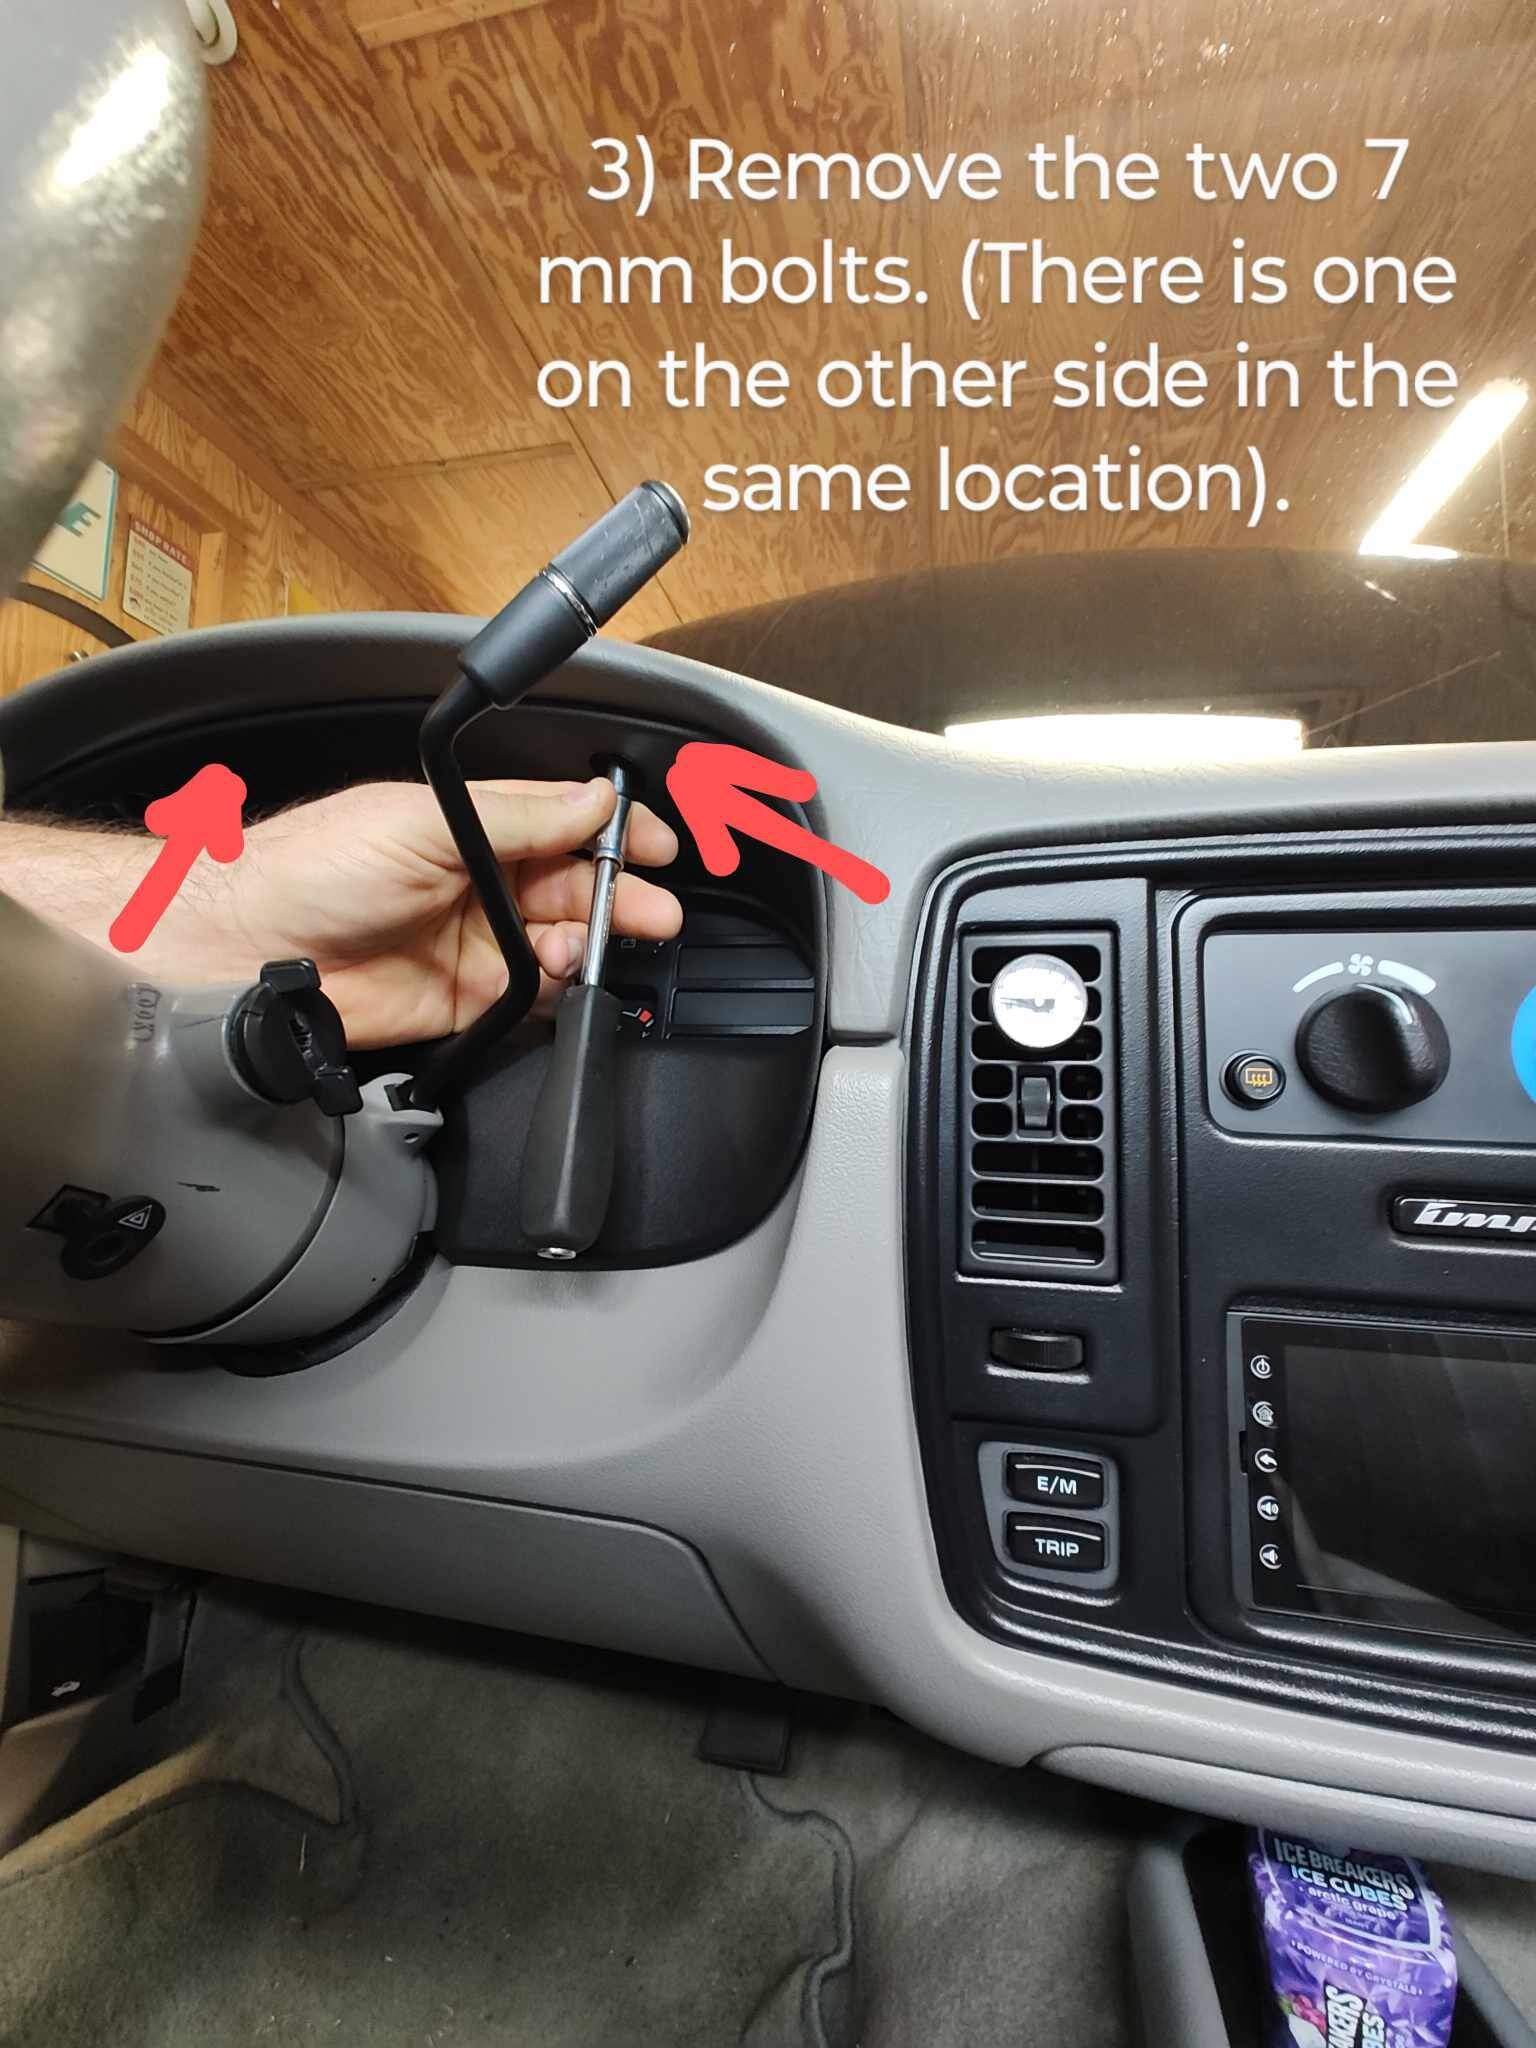
Once the glove box is removed, it's time to head over to the driver's side of the car. Now is a good time to disconnect the battery if you haven't already!
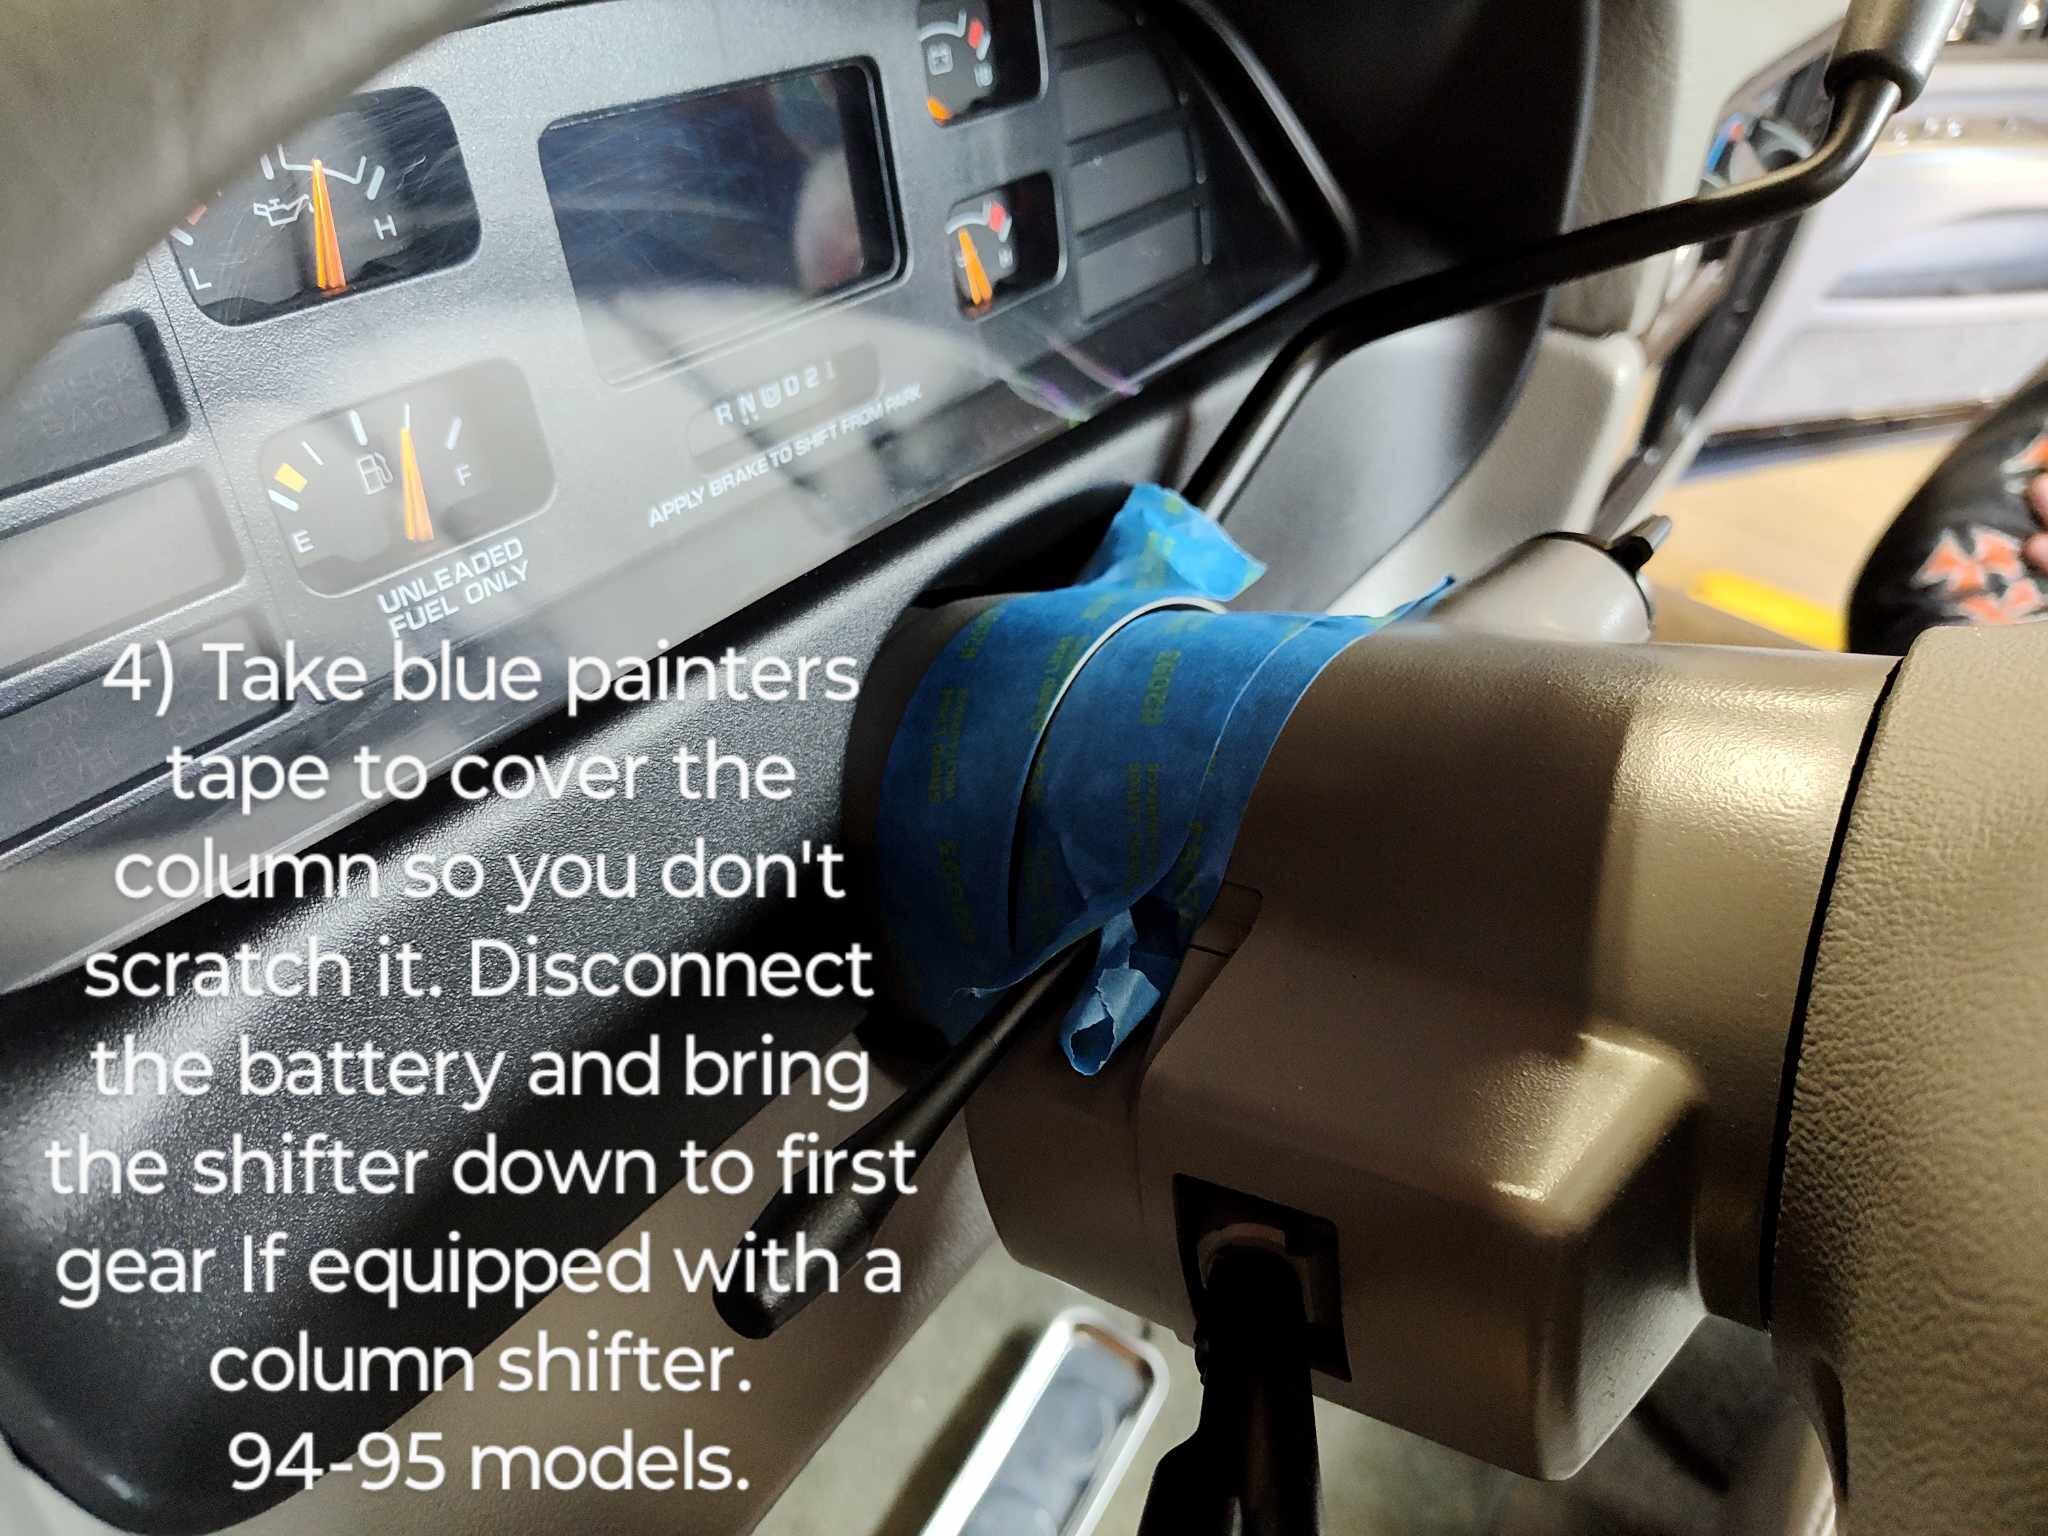
You'll be working in and around the column, so it is a good idea to protect it. In this case, Bobby used some painter's tape, but feel free to use whatever is on hand. If the vehicle is equipped with a column shifter, move it out of park and into first gear. Make sure the car is level and the handbrake is on to avoid it rolling.
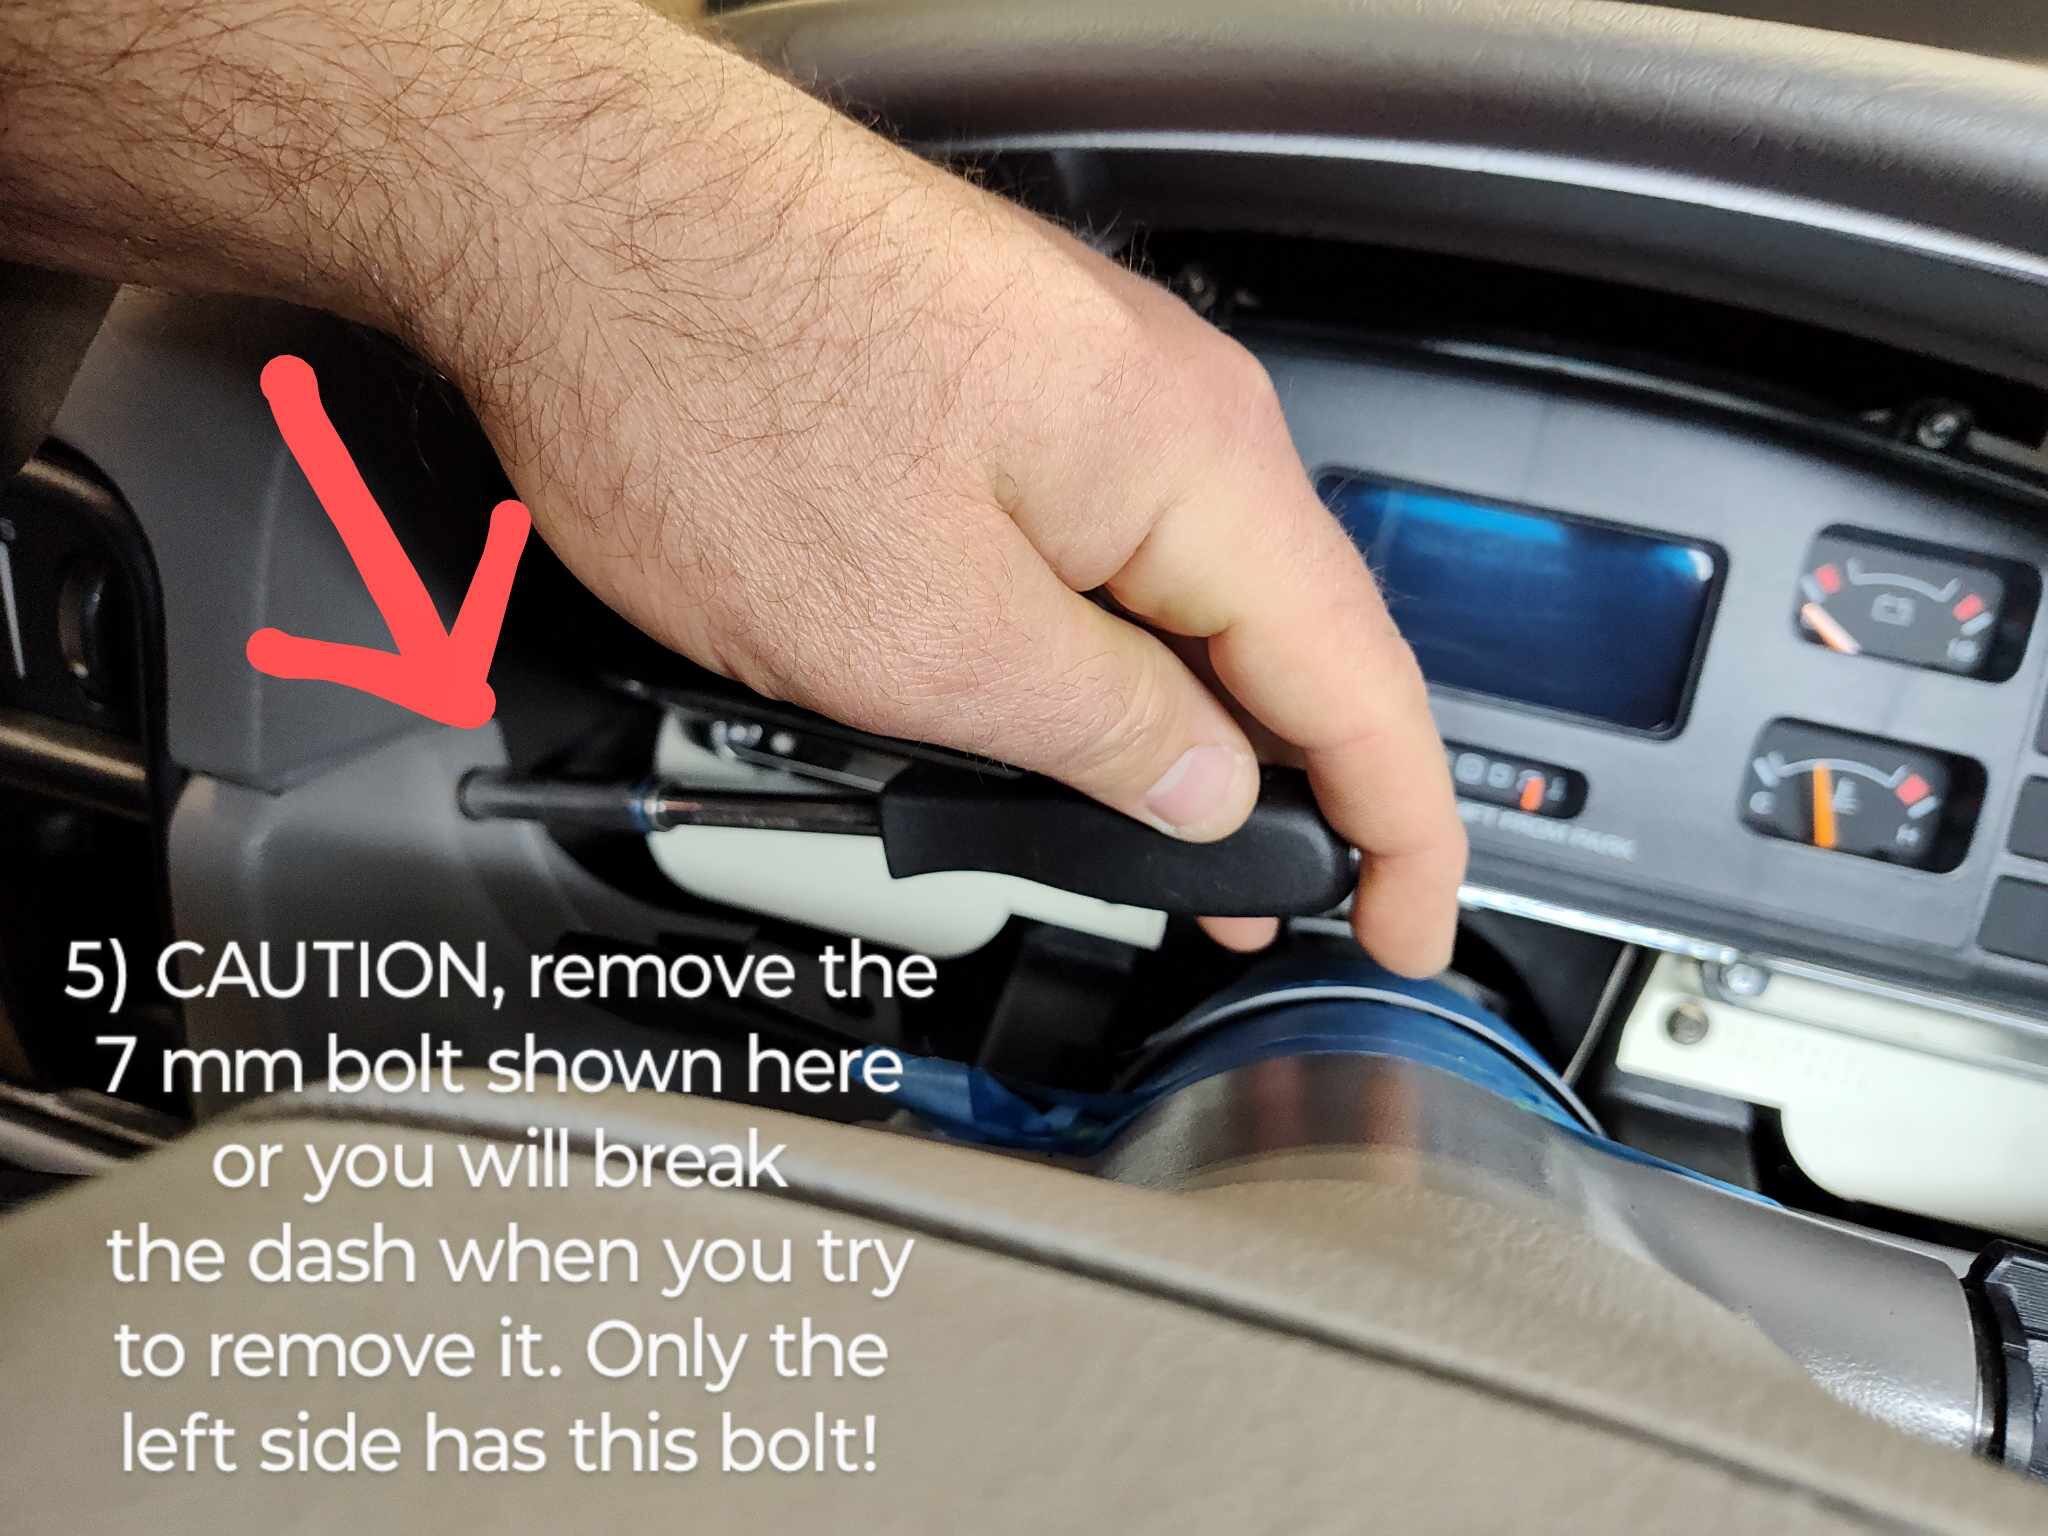
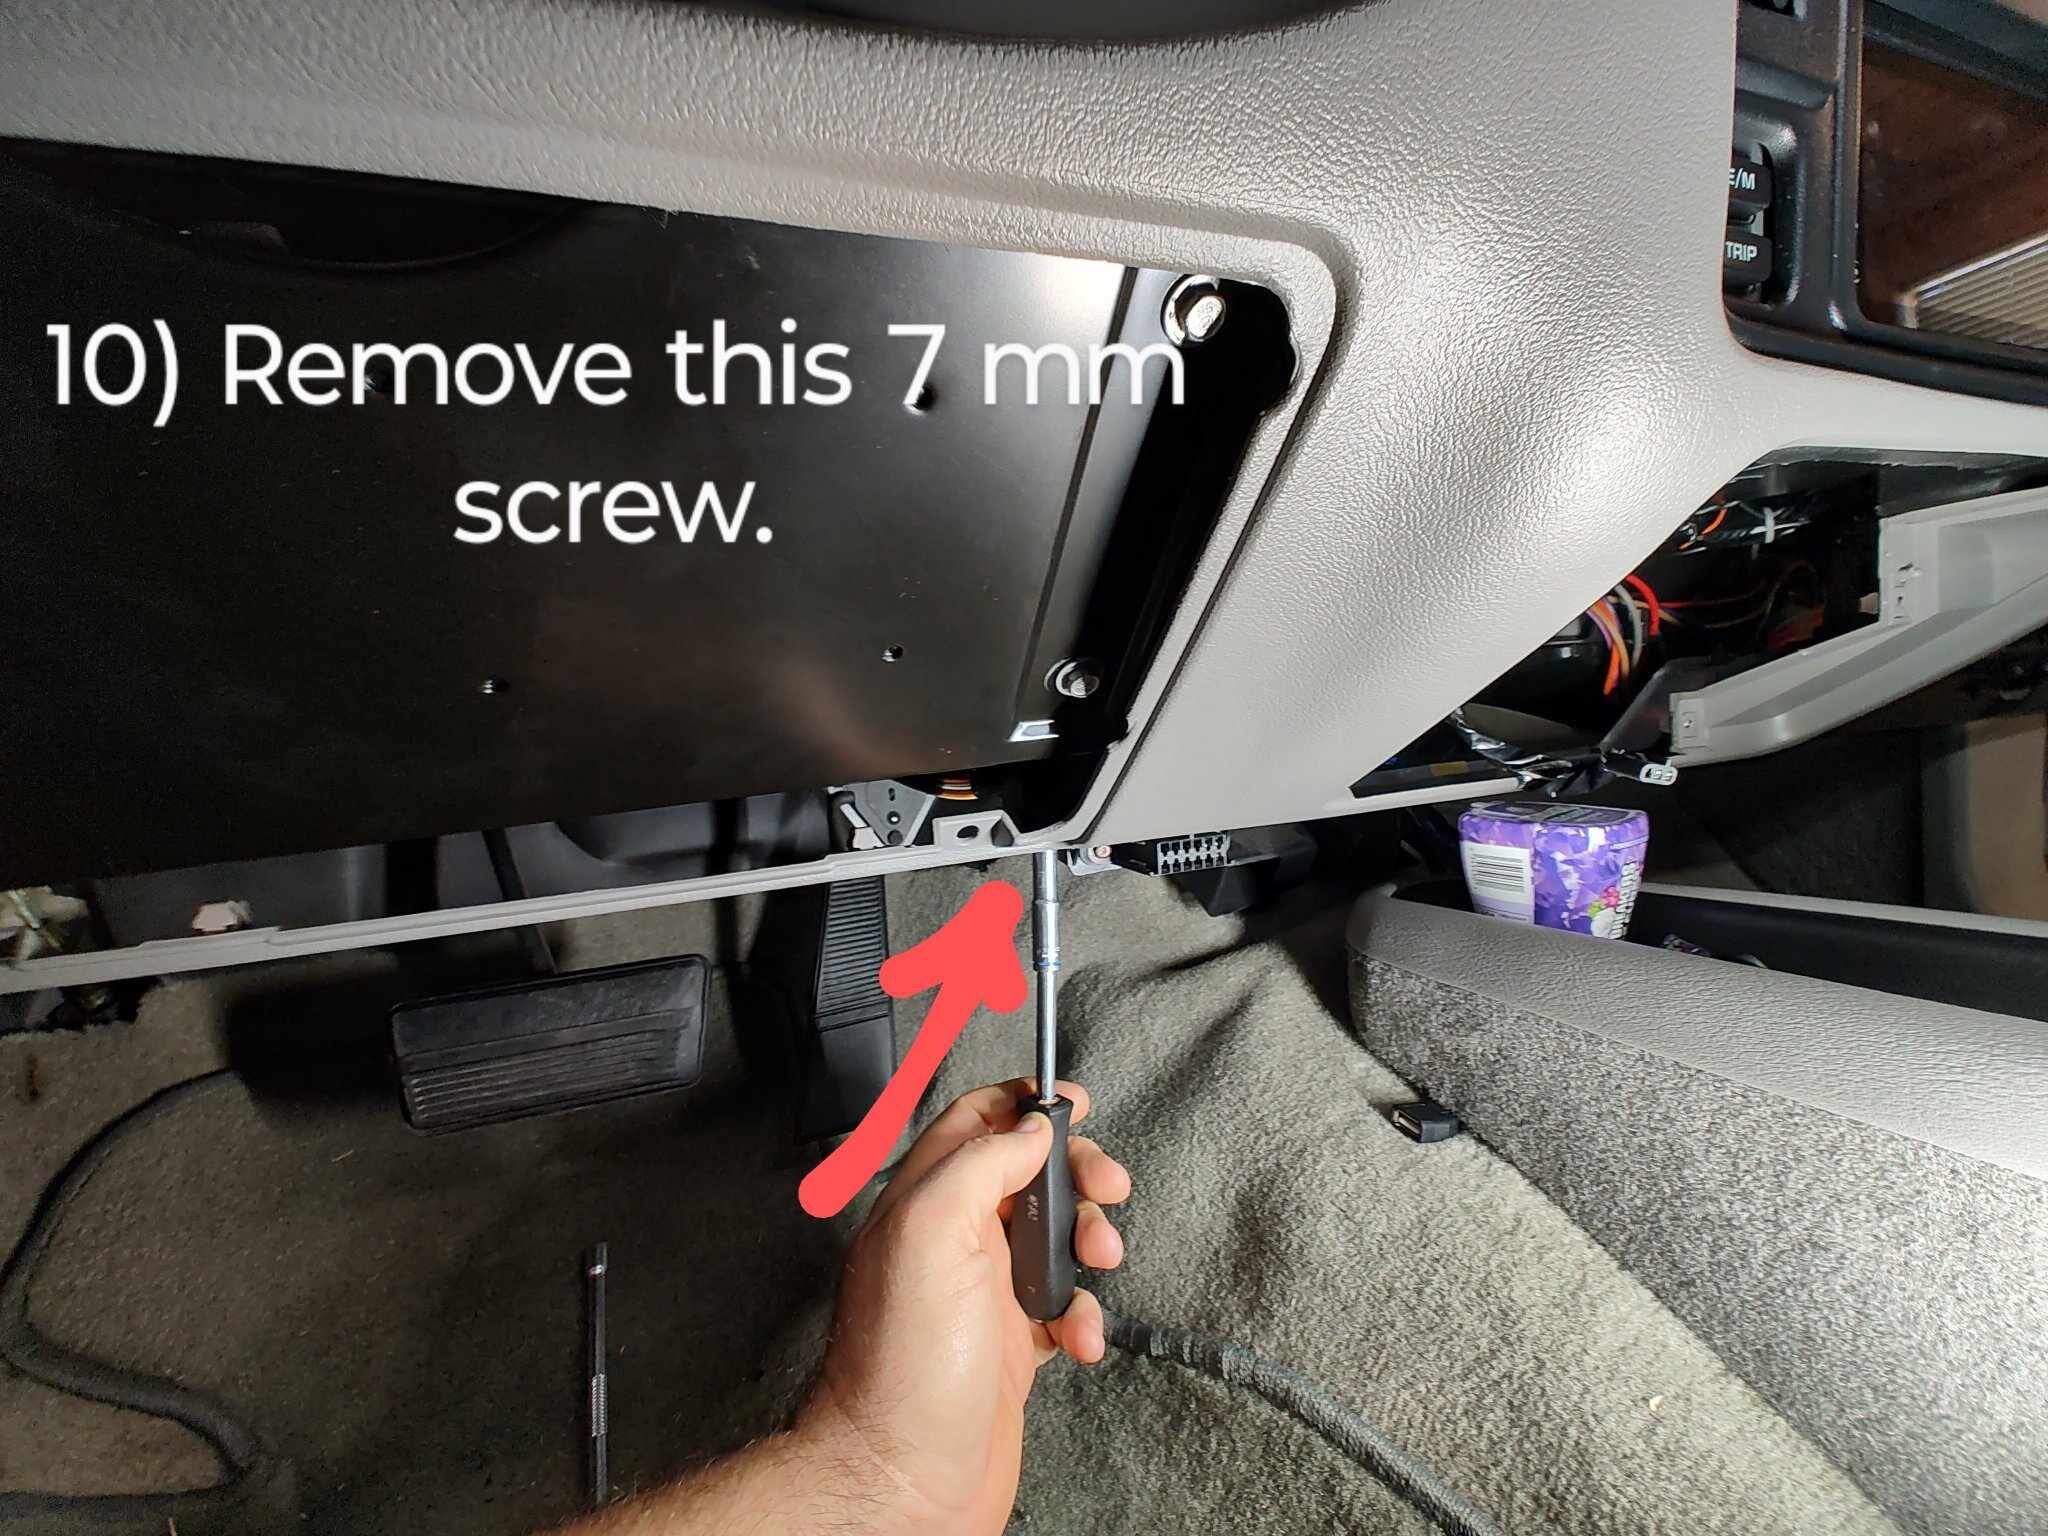
Don't forget to remove this hidden bolt! After that's out, we're going to remove a few more panels and bolts. They shouldn't be hard to get to, but make sure you get them all!
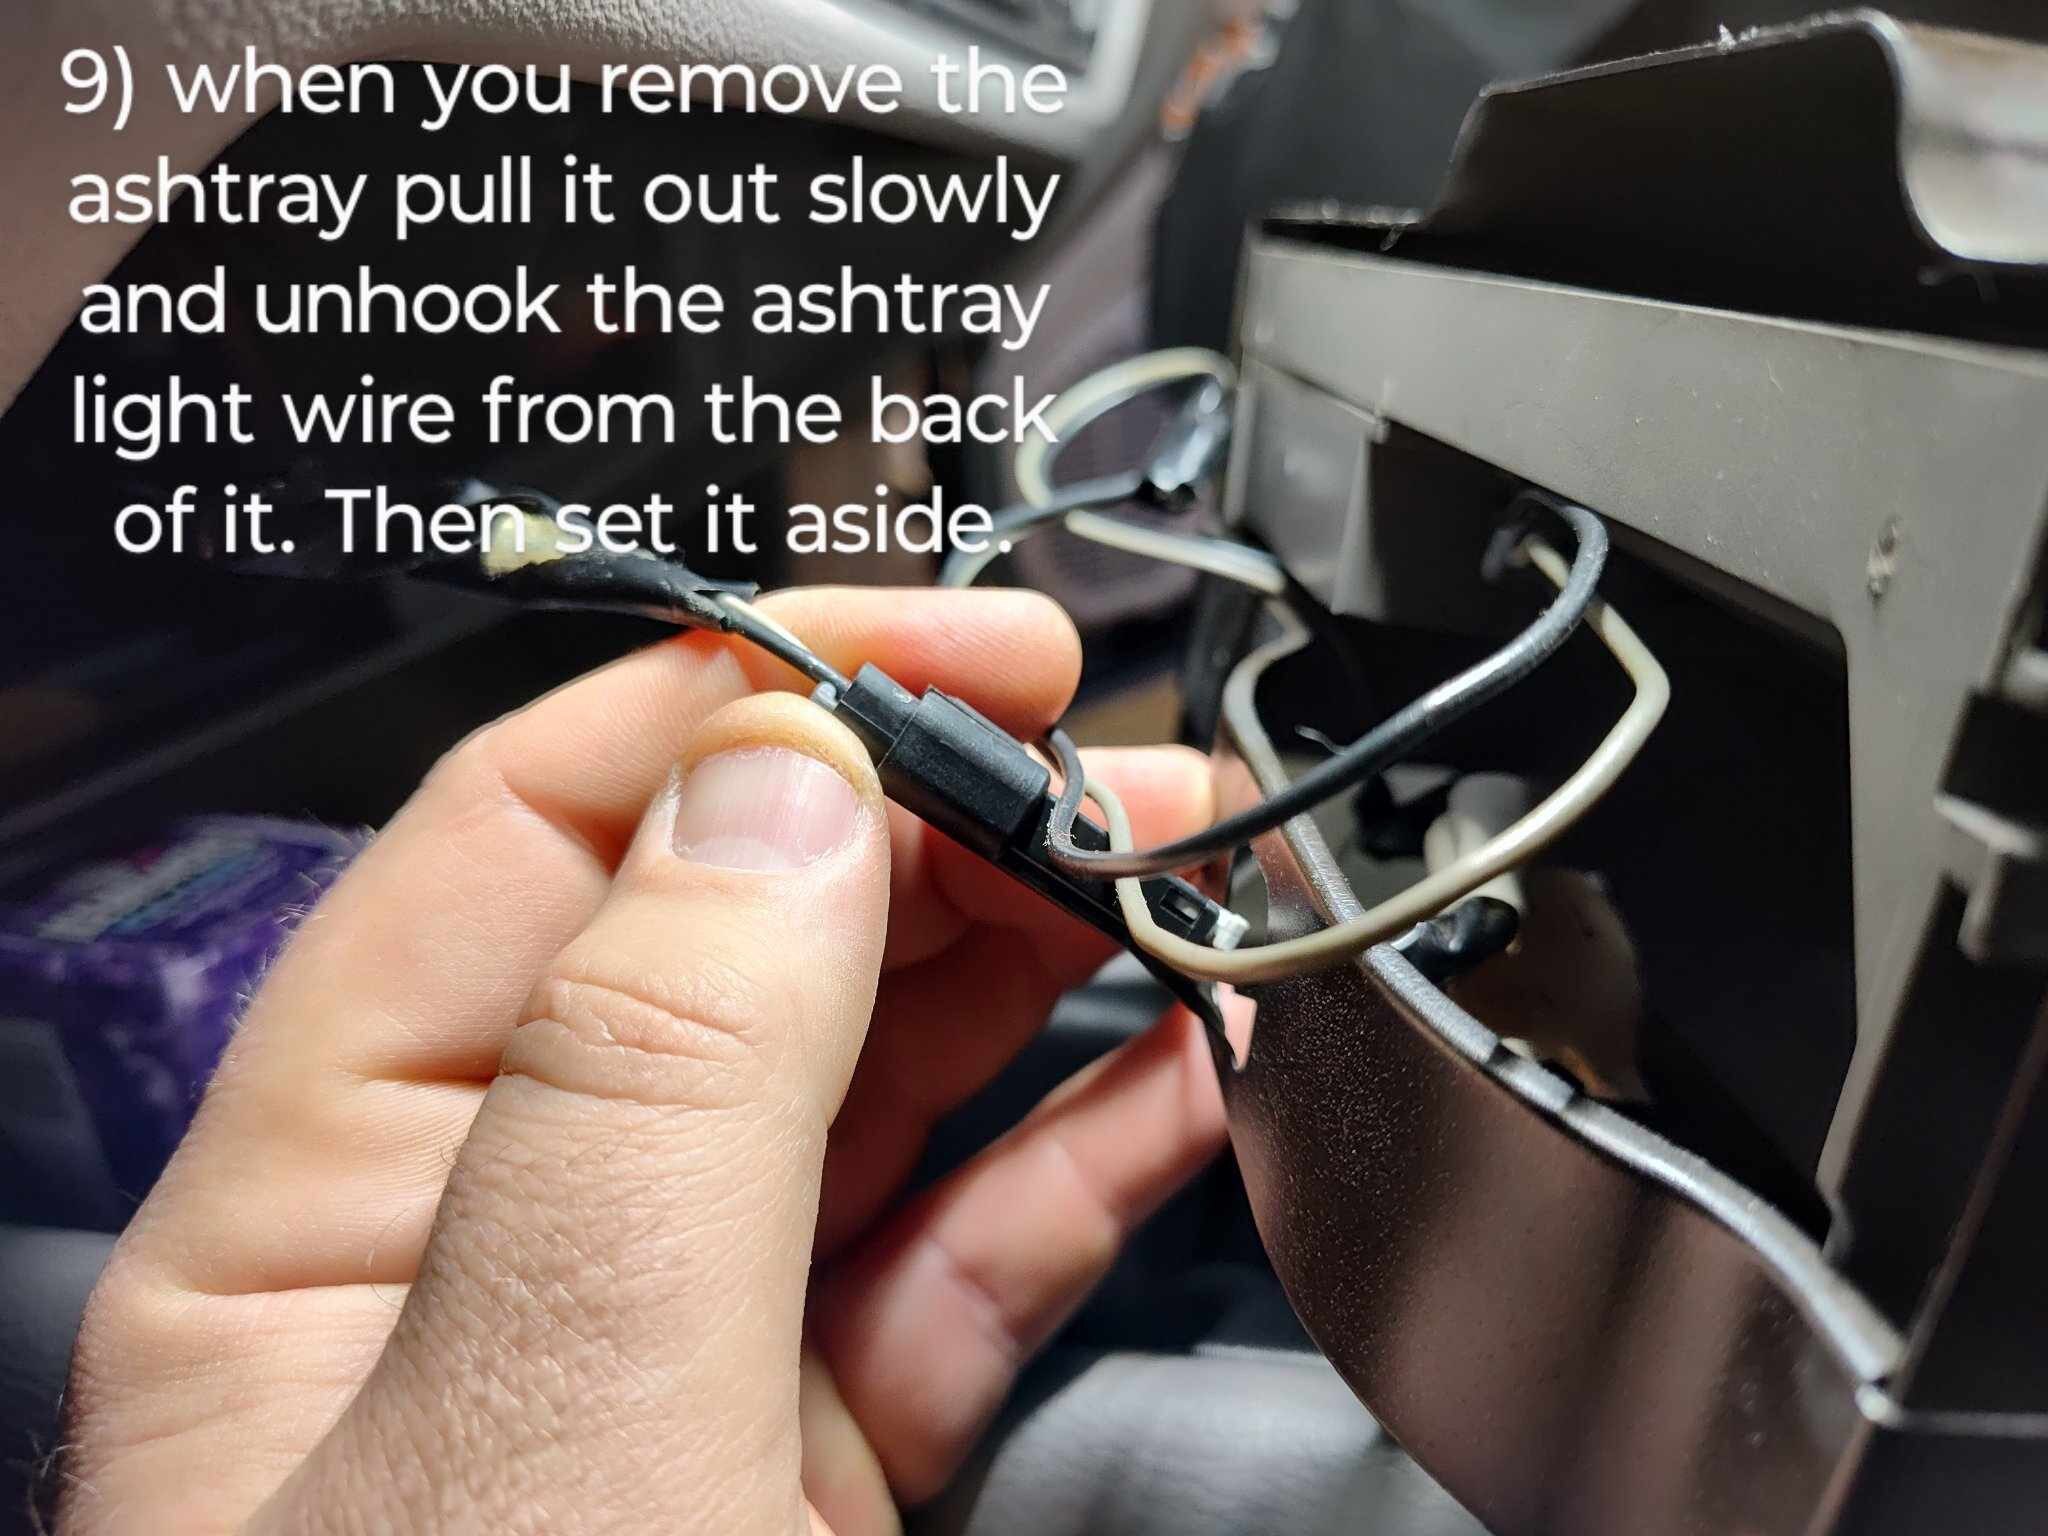
Don't yank it out! There will still be a harness attatched.
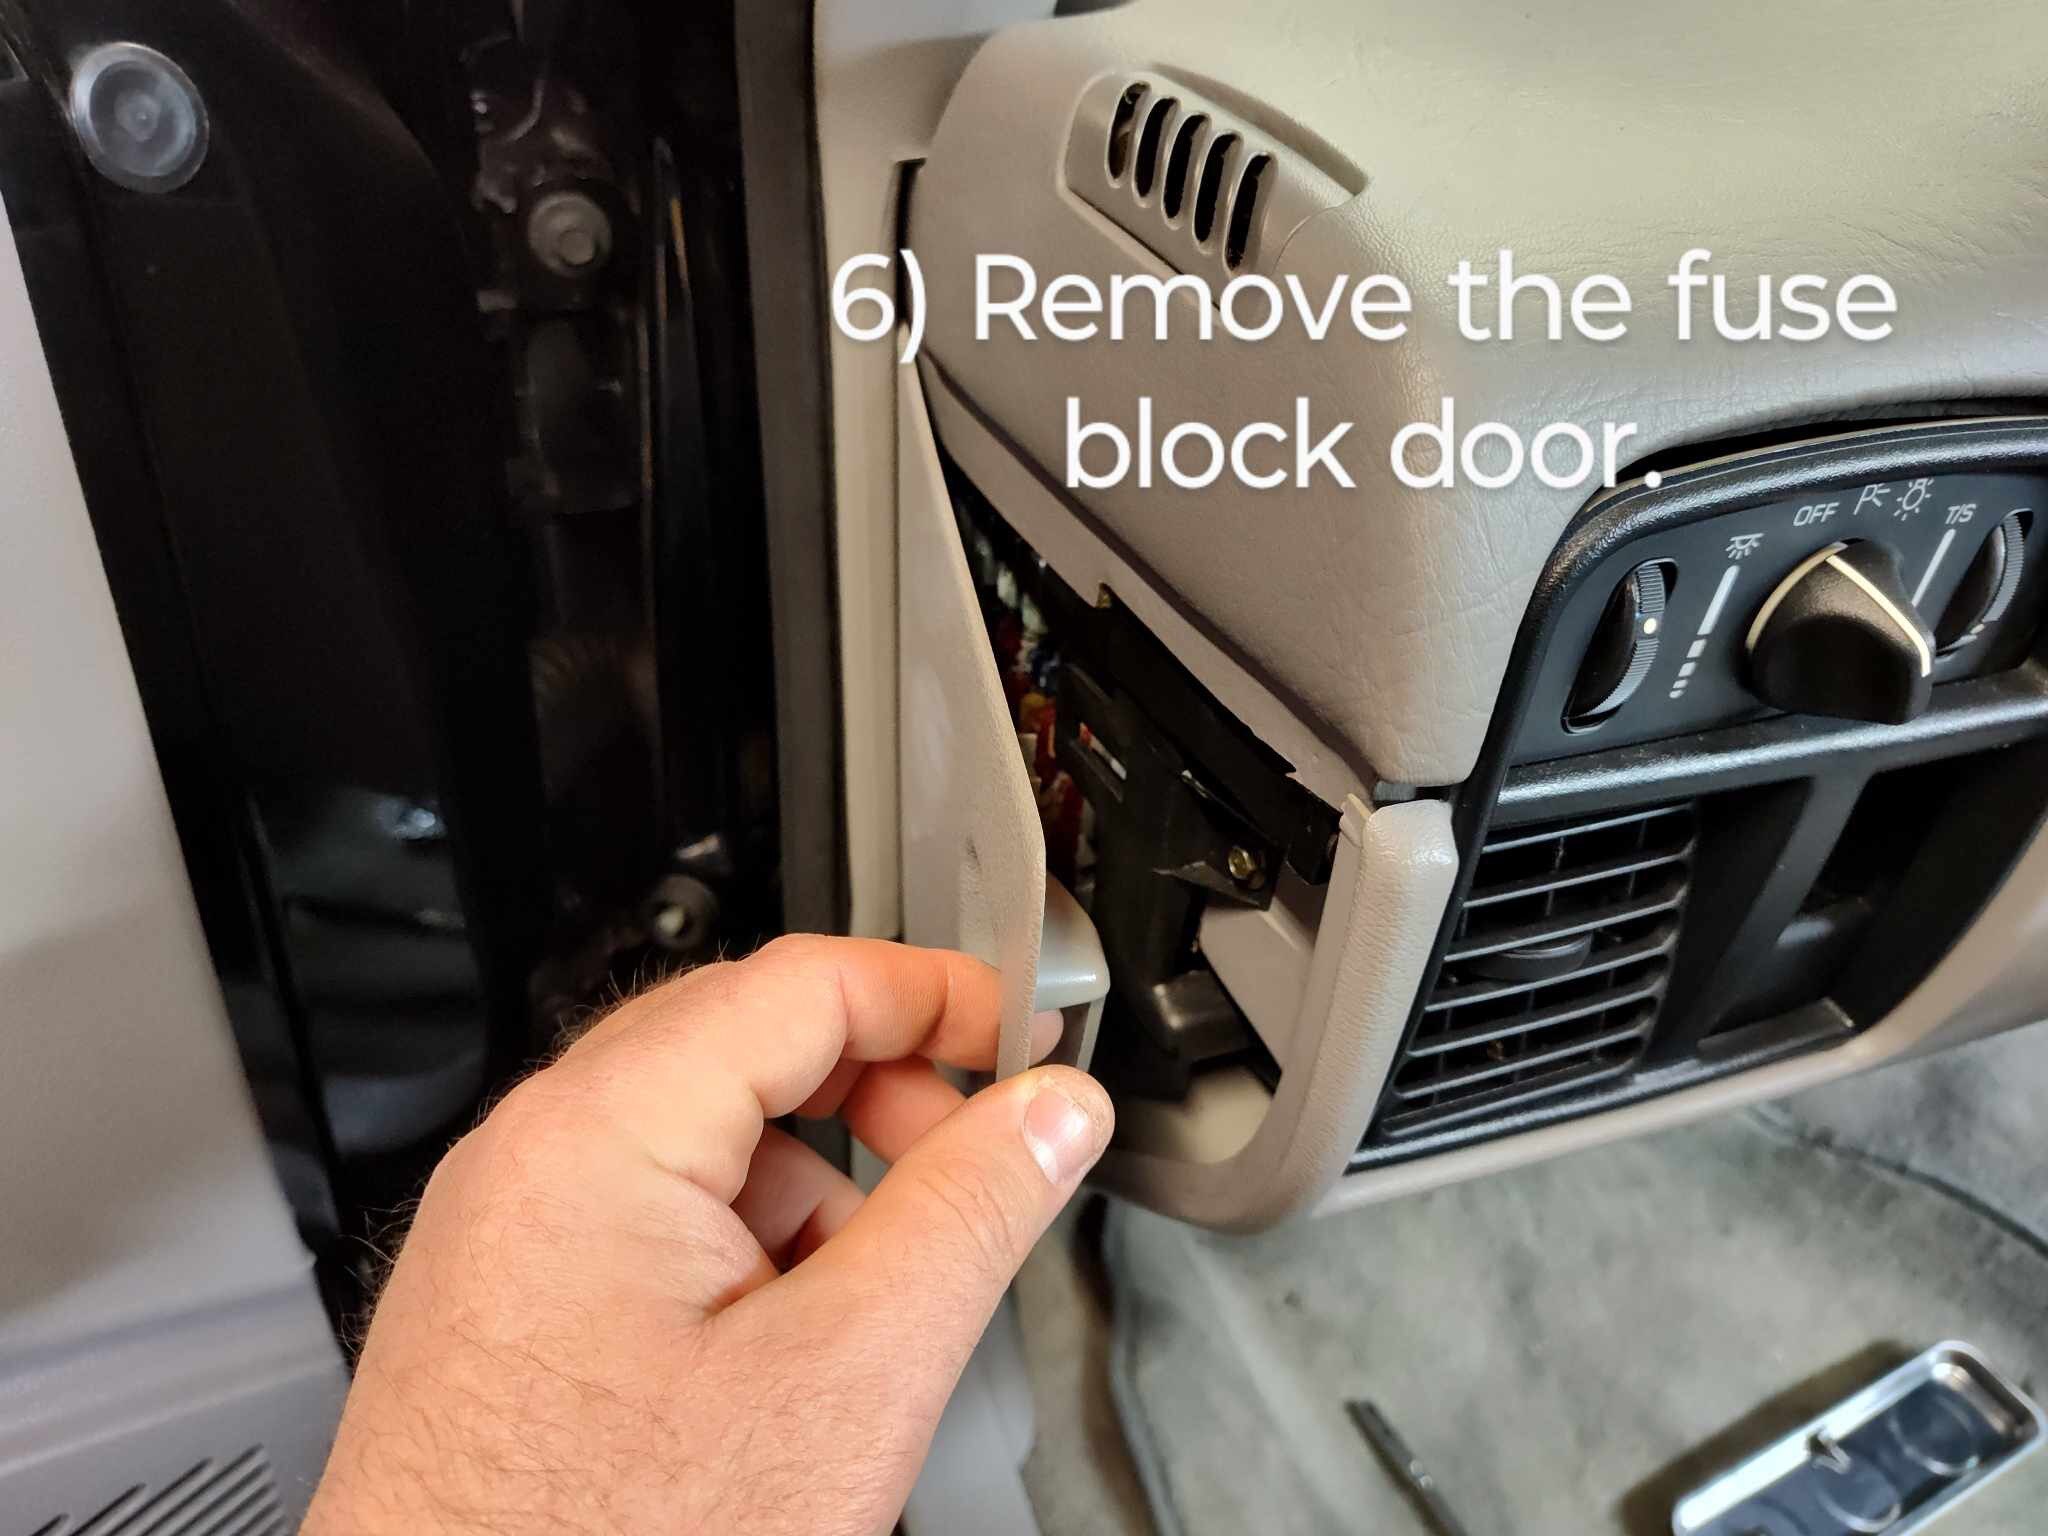
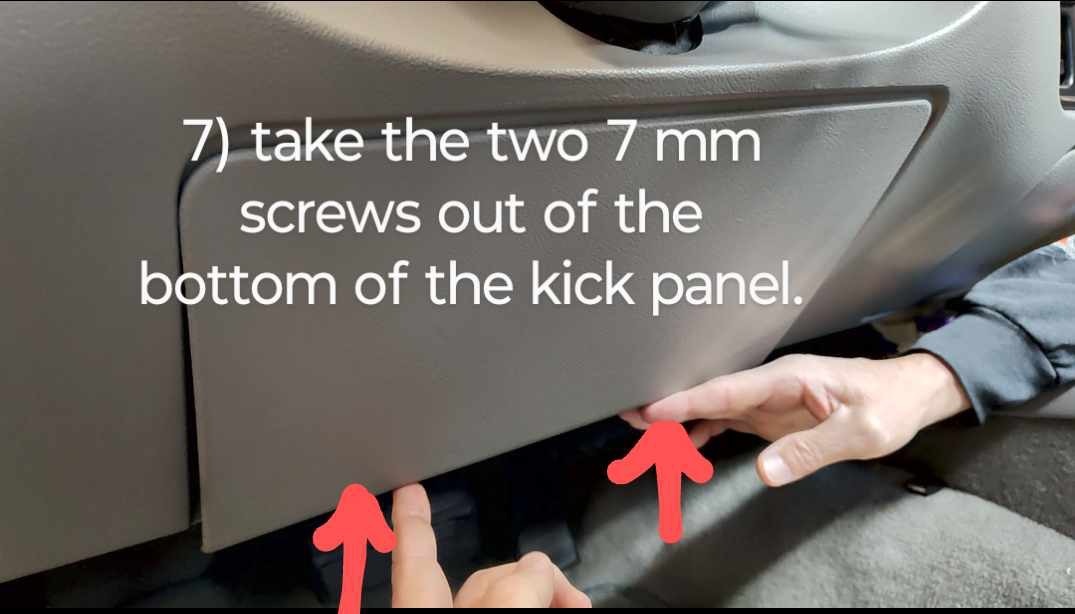
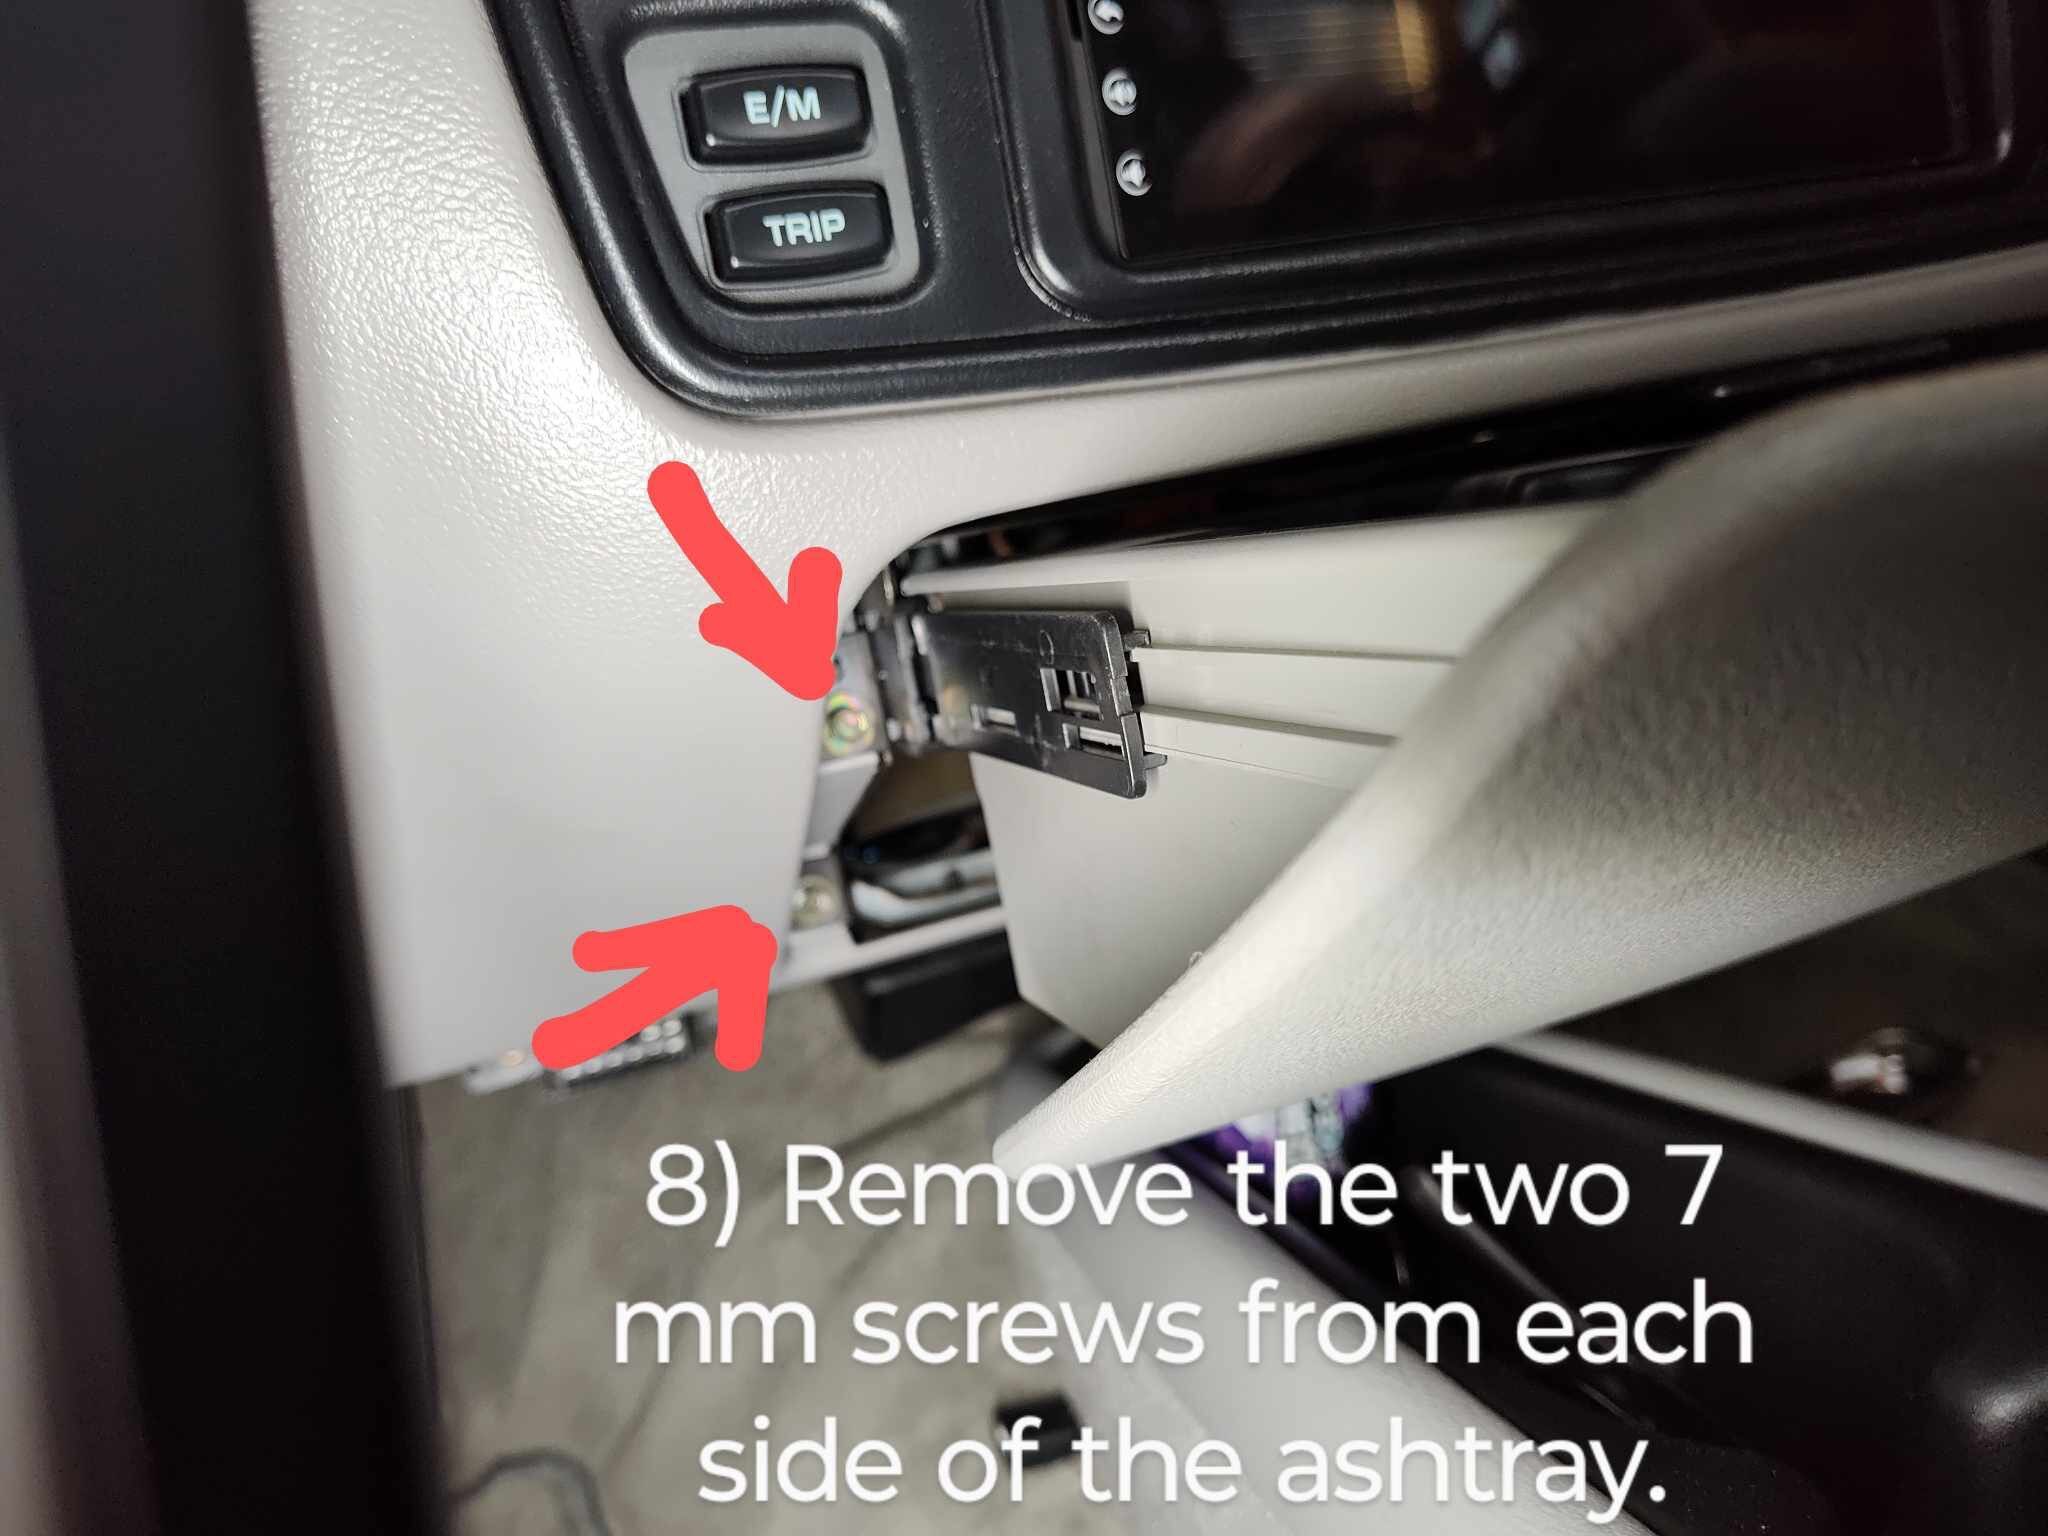
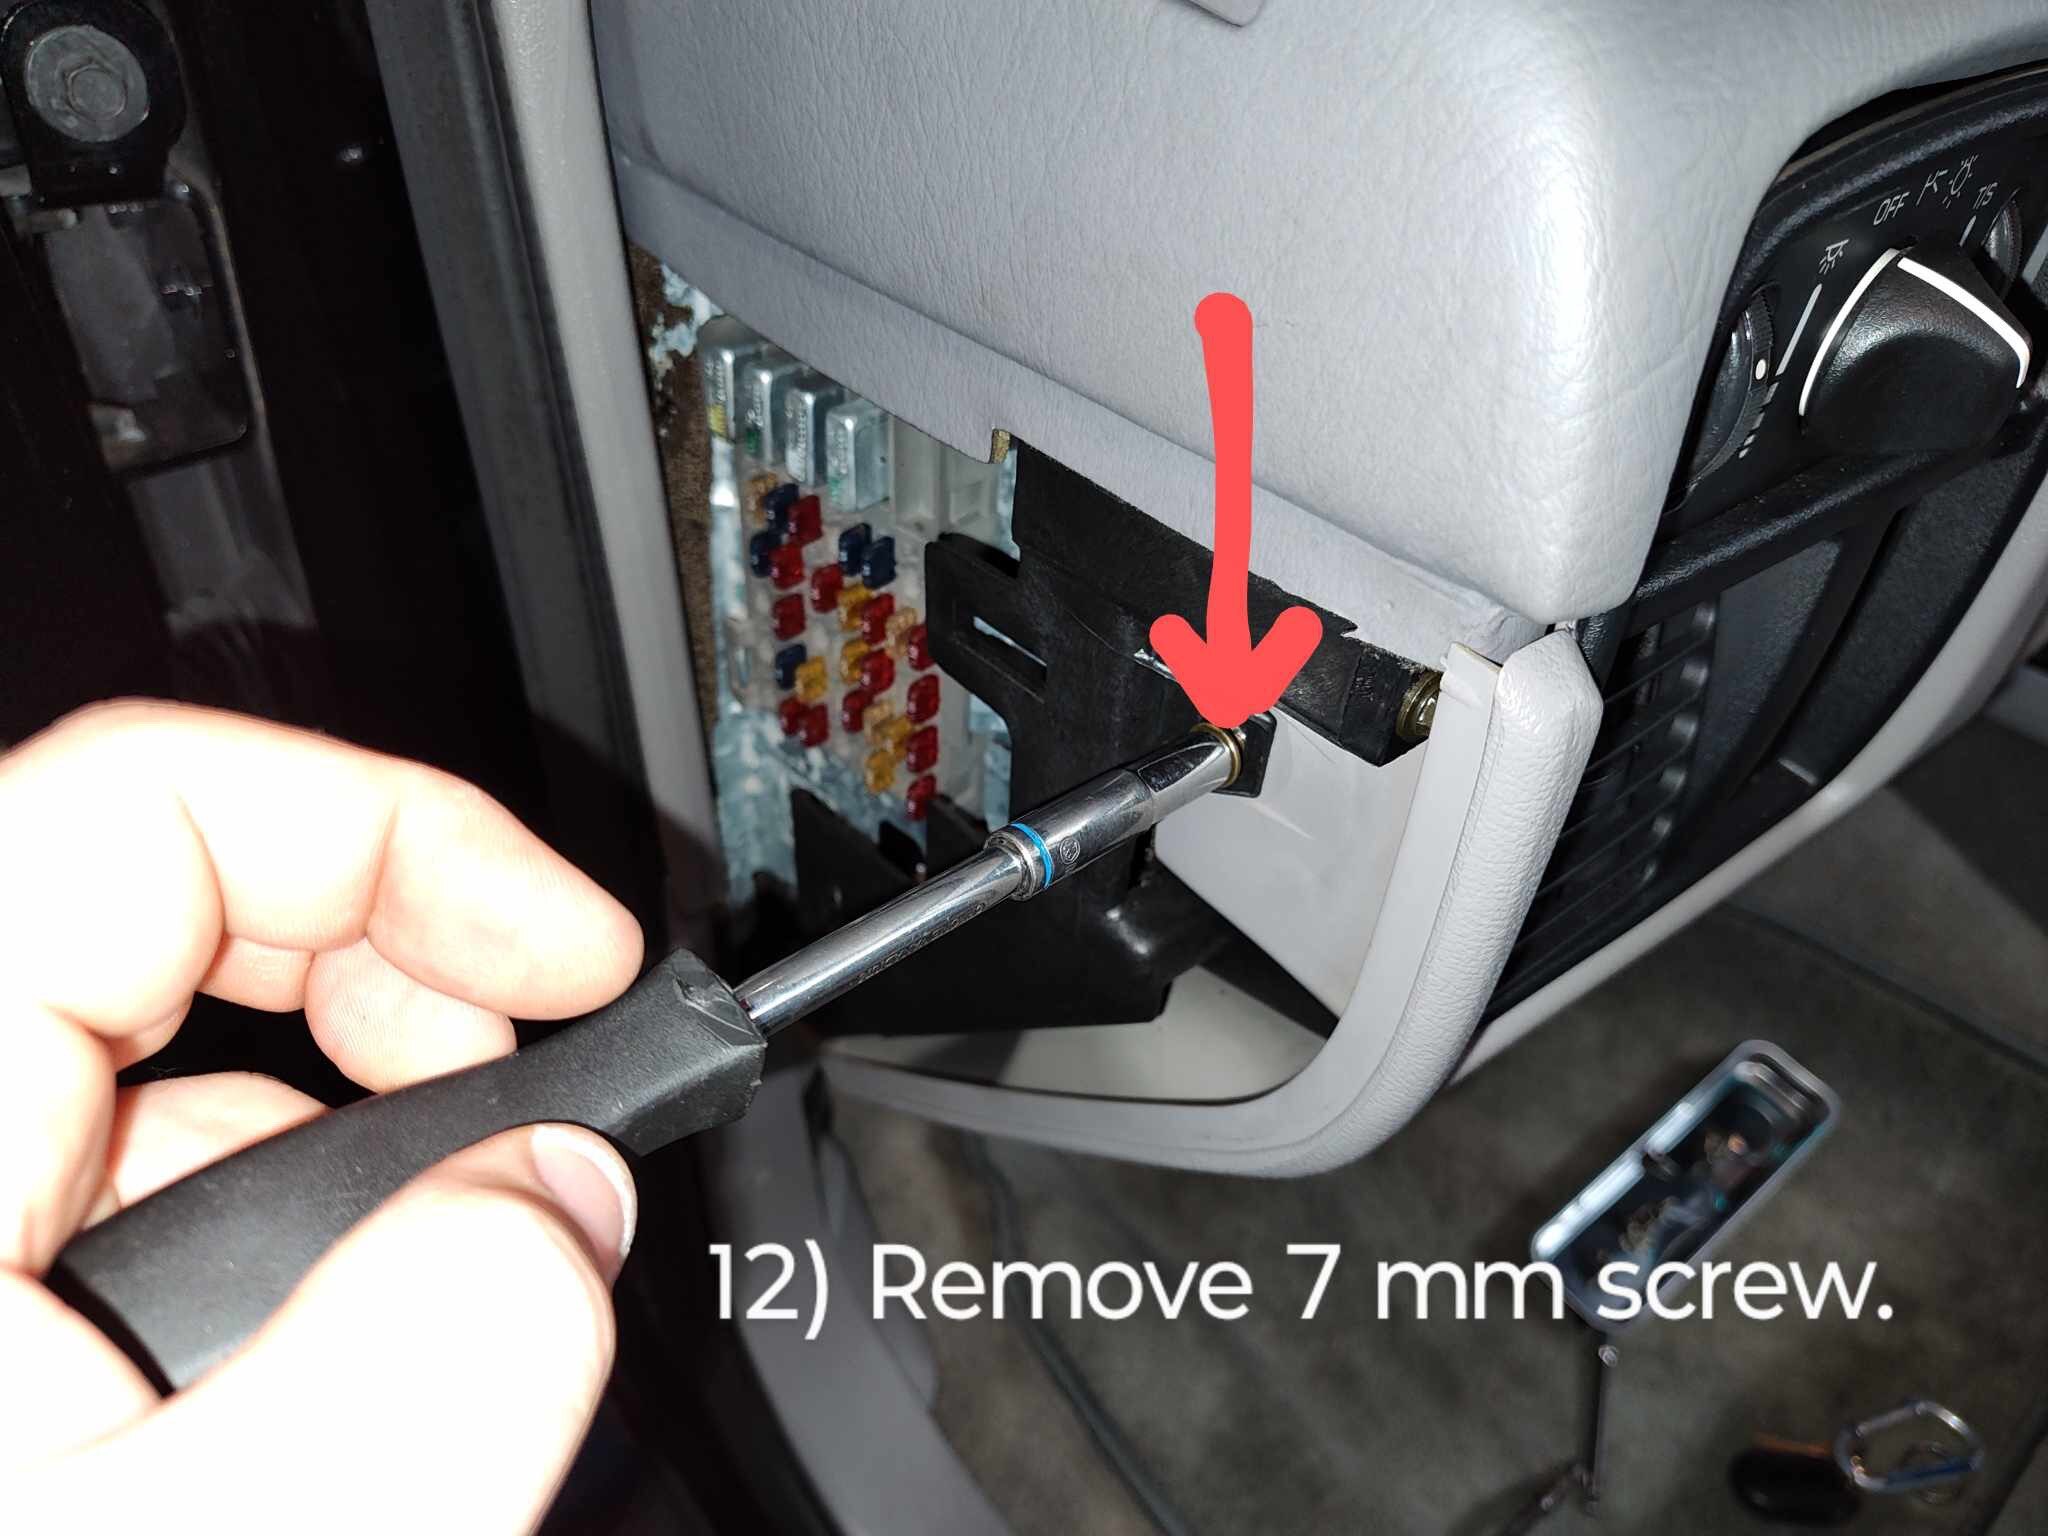
Once that is out, we're going to remove a few more screws. There will be one on each side of the driver's footwell, and another by the fuse panel on the left.

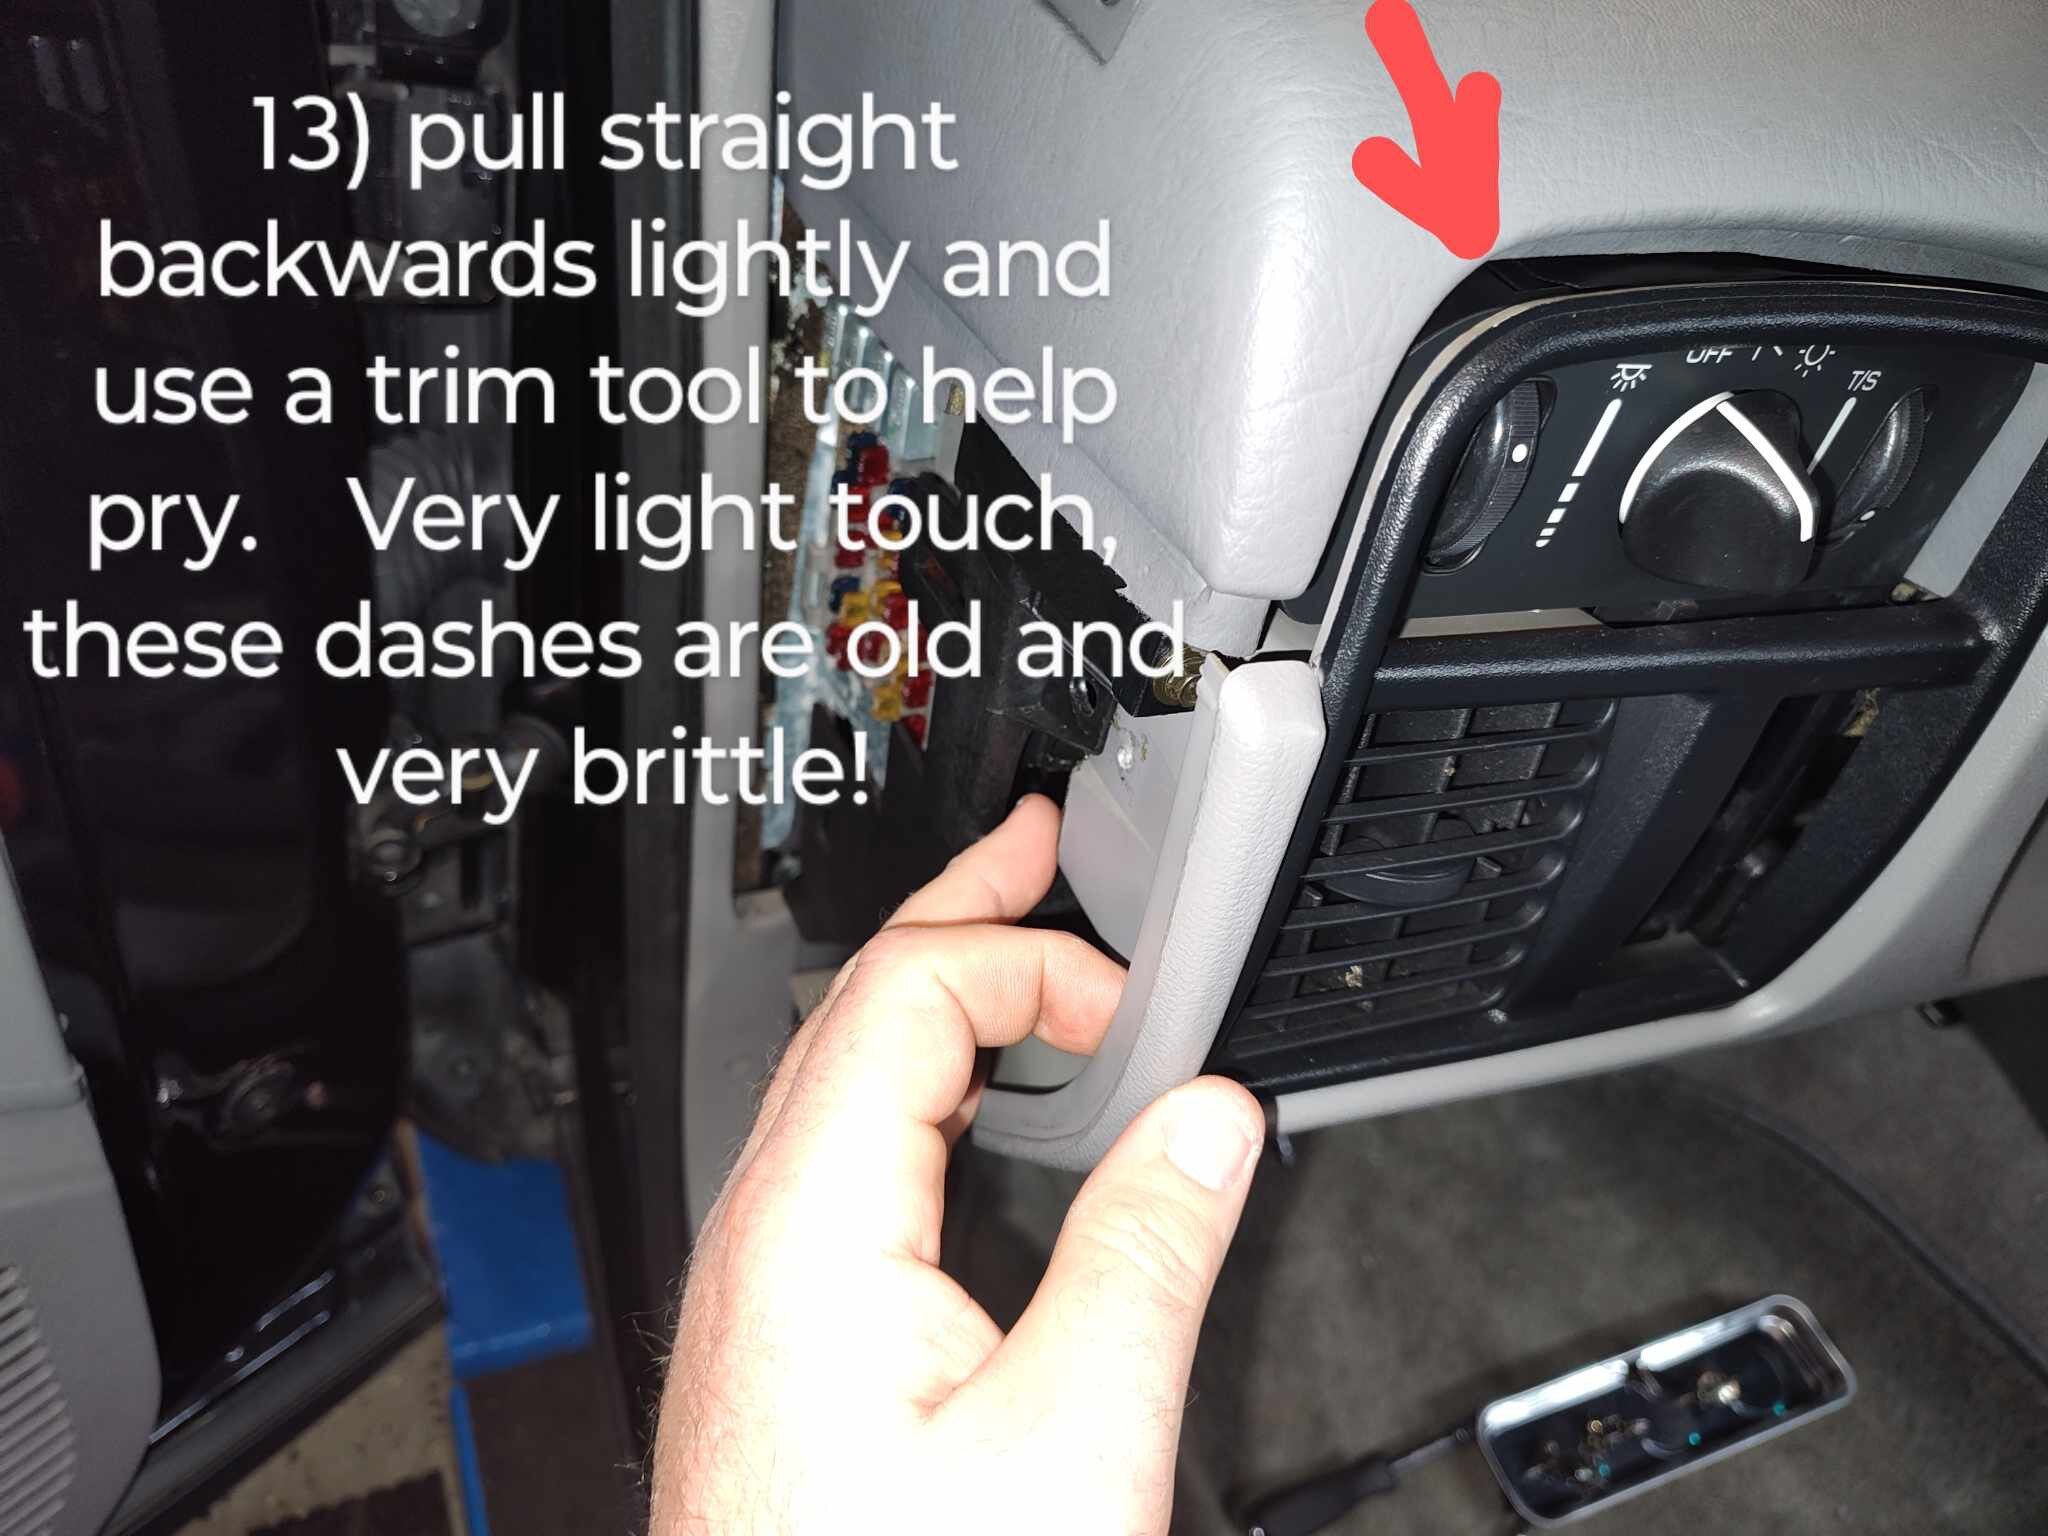
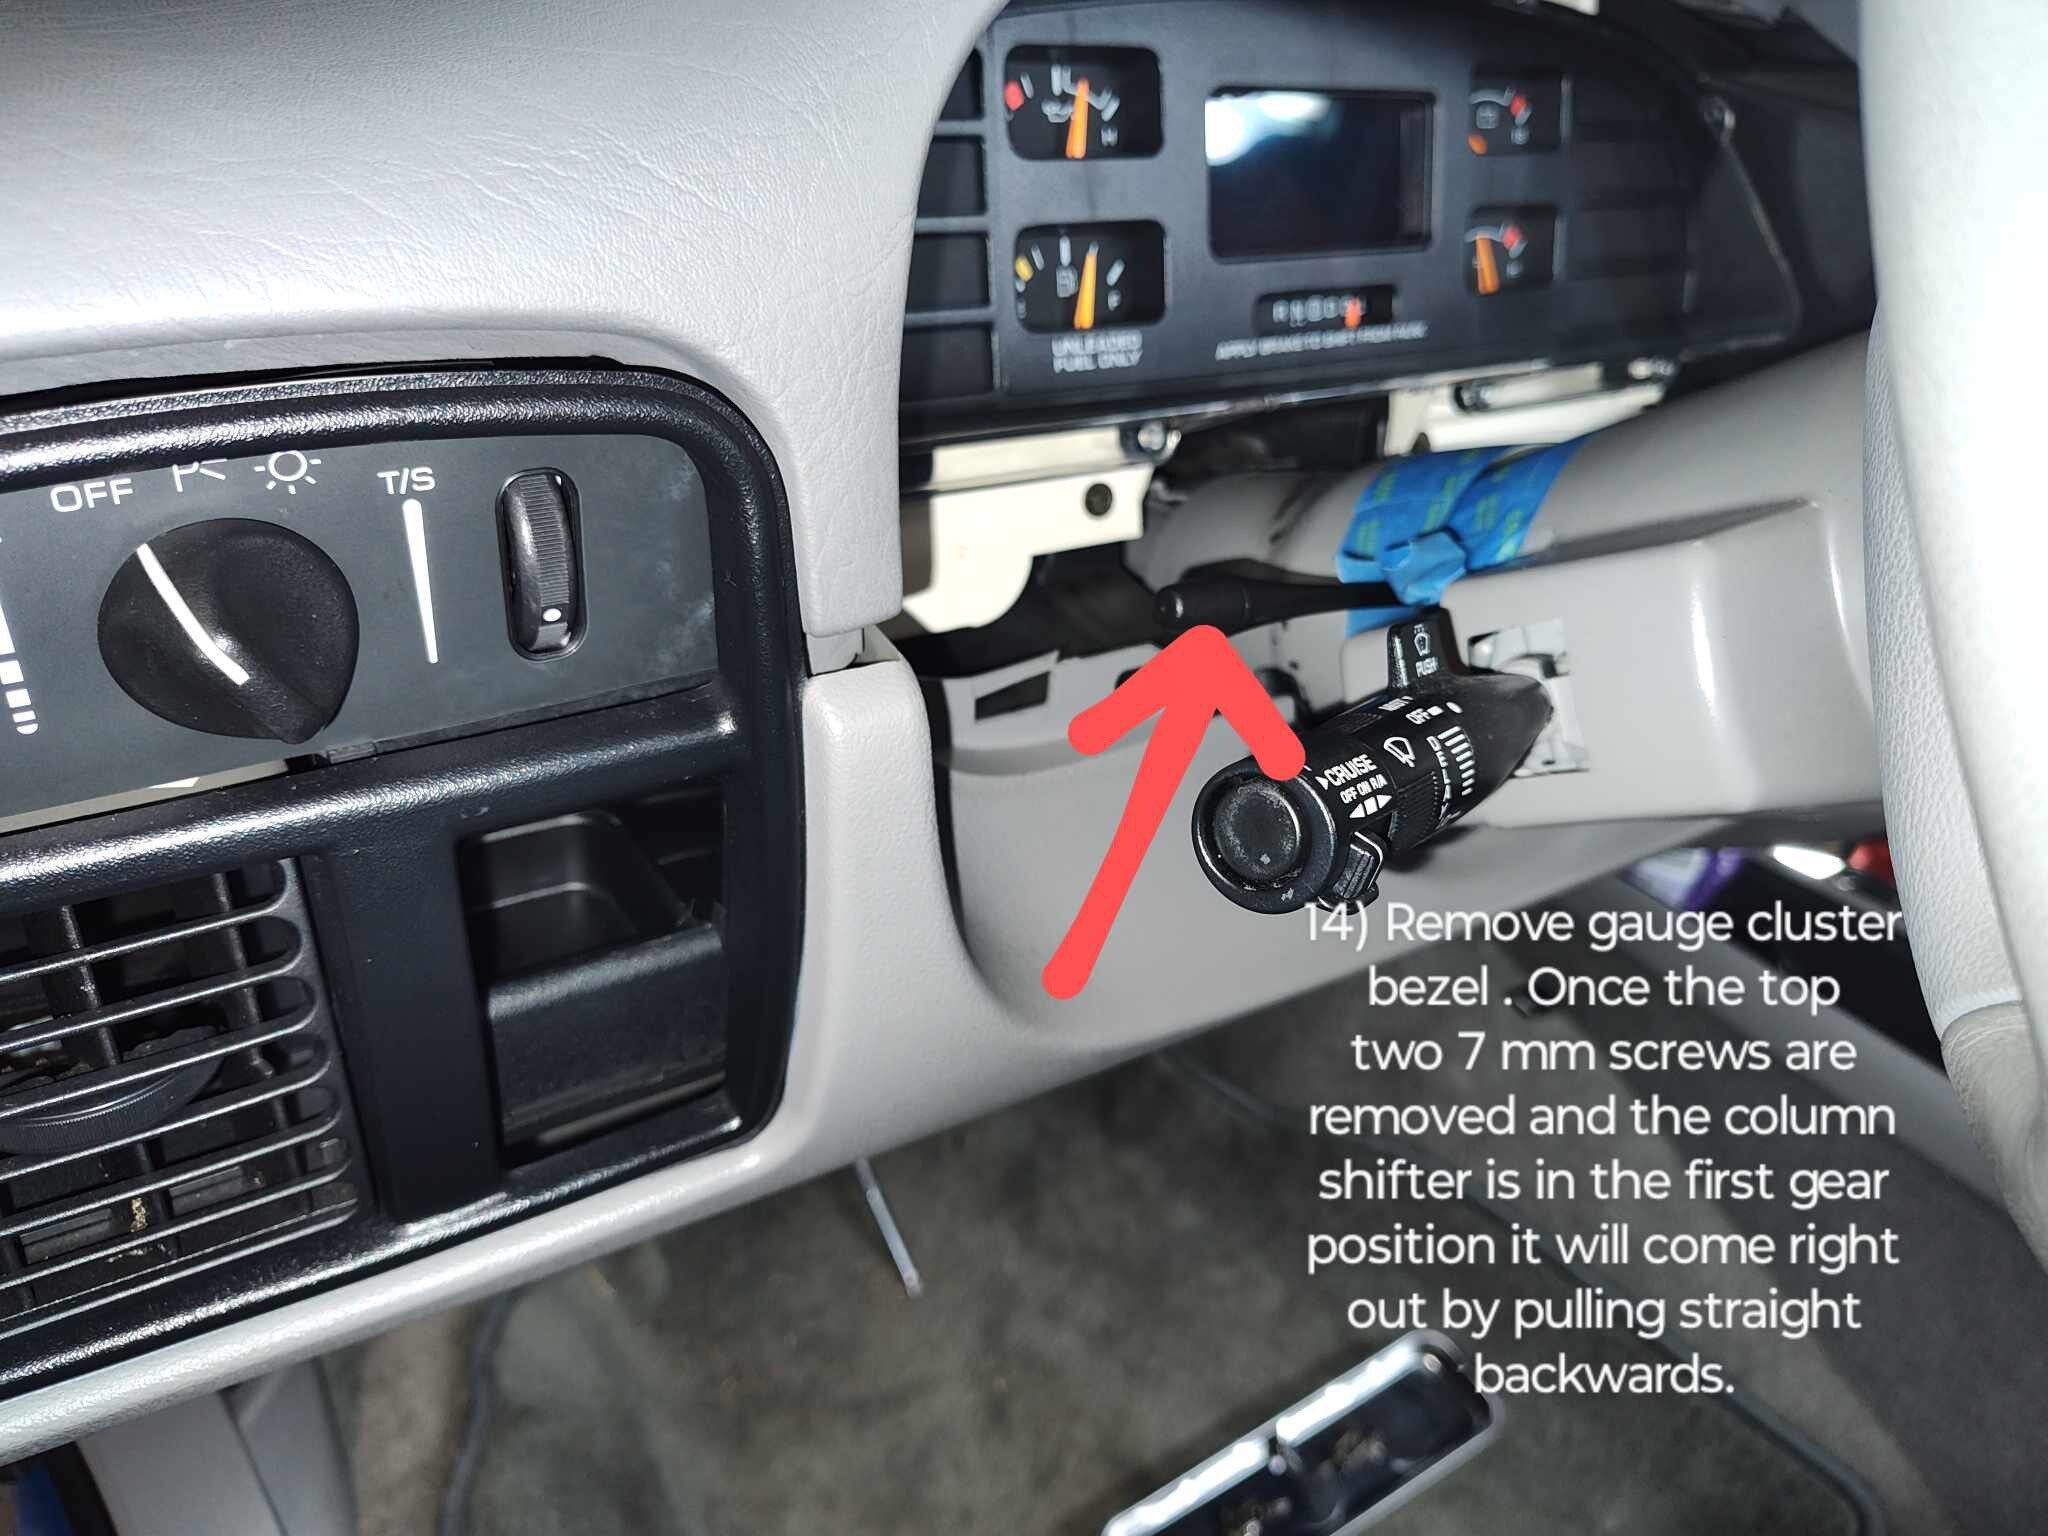
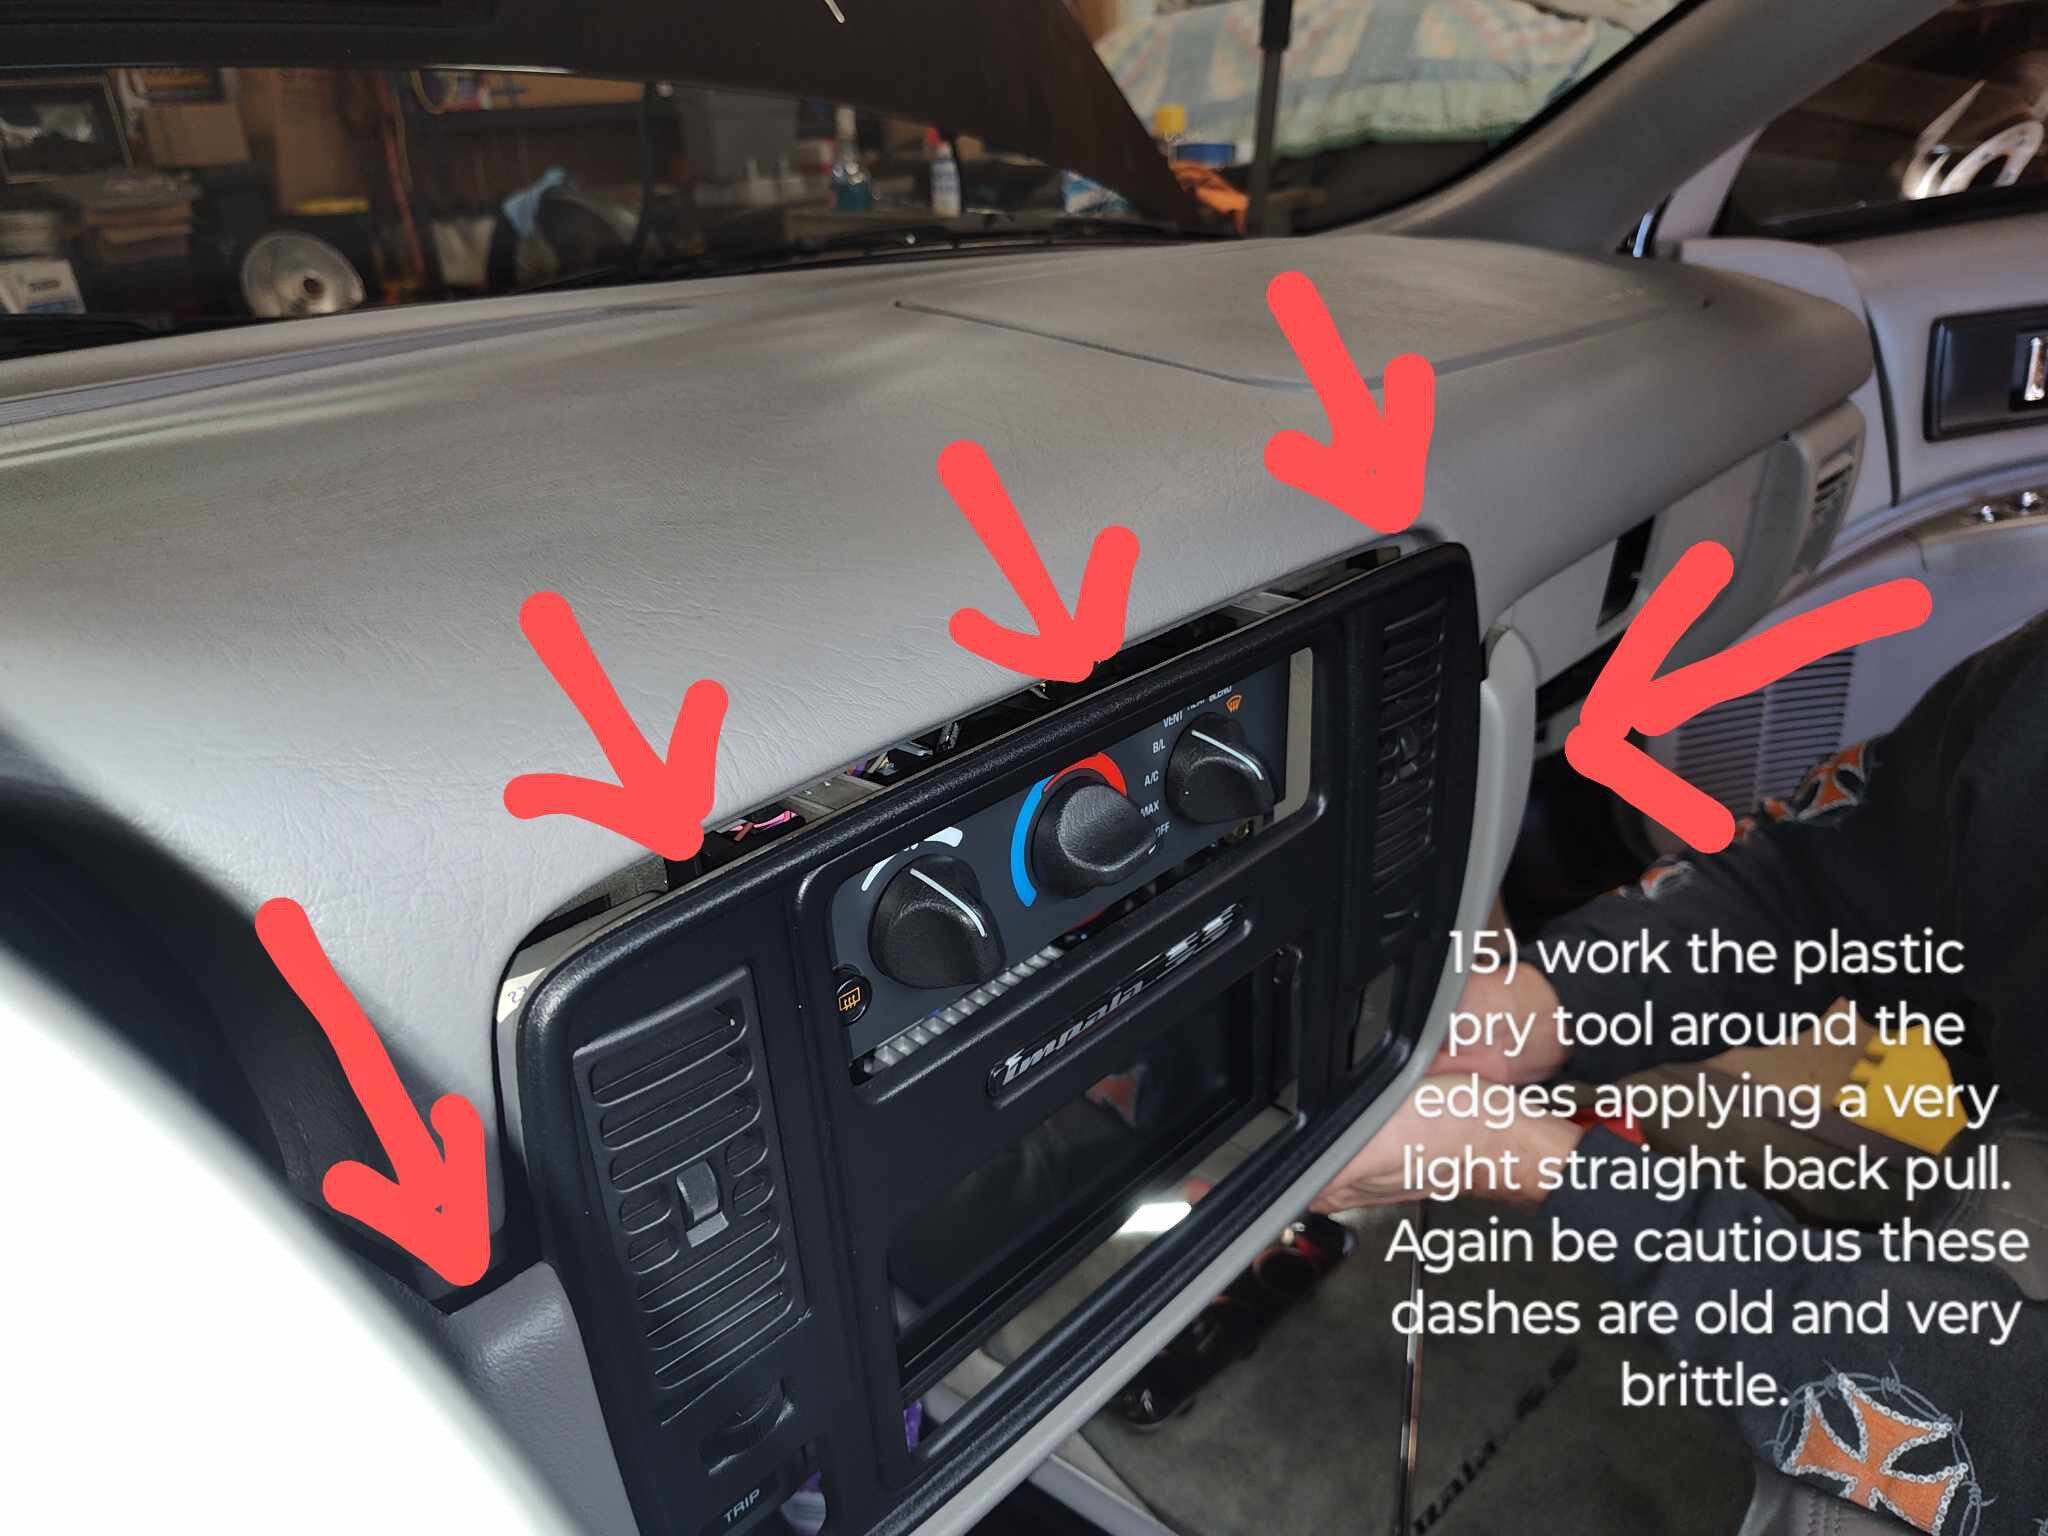
Once these are out, you're ready to begin removing the underside of the dash. We recommend using soft plastic trim removal tools and being gentle with it overall. As with any plastics of this age, they can be brittle and break easily, so take your time and be careful!
Now that all the necessary trim is removed, it is time to move onto the fun part: our new radio!
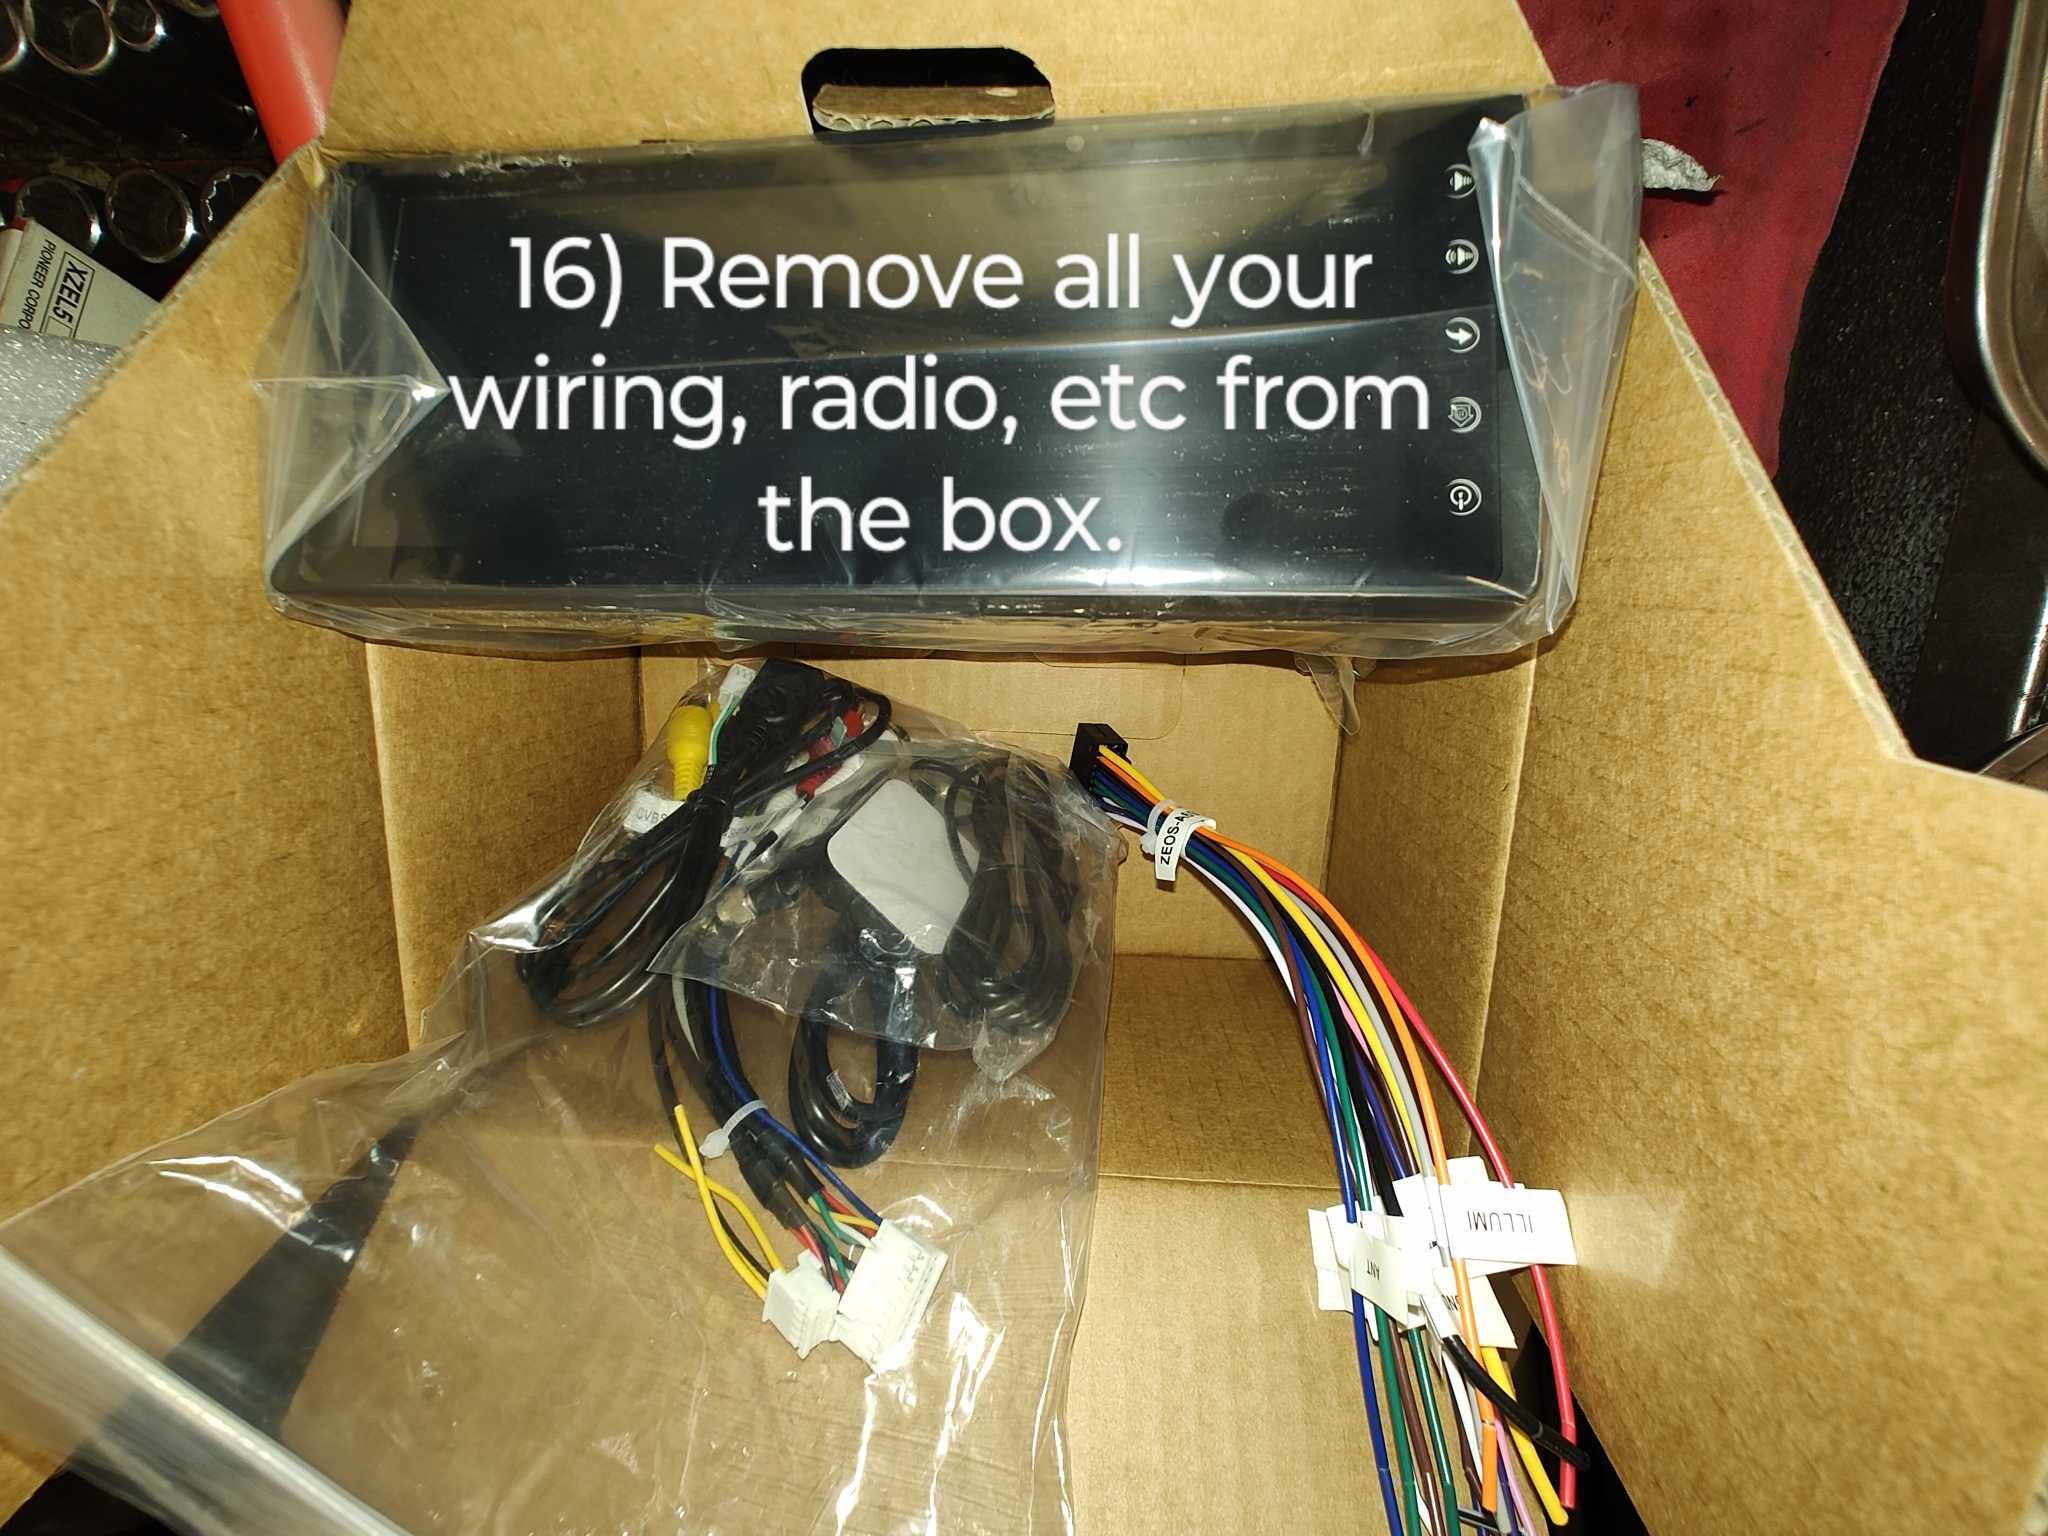
Let's open it up!
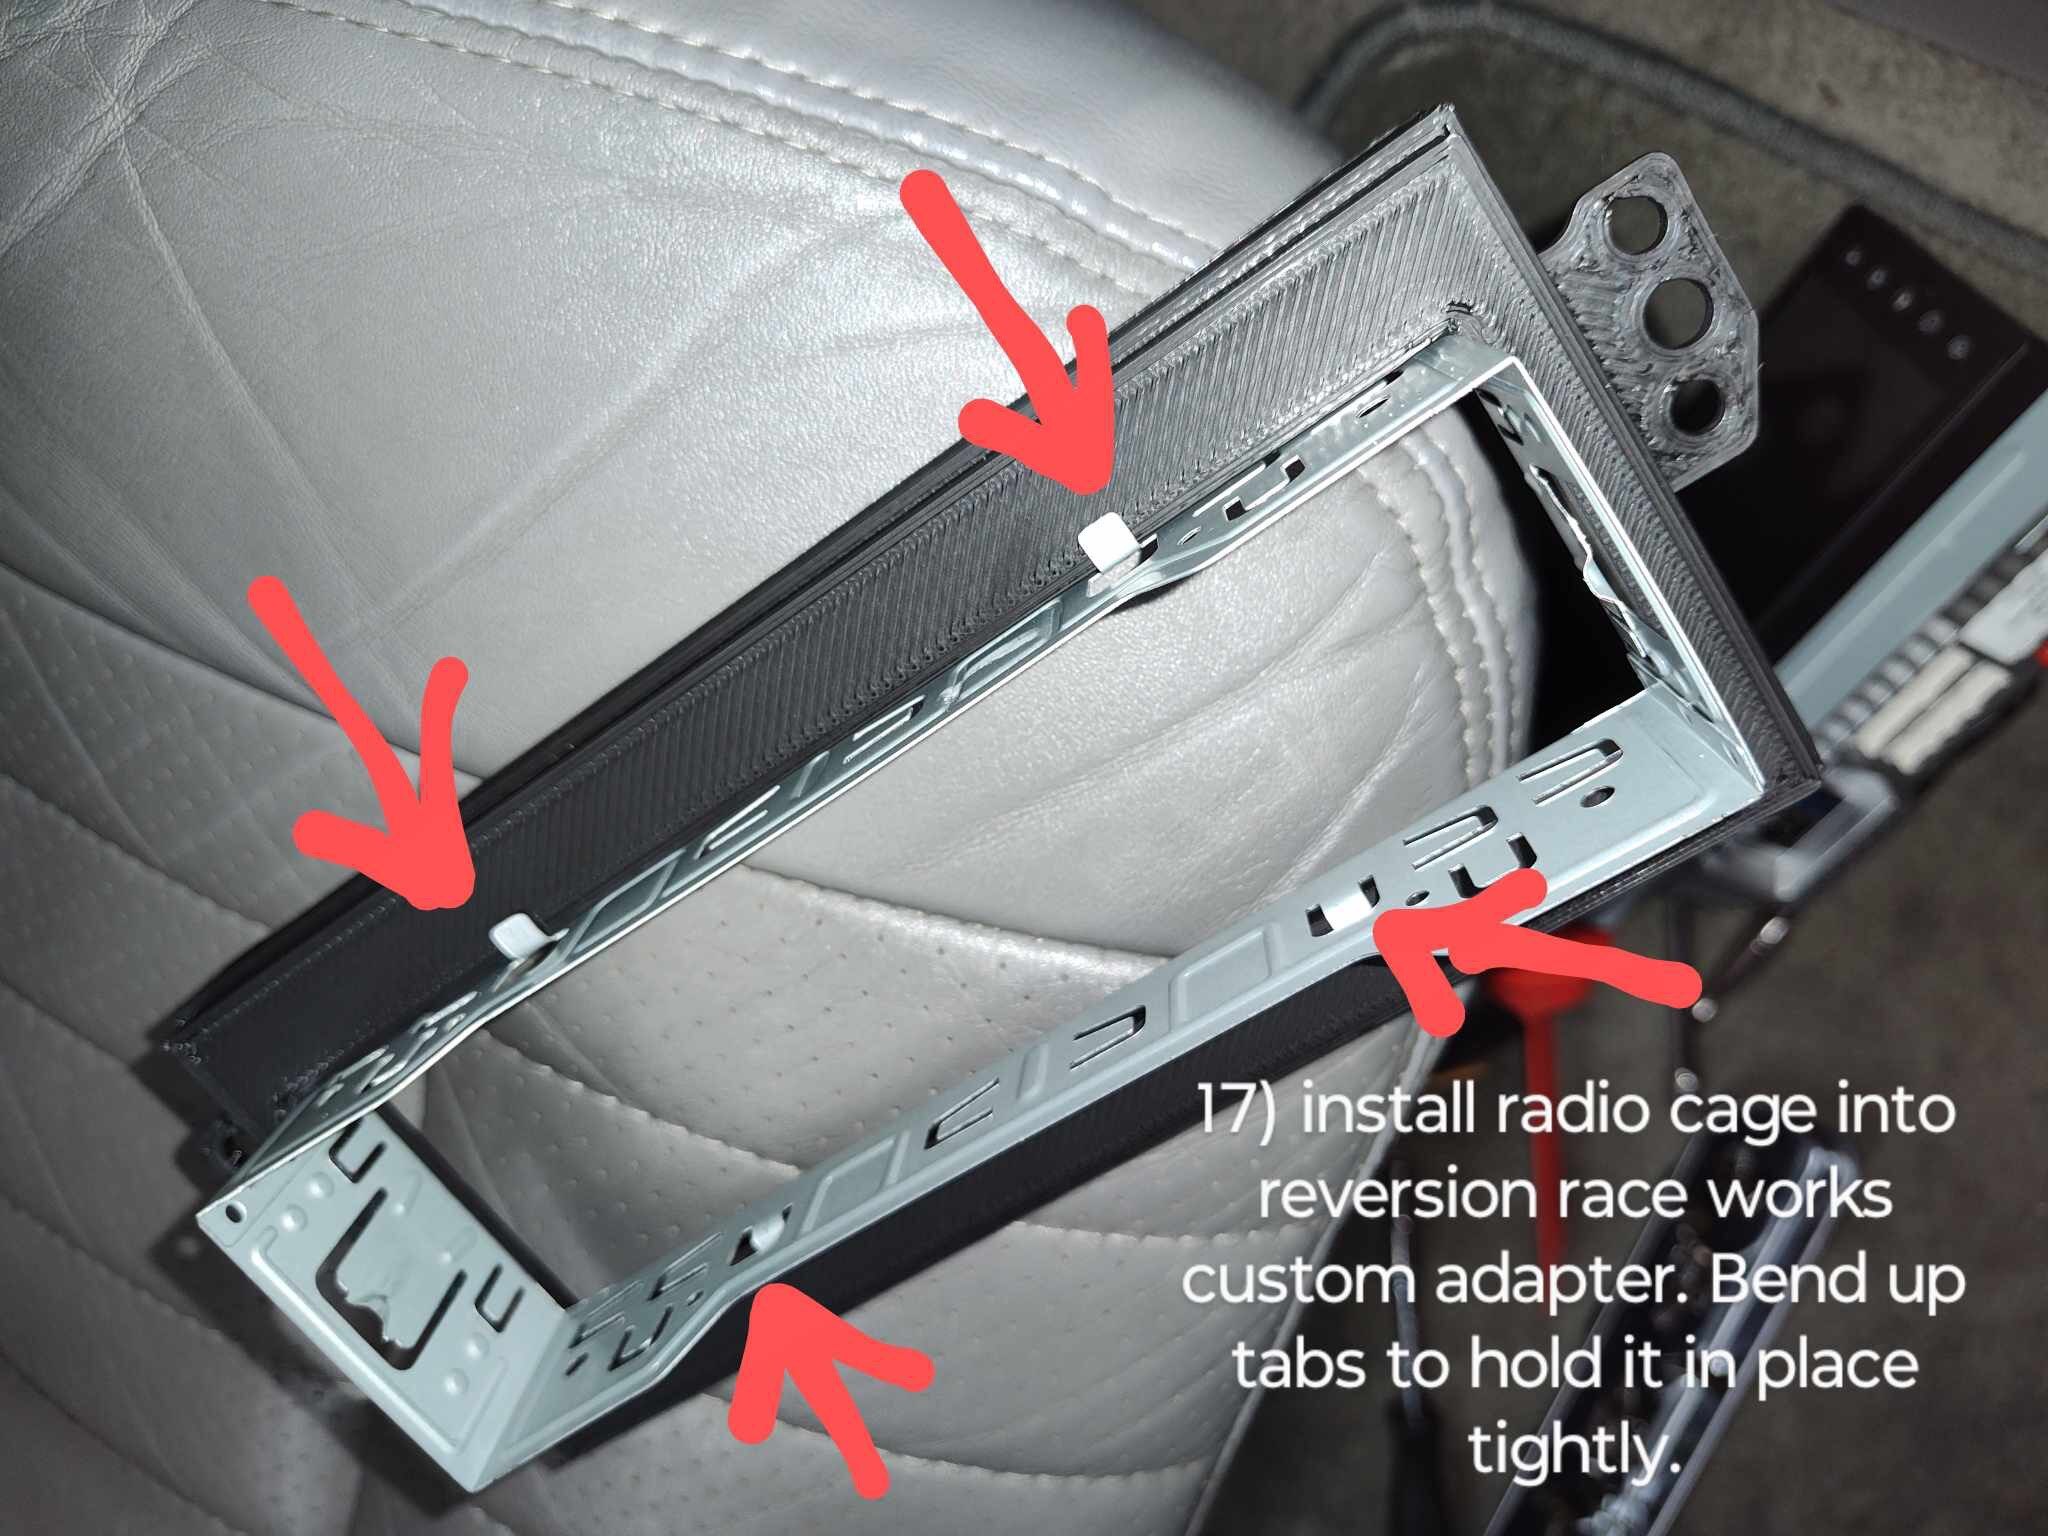
To help with installation, our newer kits have a clear "TOP" inscribed into the 3D printed bezel for easy orientation as well.
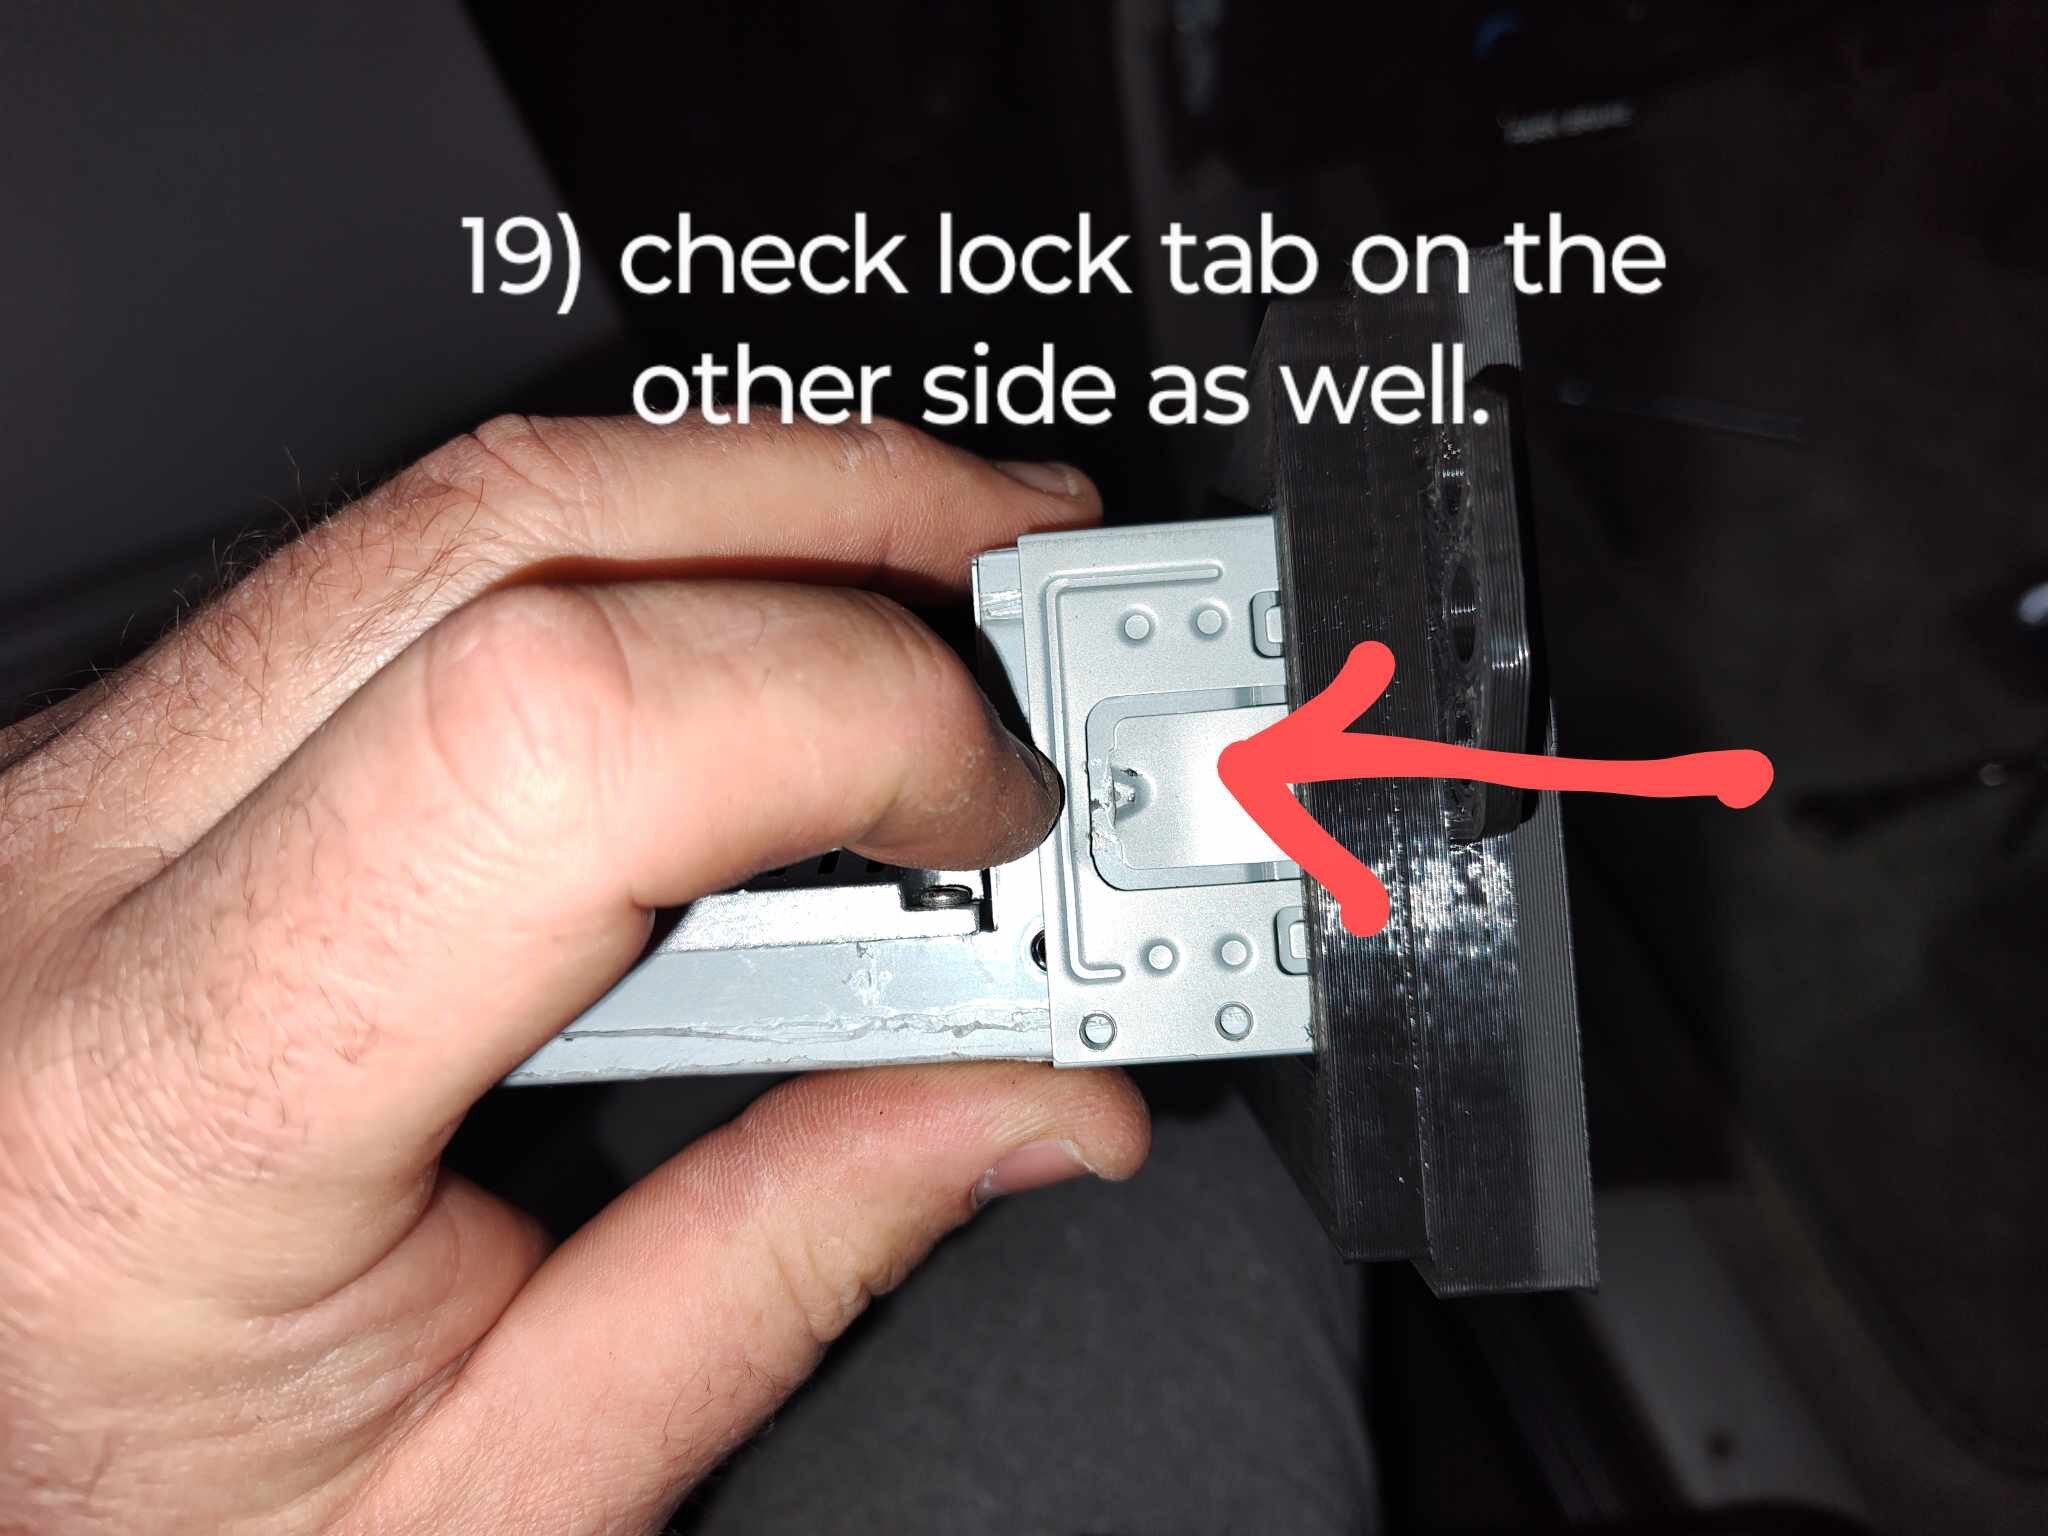
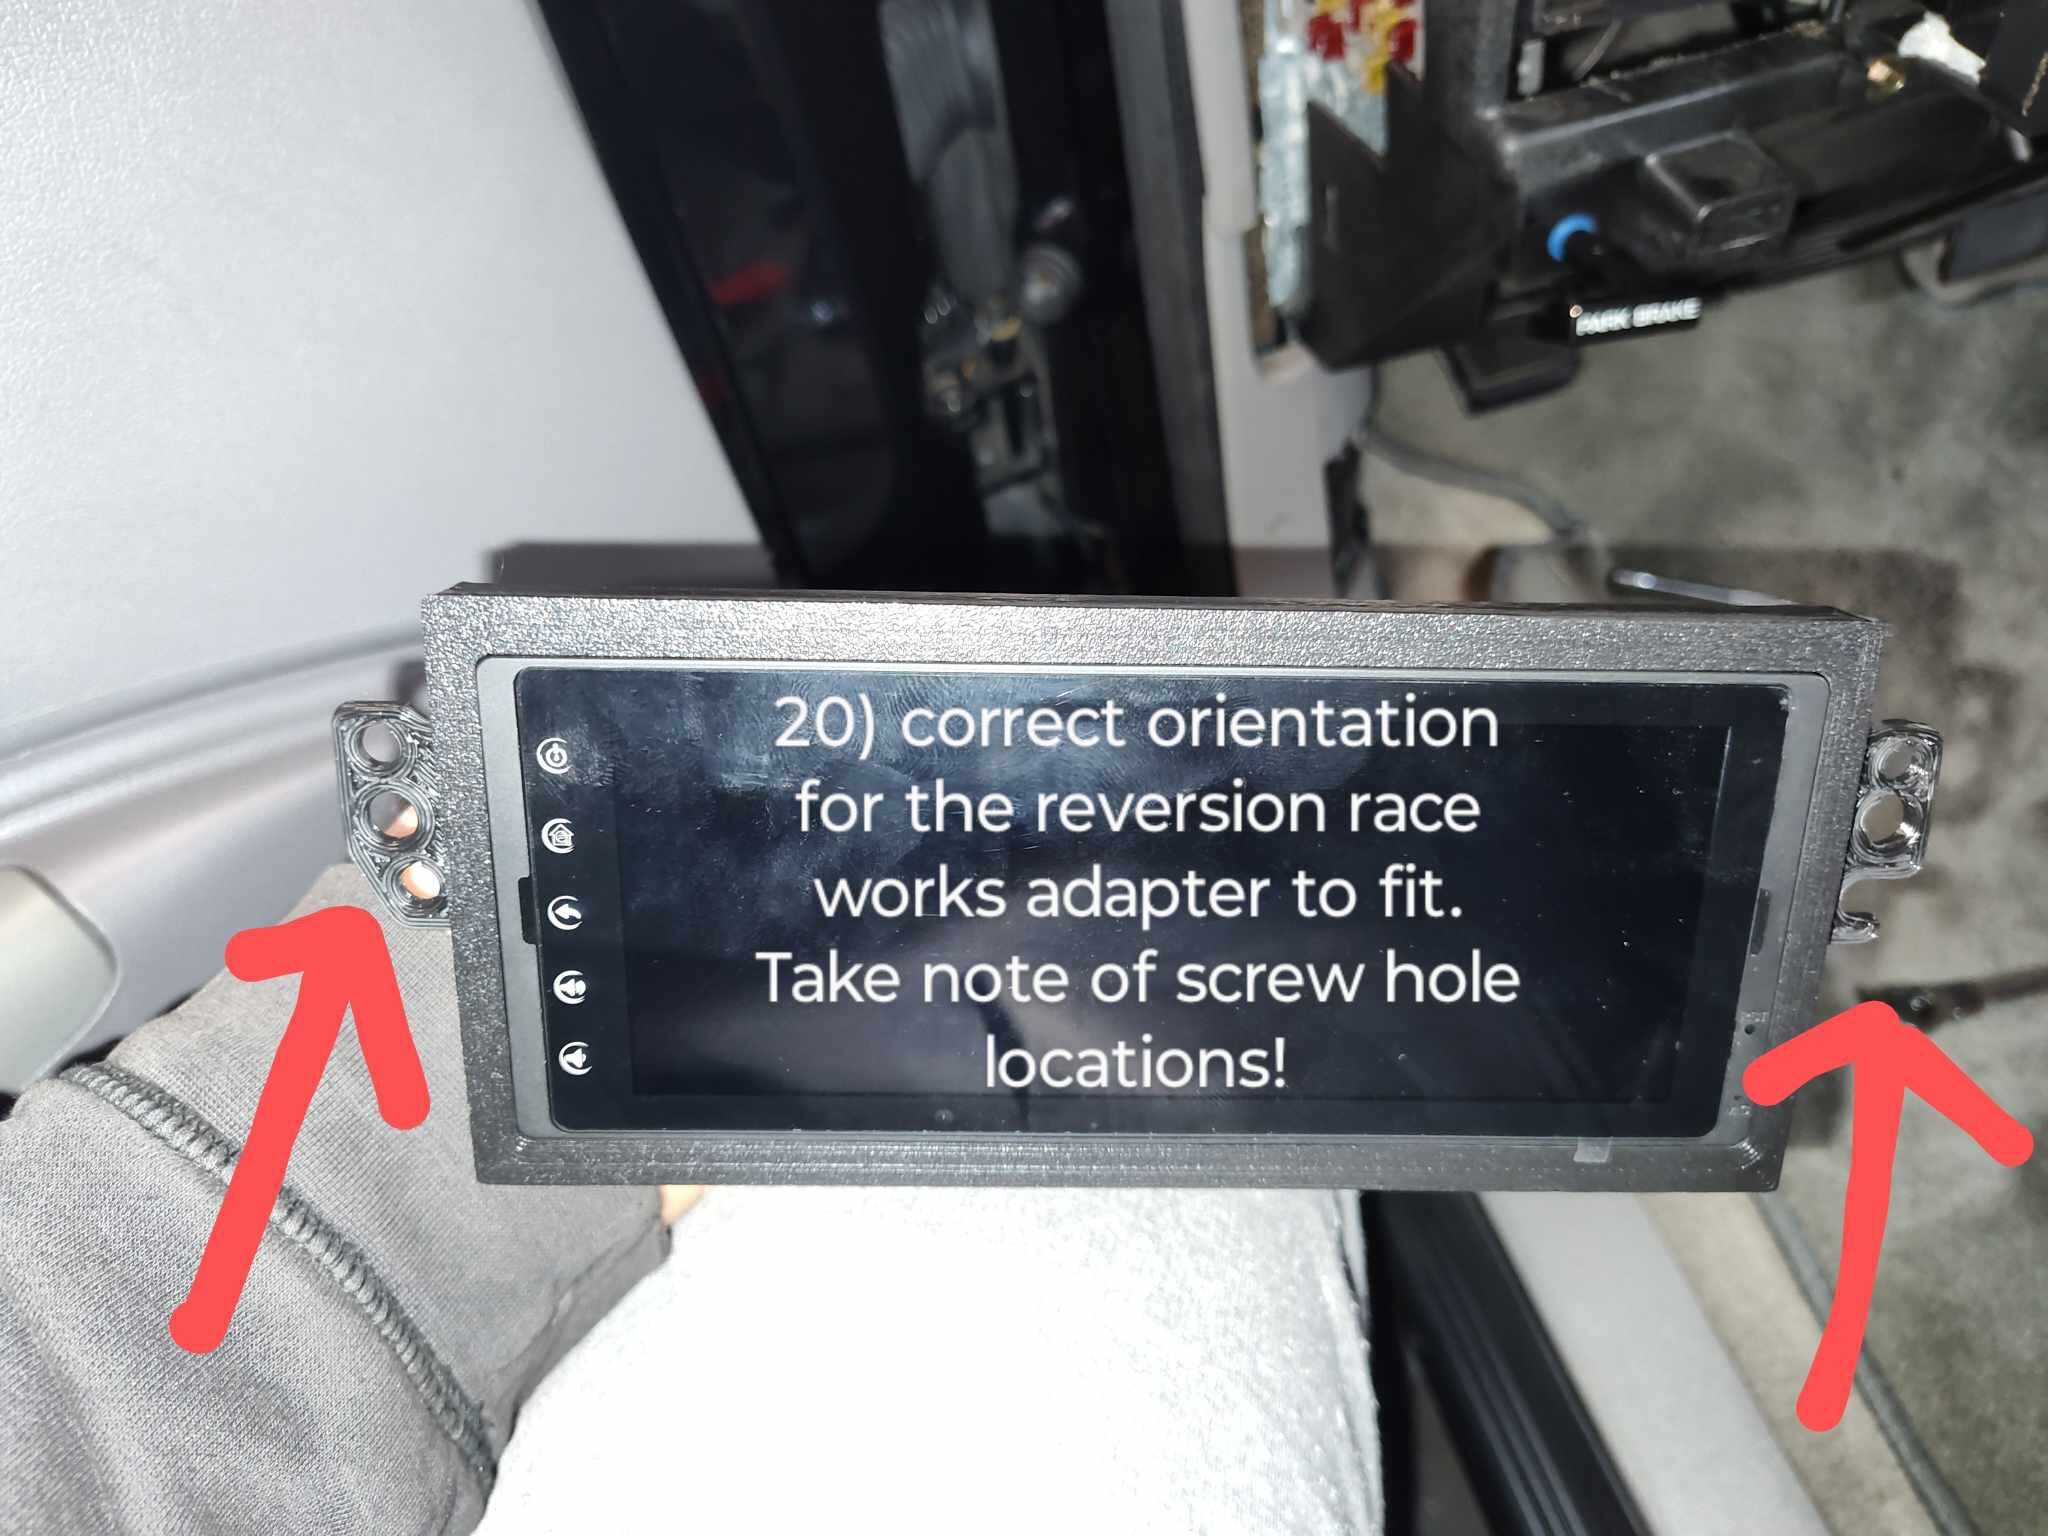
If you have an older kit without "TOP" written on it, check the bolt holes to get the right orientation. It should match your factory radio and look like this. If you flip it upside down, you'll be asking yourself why it doesn't fit right!
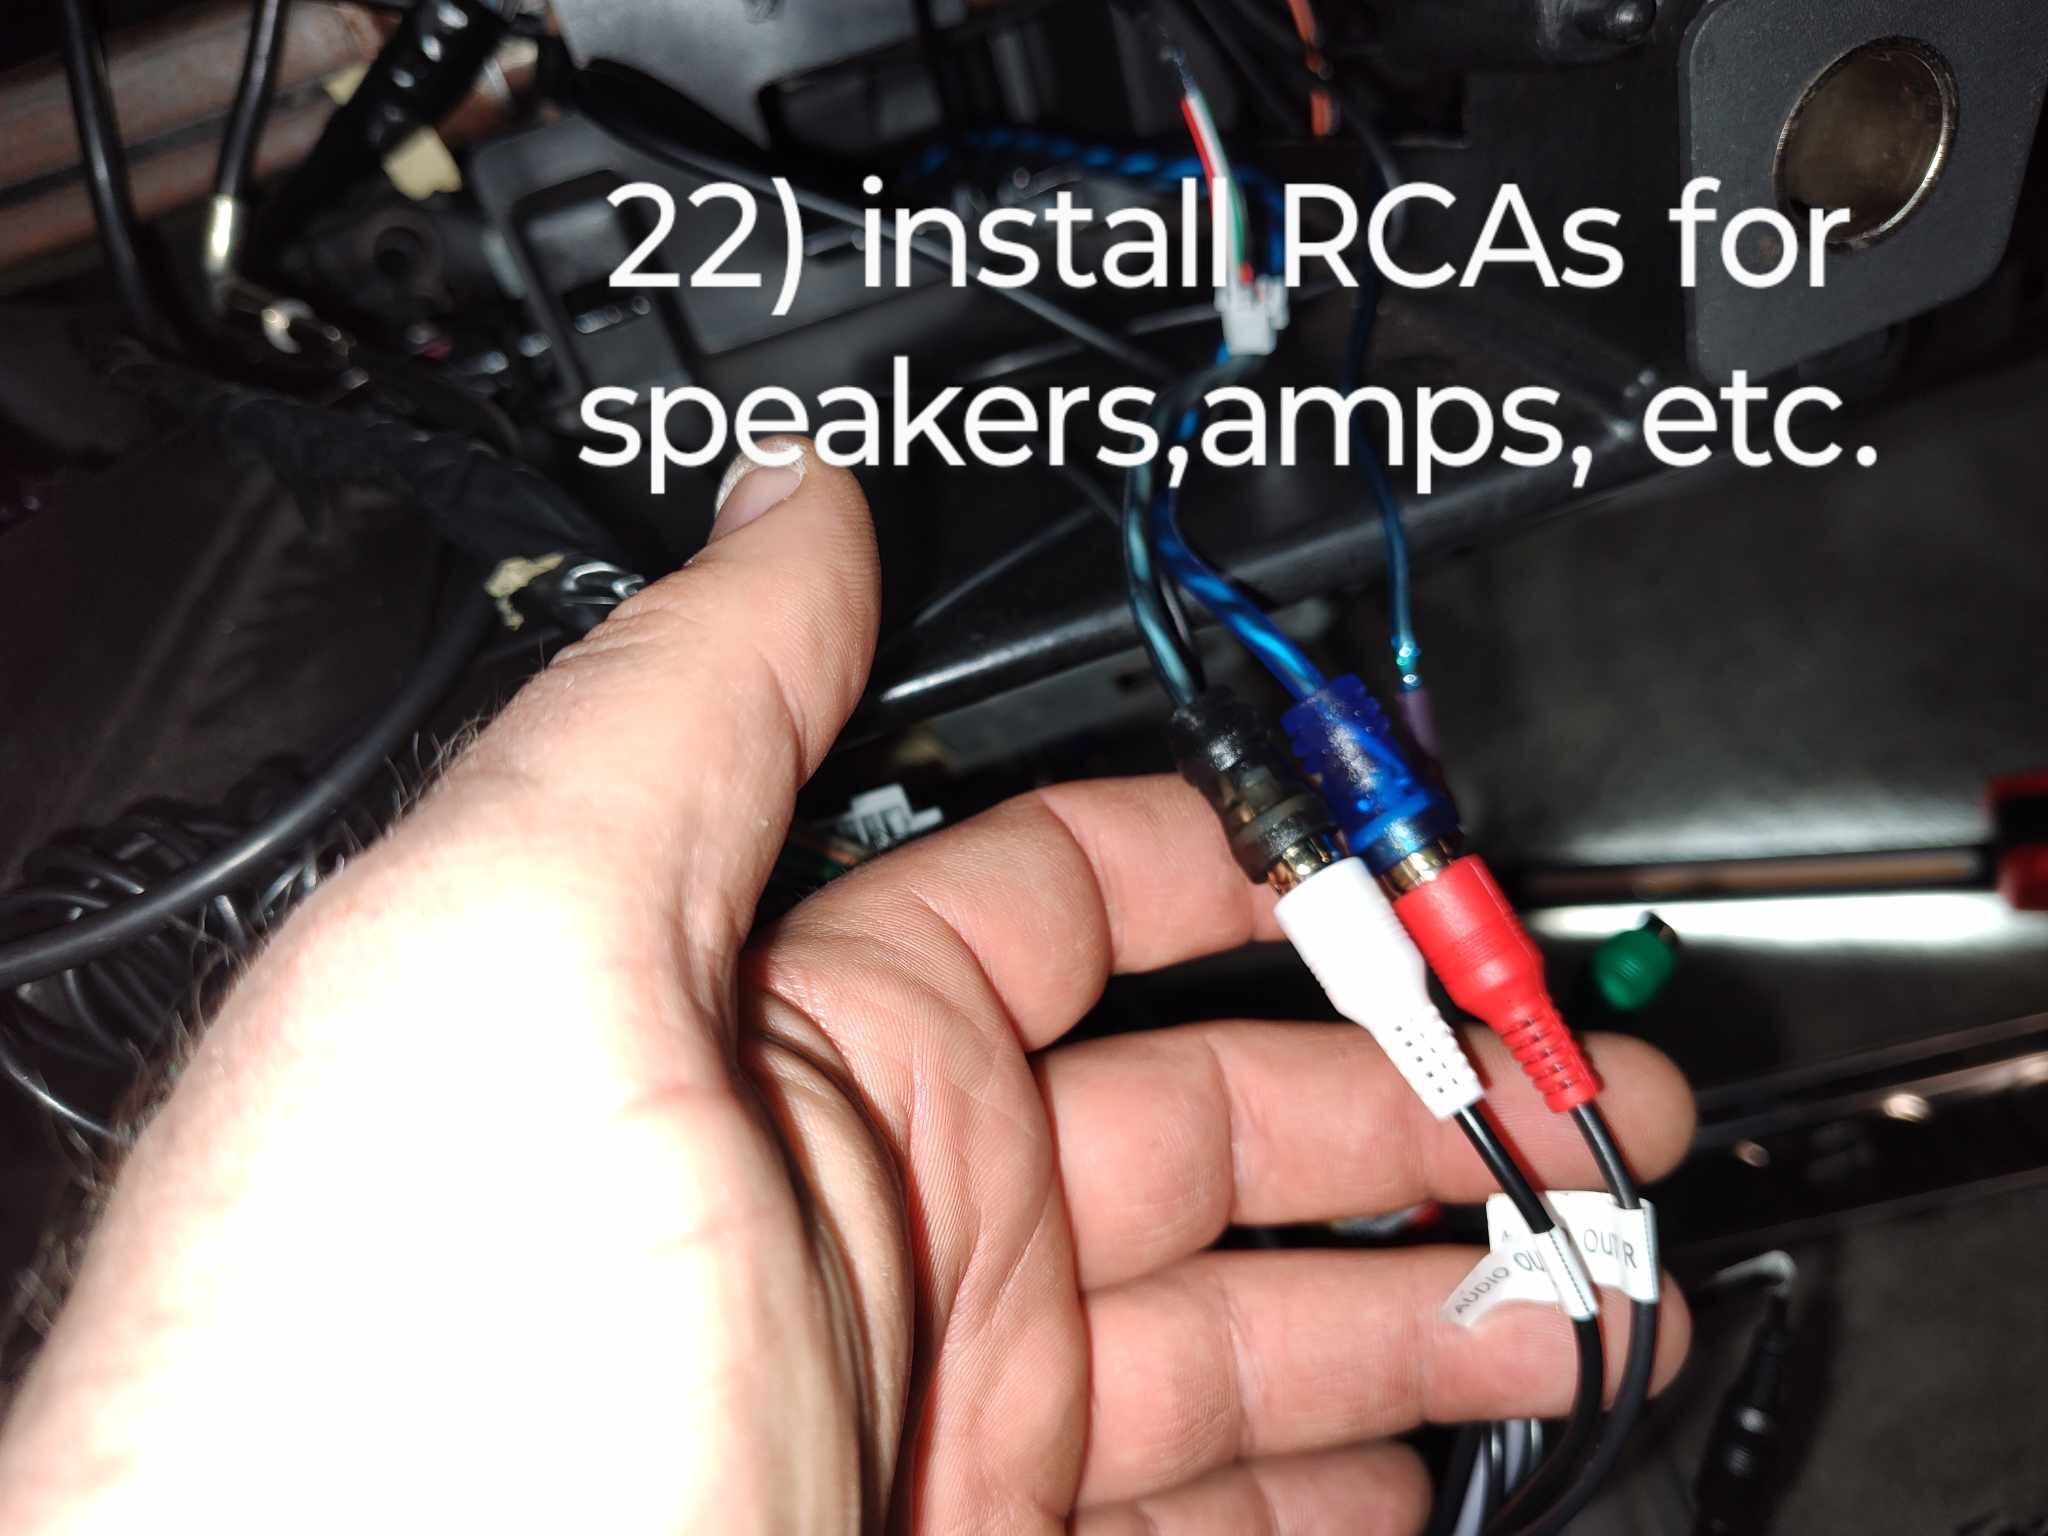
Now we'll dive into plugging everything into the radio. For more detailed instructions, please see our installation and UI guide here.
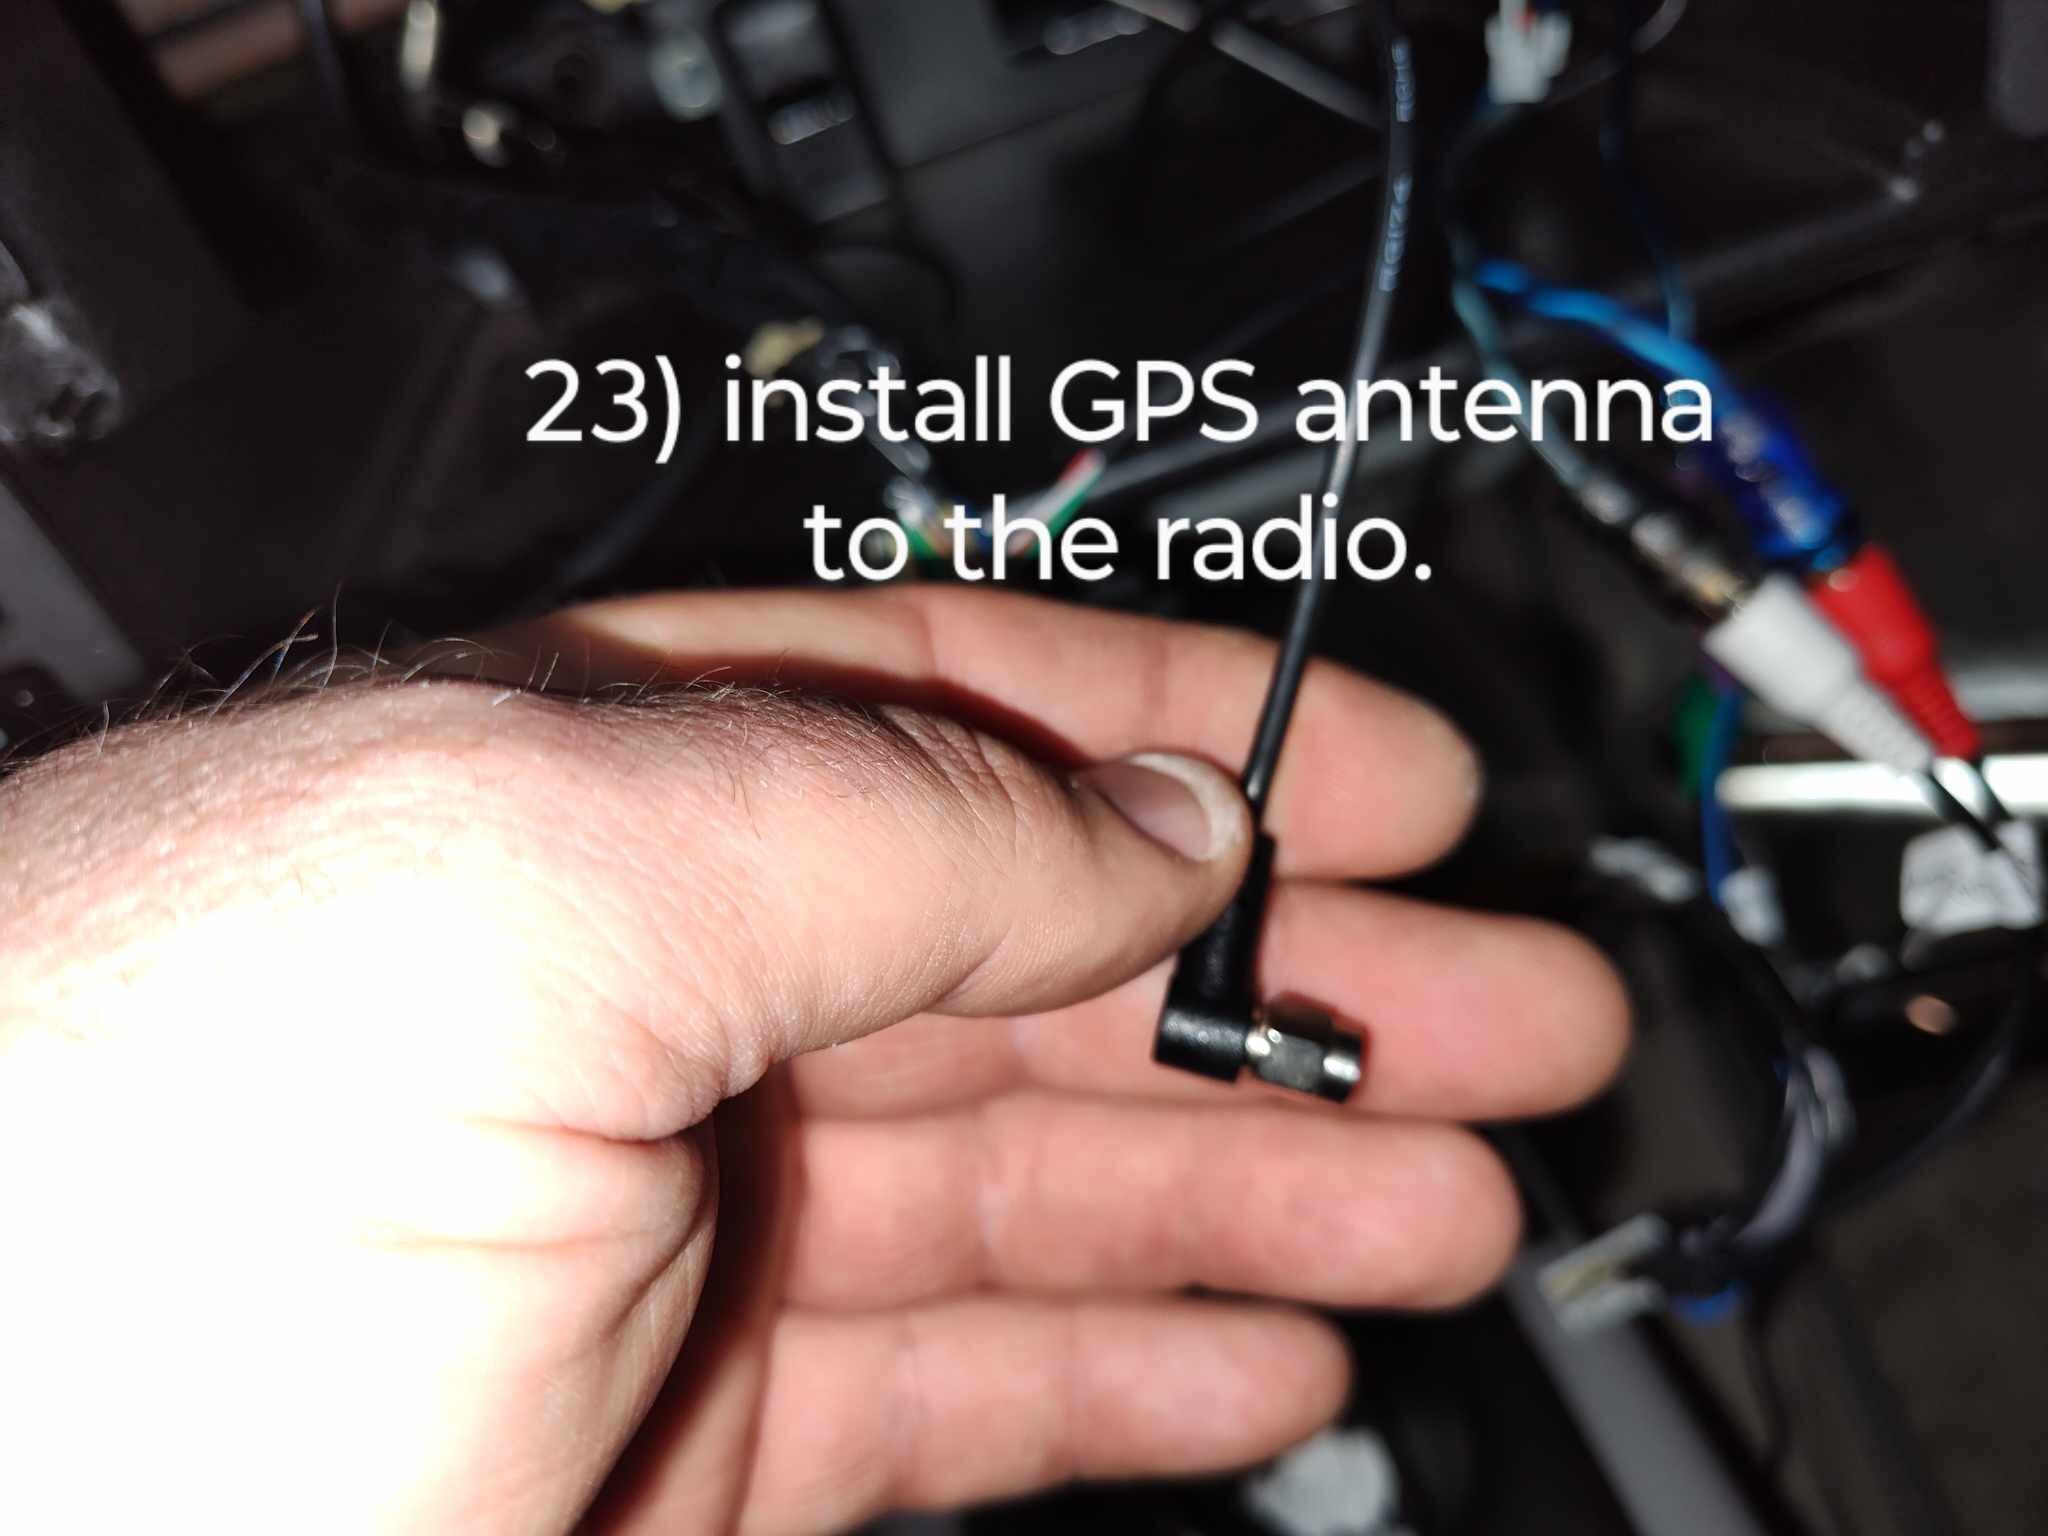
Bobby opted to go with the antenna adapter in his kit, which will plug right into the rear of the radio and allow him to recieve FM signal via the factory antenna.

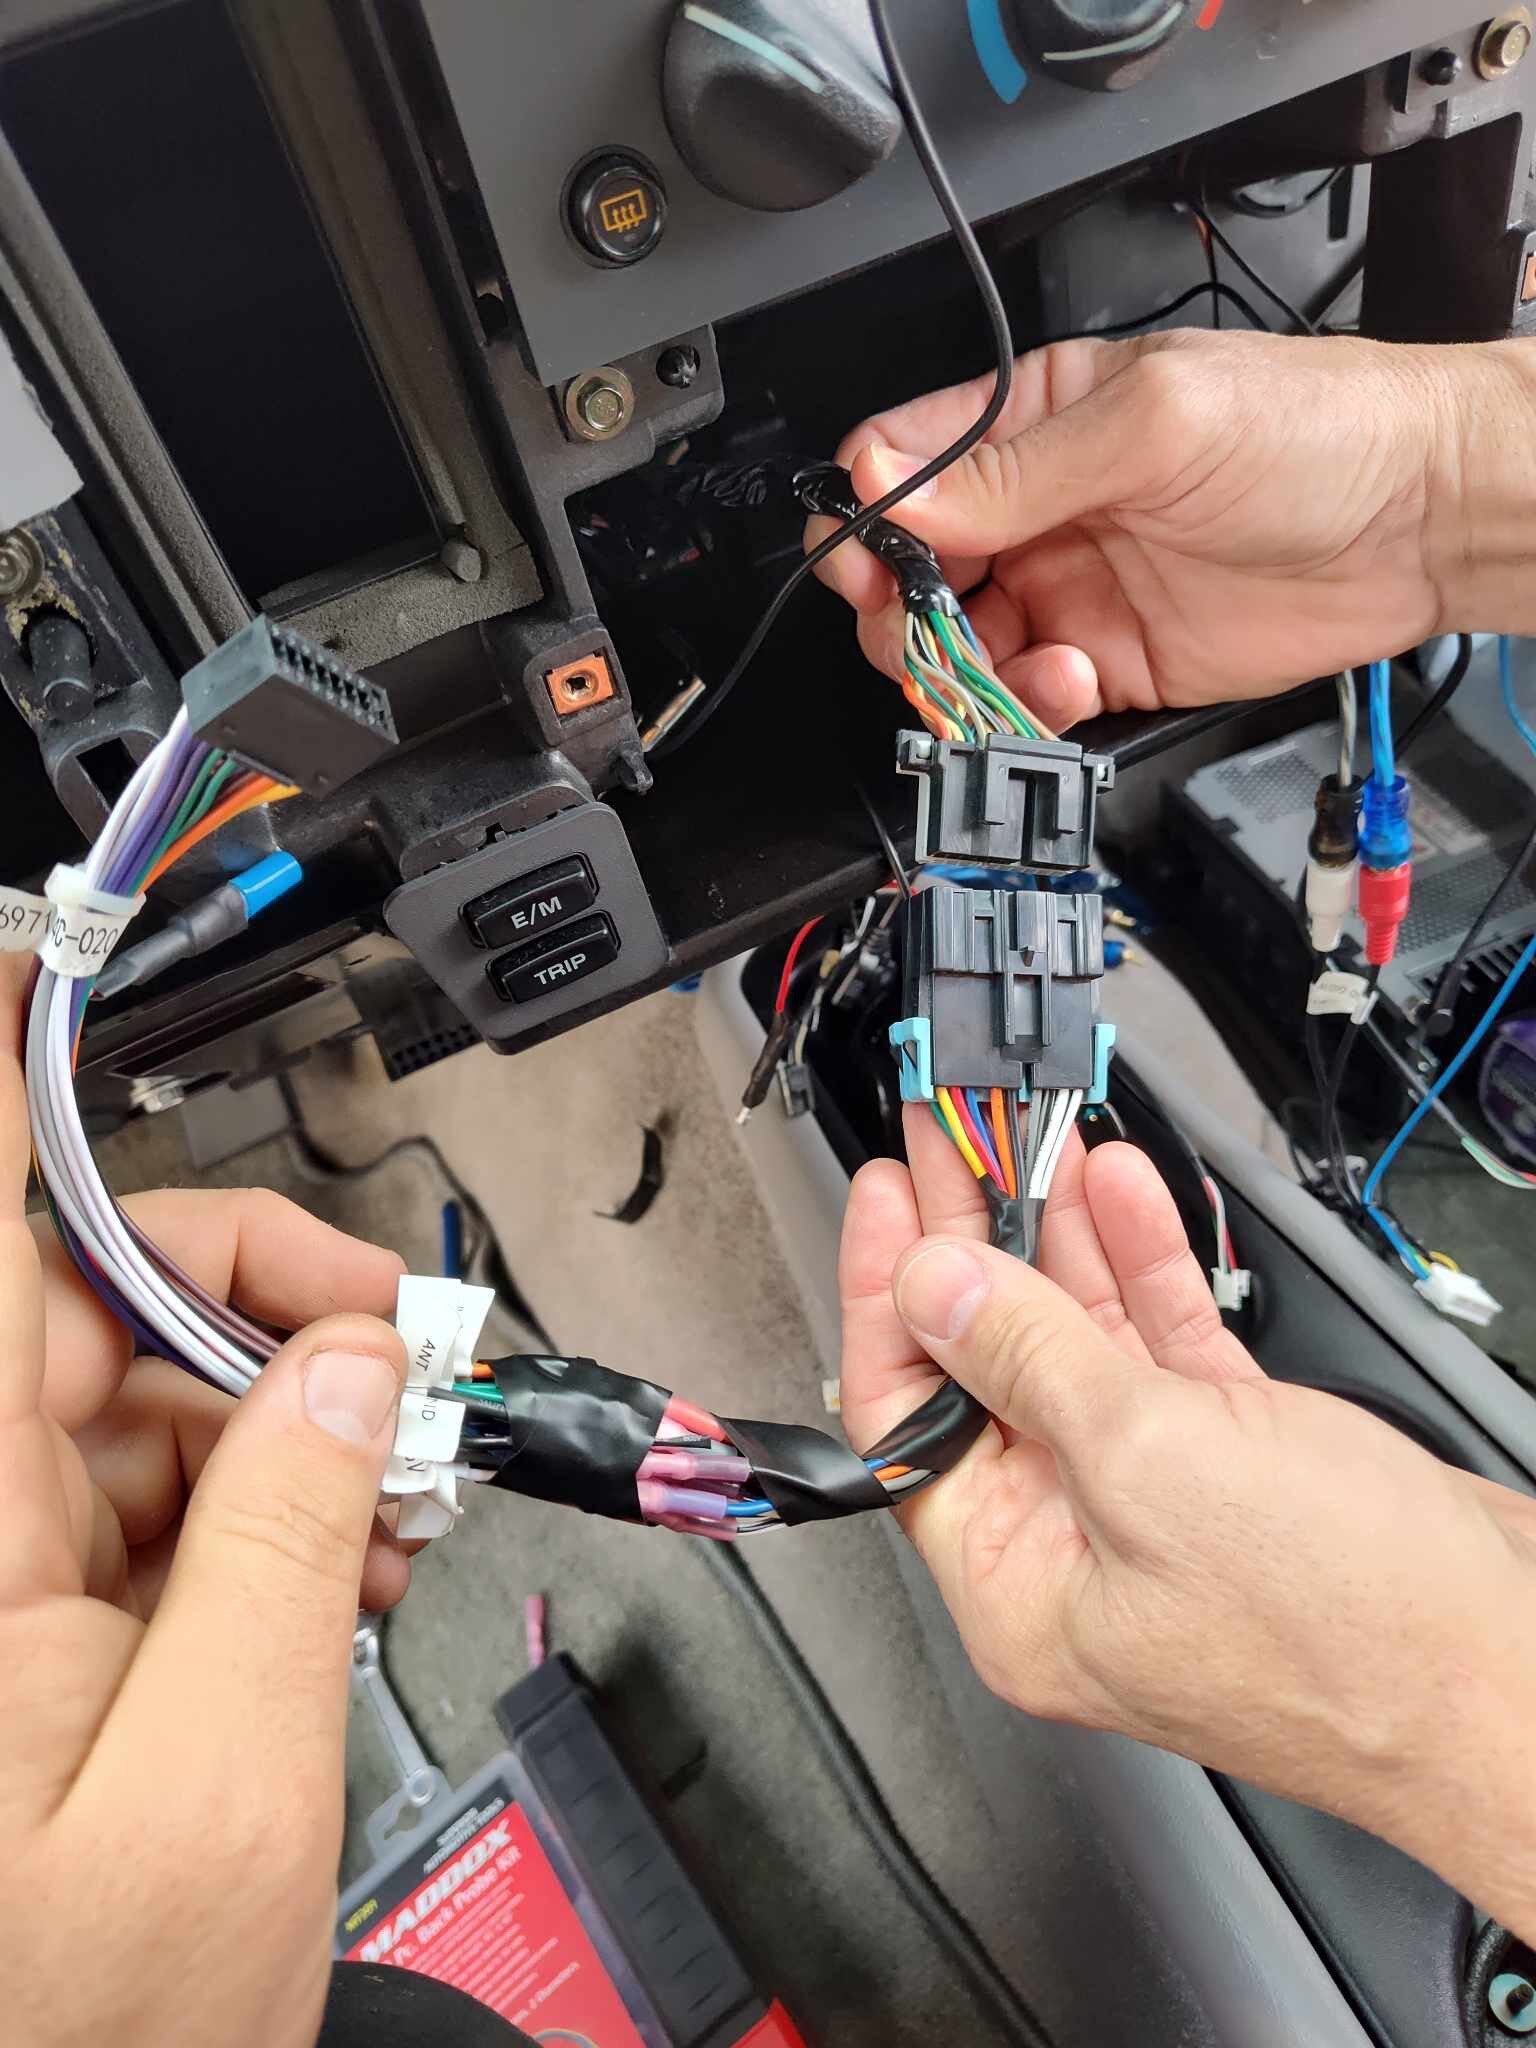
When wiring up the main radio harness to the Metra adapter, our preferred method is using uninsulated butt connectors. We find this provides an incredibly strong connection that you'll be confident in. Of course, you'll want to insulate them afterwards with shrink wrap for a clean and safe install.
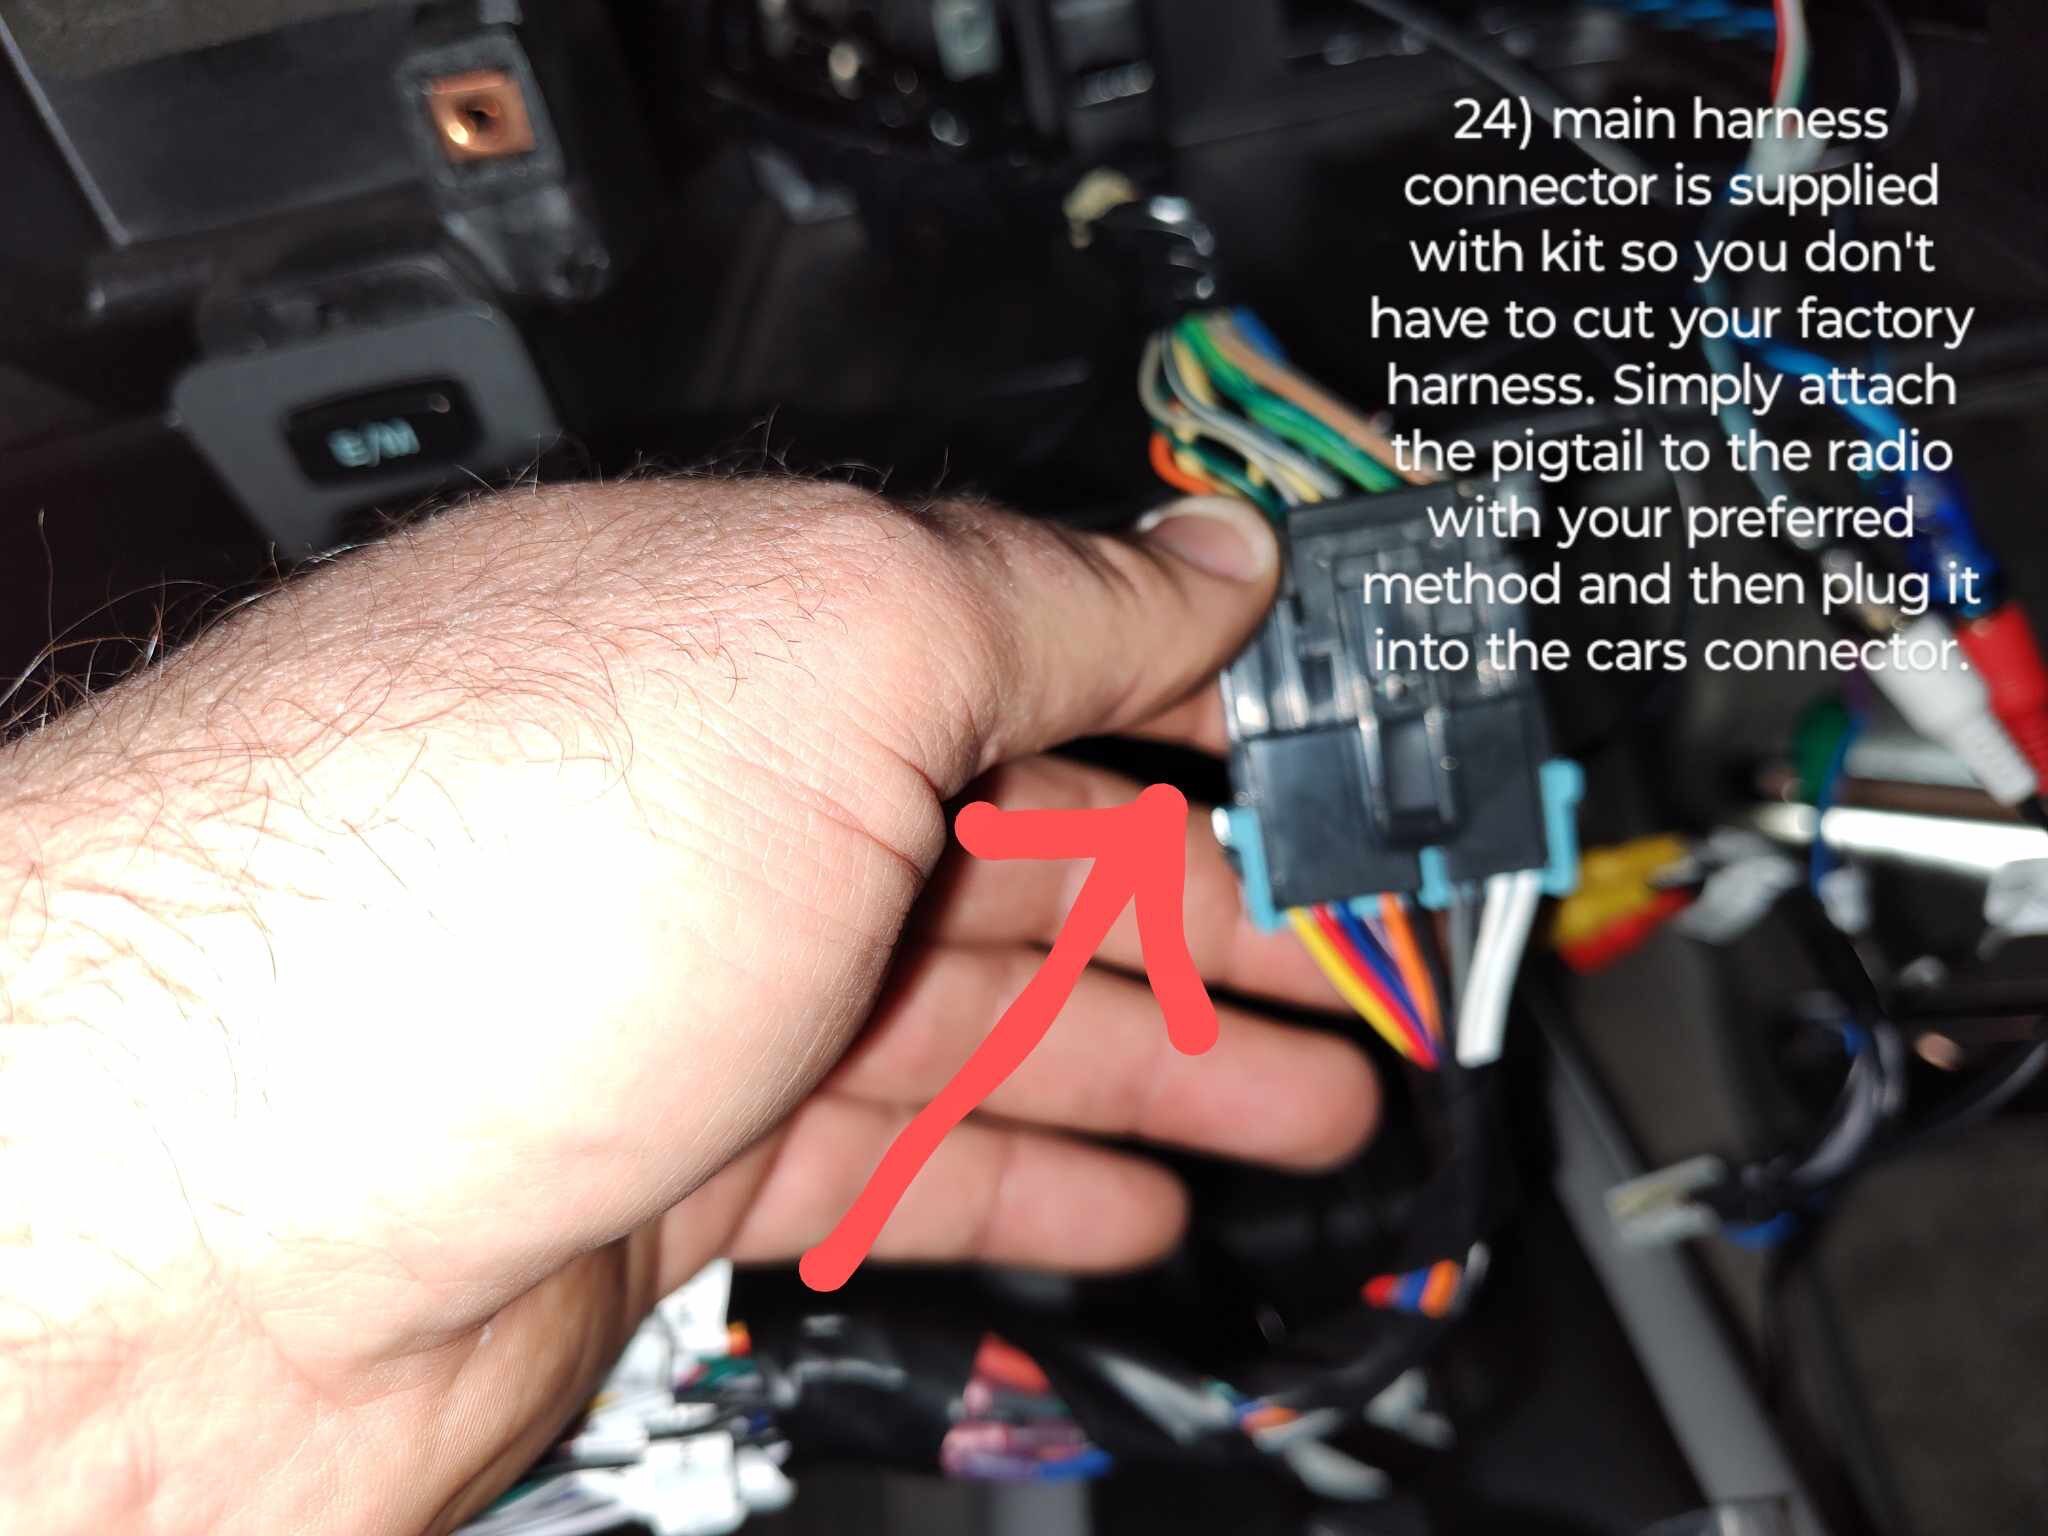
Once connected, the Metra harness will plug right into the factory connector. Not only does this make installation a breeze, but it also makes it reversible if you ever wanted to go back to the factory unit.
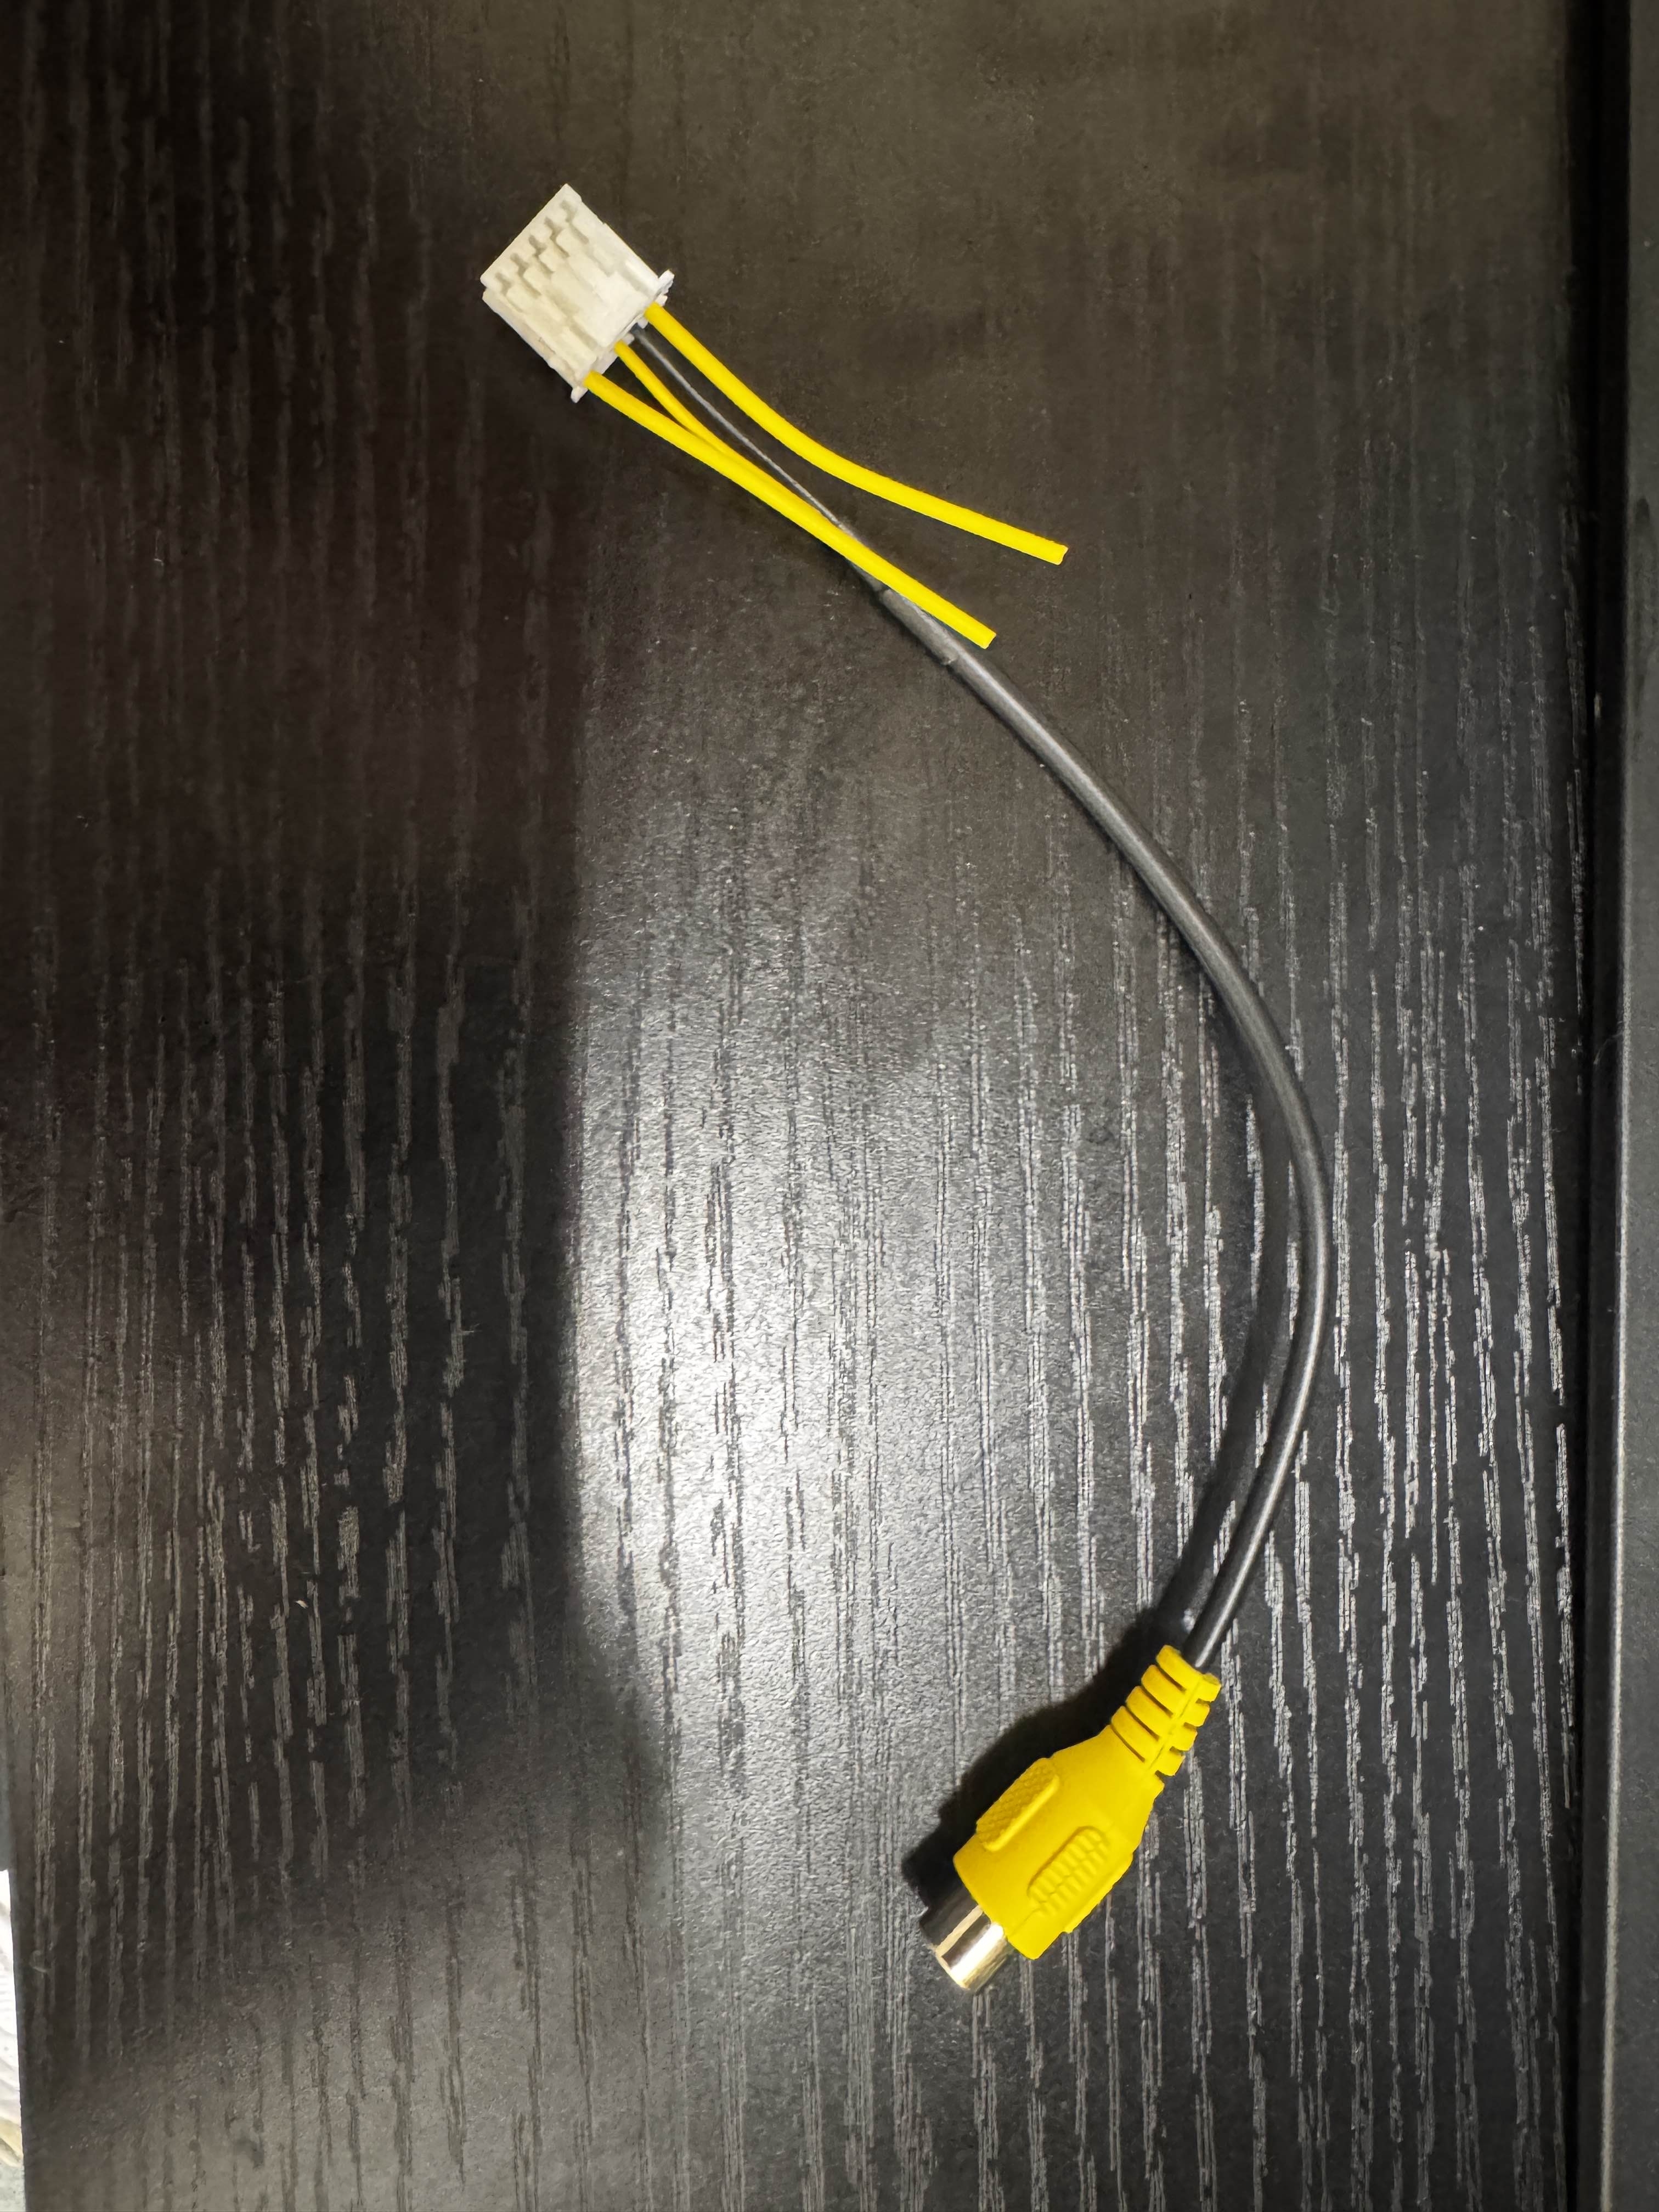
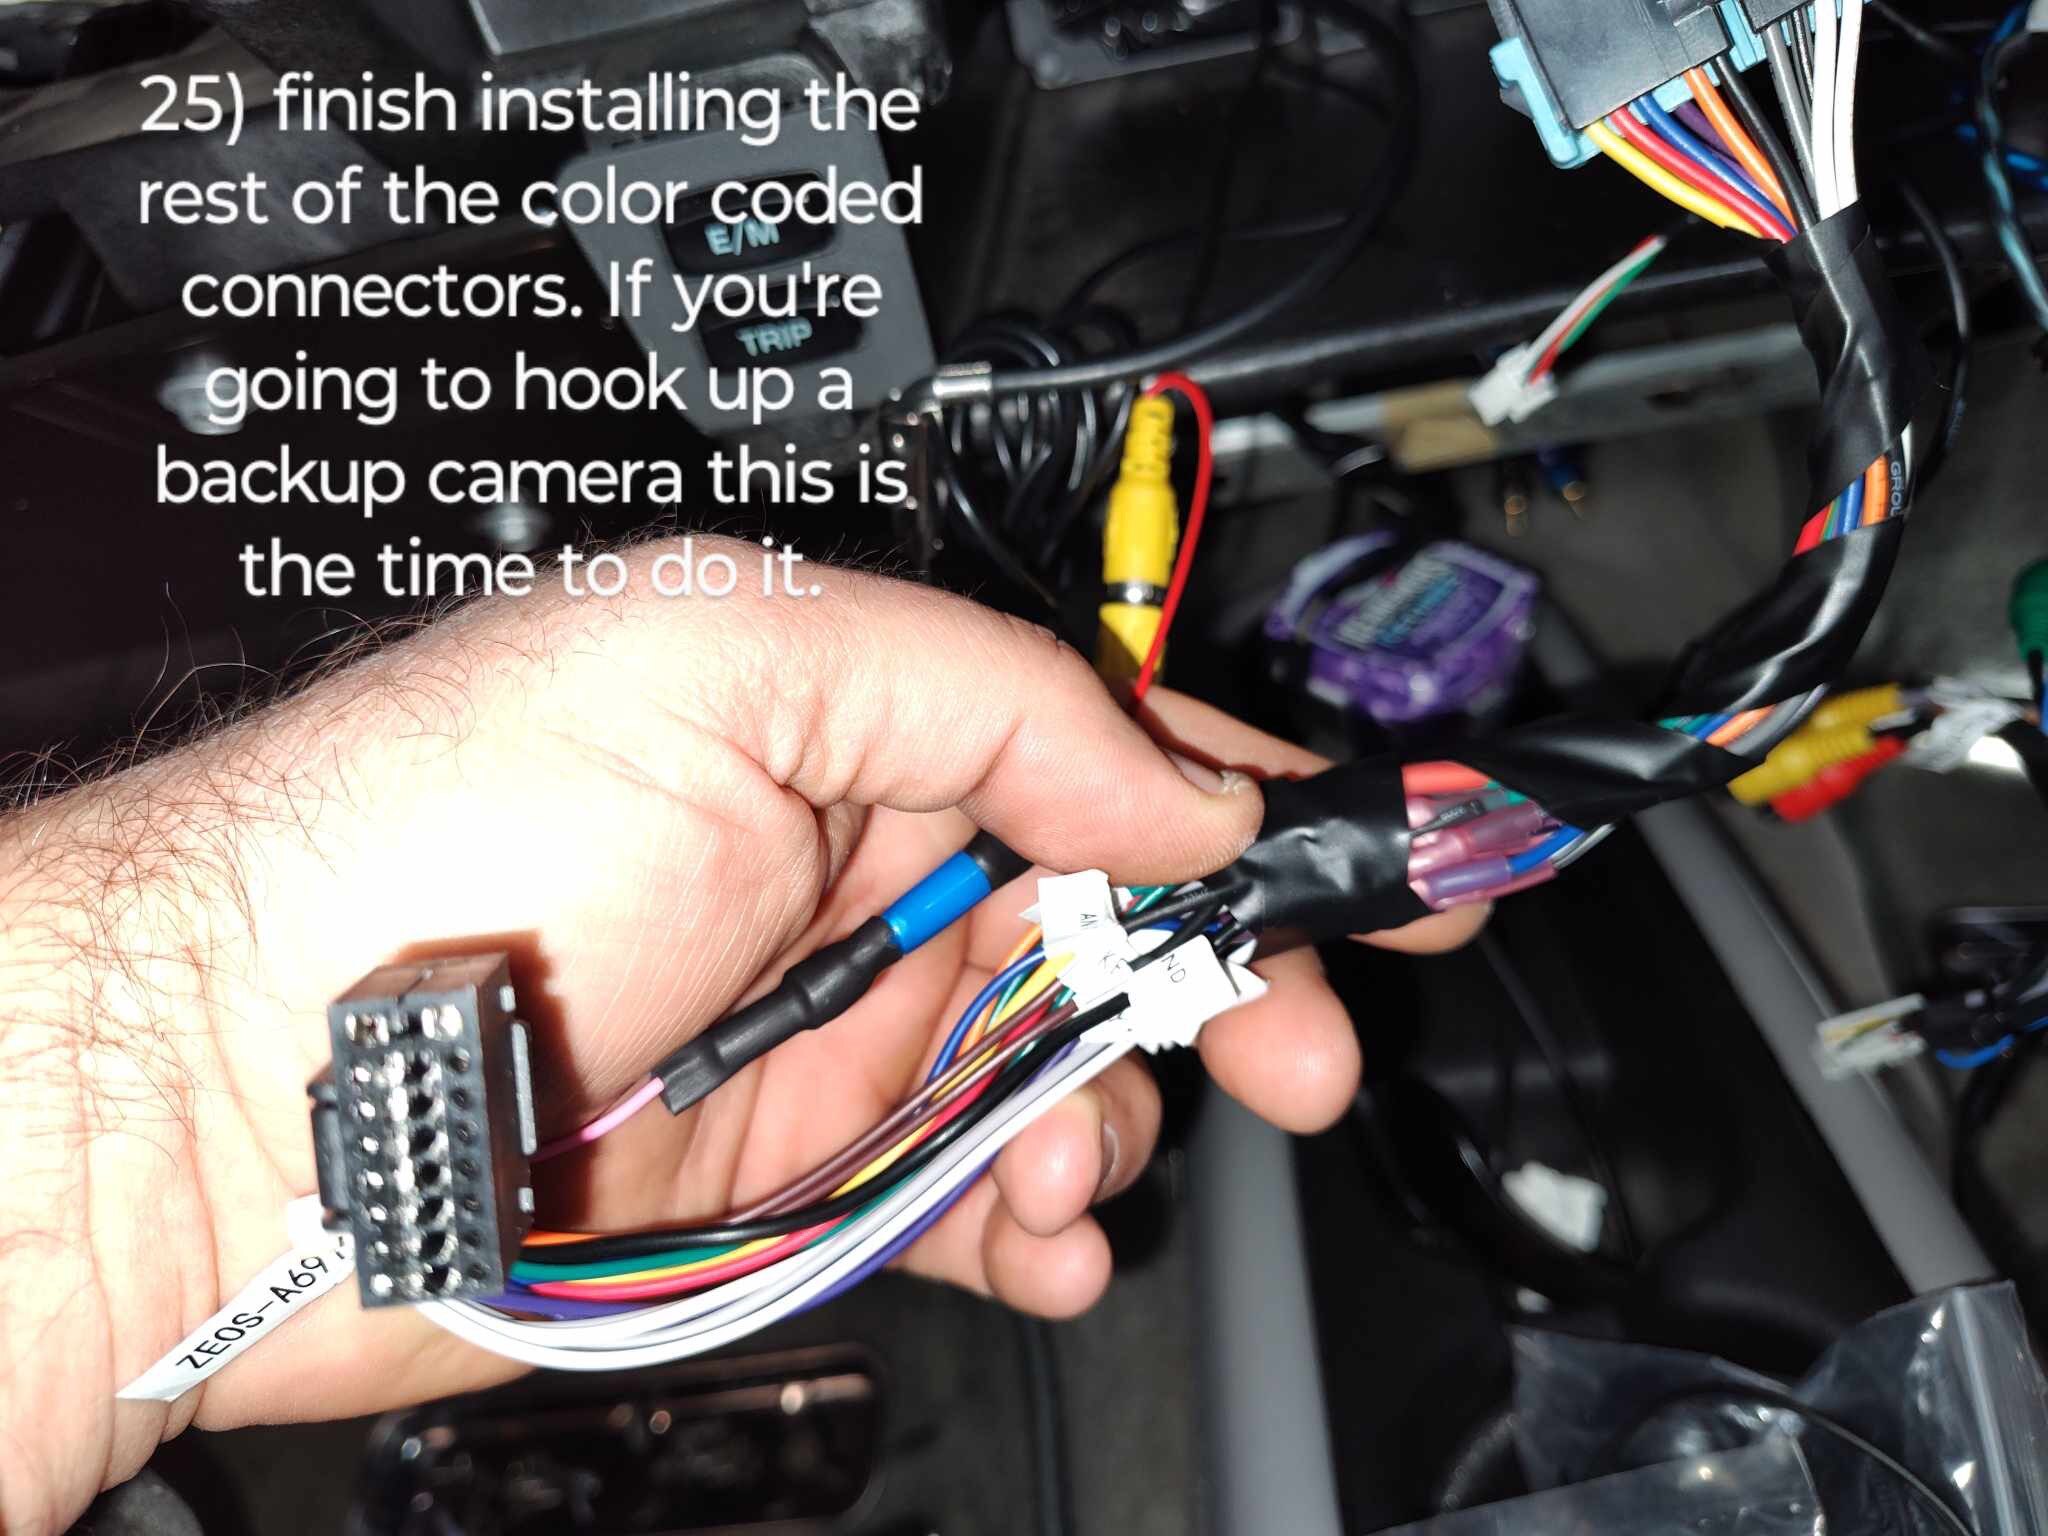
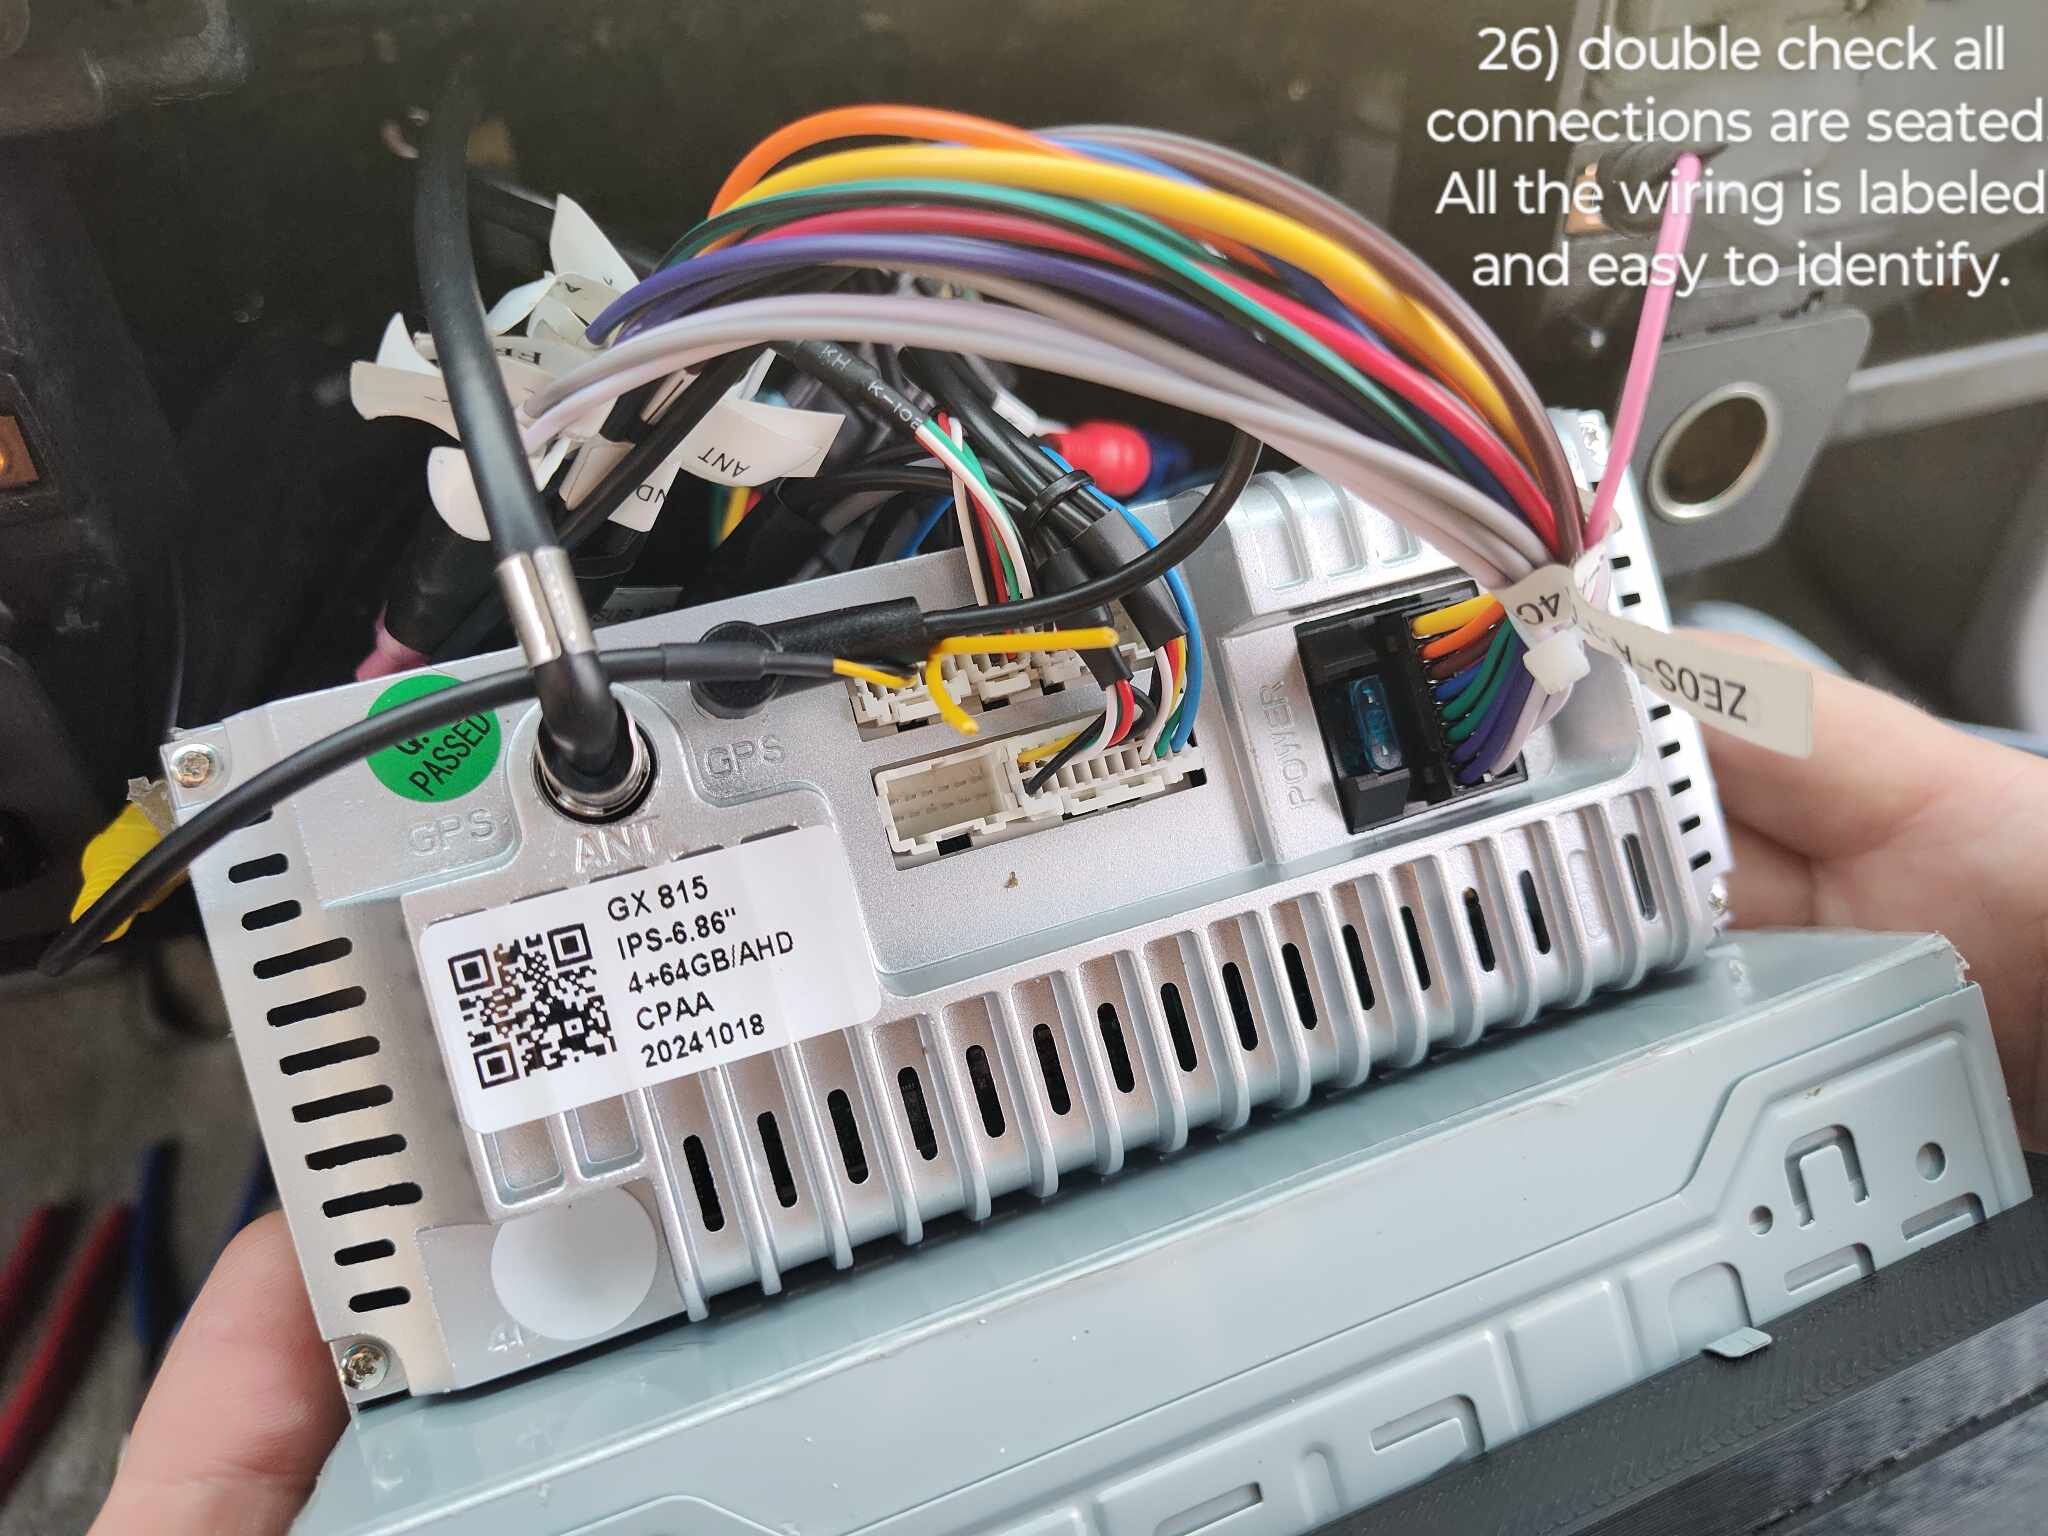
One of the most common issues we encounter with these kits is weak android auto / carplay connectivity. This is usually because users forget to install the required antenna. This antenna is easily missed, as it is included in the backup camera harness. The yellow RCA port is for the backup camera (not req’d). The two short wires are actually the antenna to boost the signal between your phone and the head unit. These are labeled for your reference.
You can see here Bobby installed a backup camera on his ride, as noted by the yellow RCA plug in use. Nevertheless, you should always install this harness for the Wi-Fi / Bluetooth antennas to boost performance!
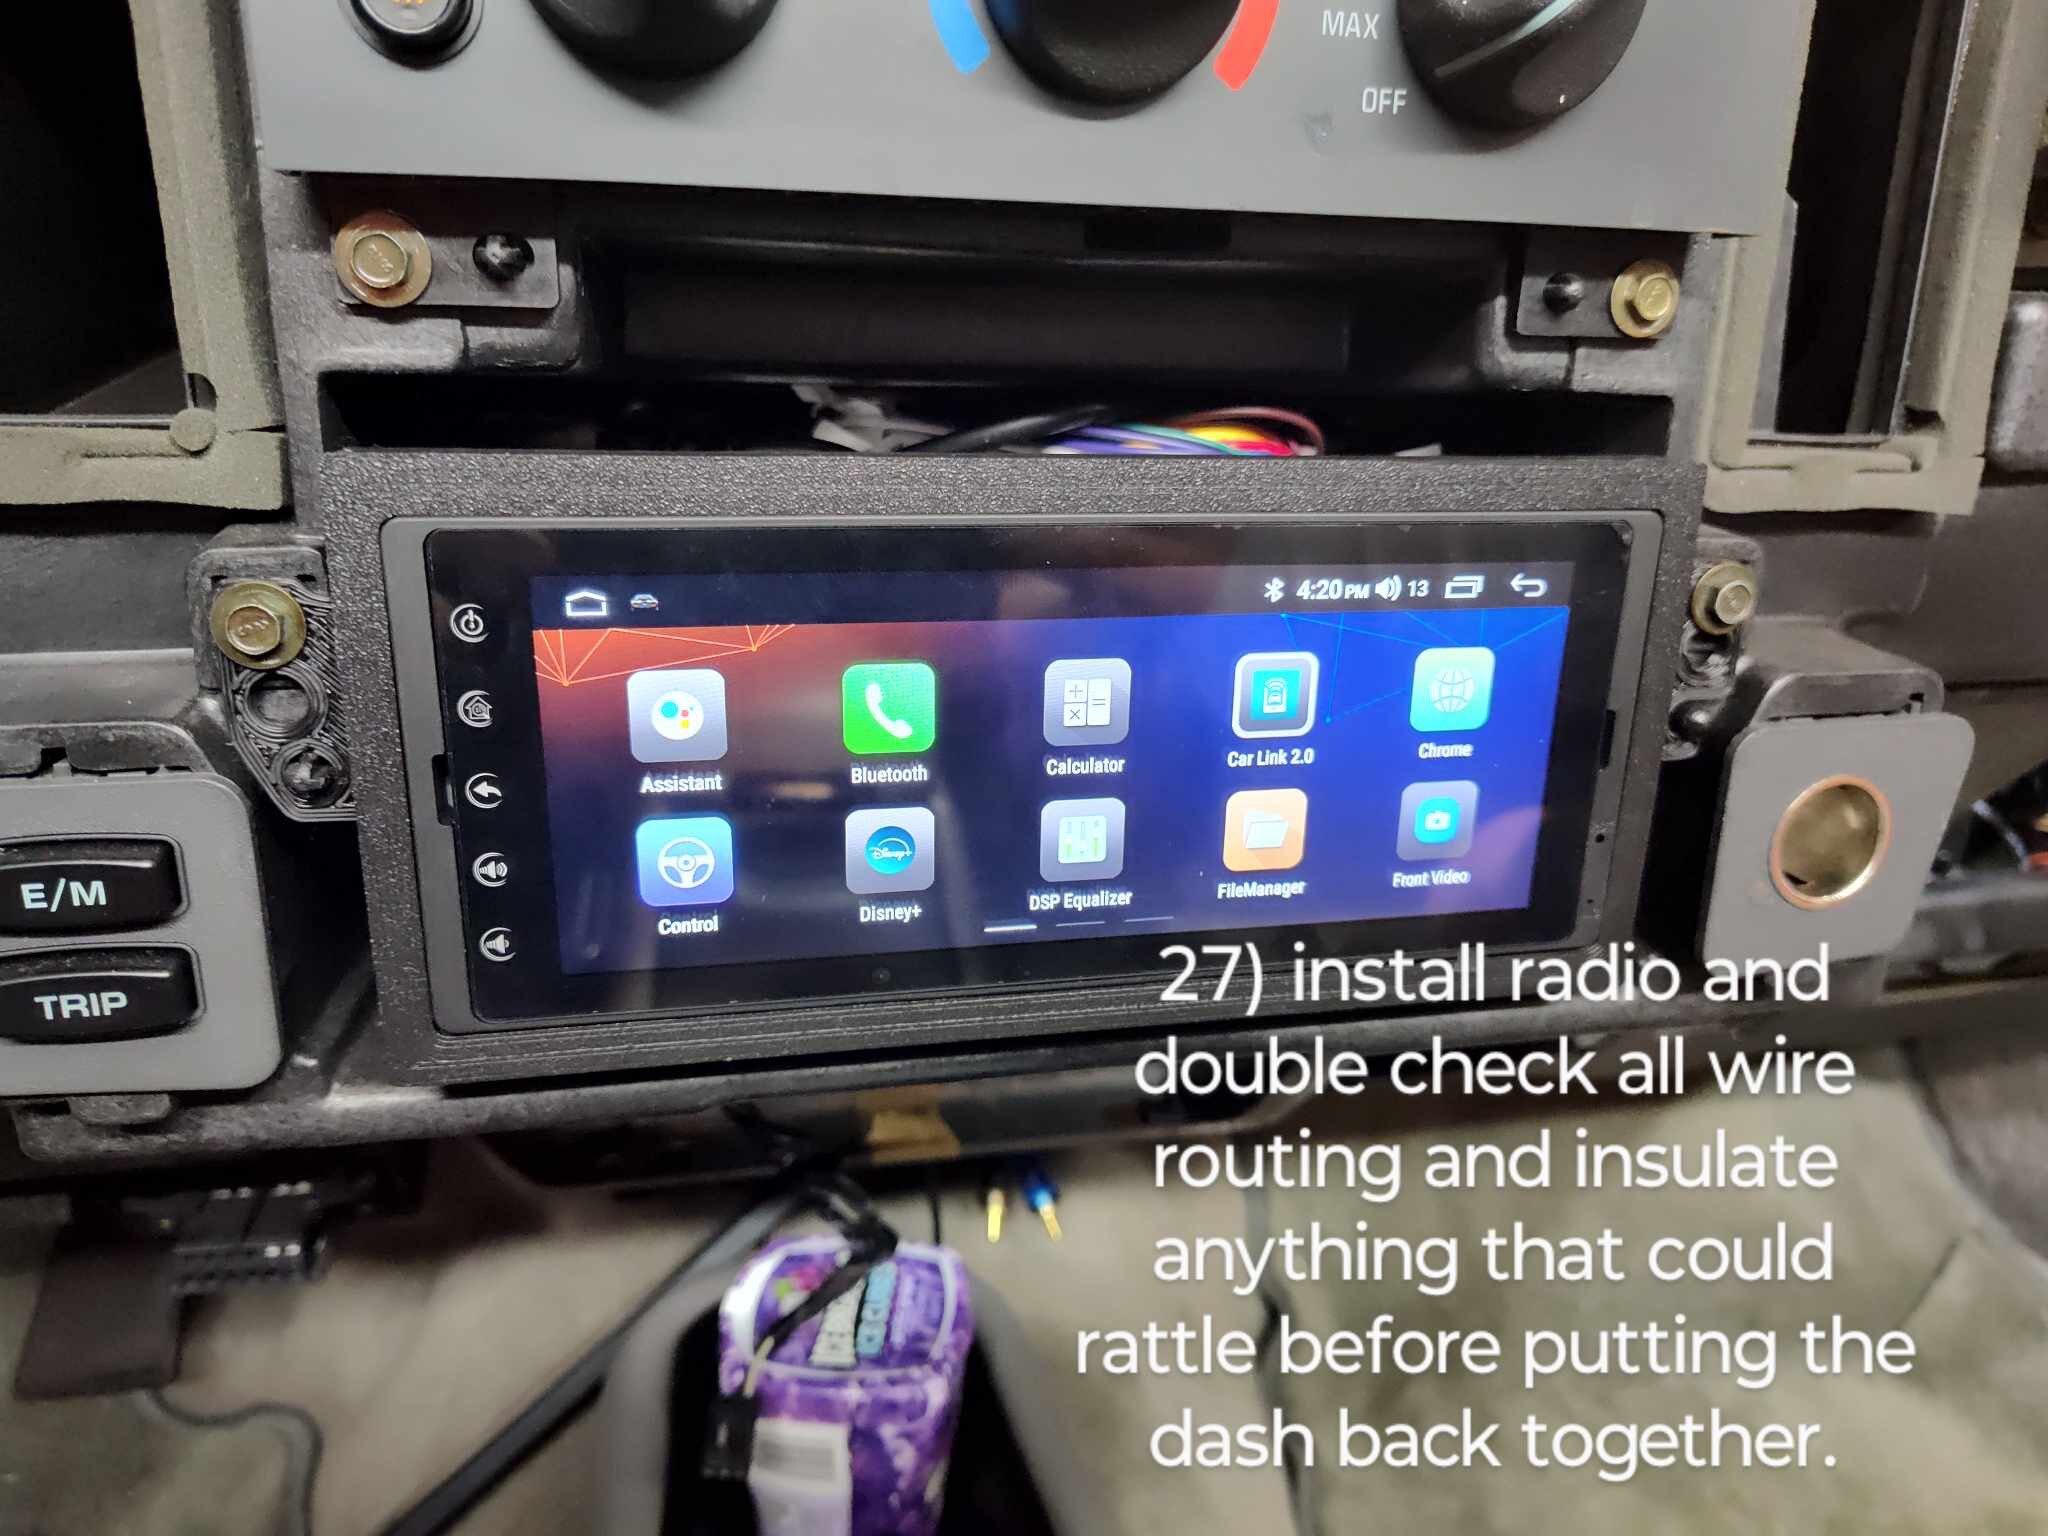
After that, you're done! All you need to do is follow the steps in reverse to reinstall the dash components. Again, take your time during this as the plastics can be brittle. You don't want to crack your dash or break off a tab - especially when you're this close to the finish line!
Thanks again to Bobby for these detailed install pictures and guide. We hope it makes your install just that much easier!